

AgentFlow empowers your business to deliver seamless, AI-driven customer interactions by configuring and deploying AI agents tailored to your unique needs. With AgentFlow, you can automate responses to enquiries, qualify leads efficiently, and optimize operational costs — all while maintaining control over your AI agent’s behavior through simple, flexible configurations. Whether you’re in sales, support, or operations, AgentFlow helps your team work smarter and scale conversations with ease.
Why use AI agents in AgentFlow
AgentFlow helps teams streamline customer conversations and reduce manual tasks by assigning AI agents to handle common interactions. Here’s how it makes a difference:
Pain points we are solving with this feature:
- Offer 24/7 customer support without extra staffing: AI agents can handle enquiries outside of business hours, reducing the need for a round-the-clock support team while keeping response times fast.
- Accelerate sales and support cycles: By automating first-touch responses and lead qualification, AI agents help speed up your workflows and get users to the right outcome faster.
- Lower operational costs through automation: Let AI handle repetitive or low-priority messages so your team can focus on high-value conversations.
- Control when AI participates in conversations: Set conditions for when the AI agent should enter, exit, or hand over to a human — giving you full control over the customer experience.
Common use cases:
- Handle FAQs automatically across channels: Set up your AI agent to respond to common customer questions using a connected knowledge base, keeping replies consistent and accurate.
- Qualify leads before handing them off: Use AI to score and filter incoming enquiries, so your team only engages with the most relevant prospects.
- Tailor AI behavior to different workflows: Adjust tone, logic, and actions to suit different teams or objectives — from customer support to pre-sales outreach.
- Trigger AI interactions with Flow Builder: Insert AI agents into automated flows that react to customer messages, ensuring the right response at the right time.
Accessing AgentFlow page
You can follow the steps below to access the AgentFlow page:
- Click on the
icon on the left navigation bar to go to the SleekFlow AI page
- In the SleekFlow AI page, Click “AgentFlow” on the top navigation menu

Creating your AI agent
You can follow the steps below to create your AI agent in AgentFlow:
- In the AgentFlow page, click on the “Create new agent” button on the top right corner
- A “Create AI agent” modal will appear

- You can choose a template to start, or create your own from scratch. We currently support the following templates that serve different purposes:
-
Basic support:
- Use this if your goal is to handle common customer enquiries quickly and consistently. This template is ideal for support teams that want to automate FAQ replies or manage high-volume conversations with minimal setup
- Best for: Customer service or help desk use cases
- Focus: Speed and efficiency
- Available actions:
- Send message
- Exit conversation
- Add labels
-
Sales growth:
- Choose this template if you want to qualify leads and support sales conversations. It’s designed for sales teams looking to automate lead scoring or early-stage prospecting before handing off to a human agent.
- Best for: Lead qualification and pre-sales engagement
- Focus: Quality and conversion potential
- Available actions:
- Send message
- Exit conversation
- Calculate lead score
- Add labels
-
Custom:
- If your workflow doesn’t fit neatly into the templates above, you can build a fully custom AI agent. This option gives you full control over what actions are available and how the agent should behave, making it suitable for more complex or multi-team scenarios.
- Best for: Teams with specific workflows or advanced automation needs
- Focus: Flexibility and customization
- Available actions: Configurable based on setup
-
Basic support:
- Once you have selected the template, you will be required to fill in the AI agent’s name. You can also fill in the description of this AI agent to provide context on its purpose, intended use case, or any specific instructions your team should be aware of.

Configuring your AI agent with “Basic mode”
“Basic mode” offers a simplified way to configure your AI agent, designed for teams who want faster setup and fewer customizations. Instead of writing your own prompts, you’ll choose from predefined options for each configuration, including instructions, actions, and tone settings.
This mode is ideal for users who are new to prompt design or prefer guided configurations over custom behavior.
Benefits of using Basic mode
- Faster setup: Choose from pre-filled, best-practice templates without needing to write your own prompts.
- Easier onboarding for new users: Ideal for non-technical users or teams just getting started with AI agent setup.
- Standardized agent behavior: Ensures more consistent performance across different teams or use cases.
Enabling and disabling “Basic mode”
You can follow the steps to enable or disable “Basic mode”:
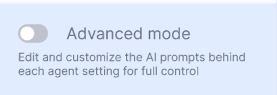
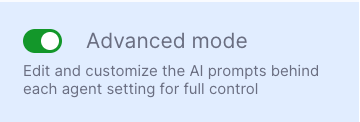
- In the AI agent settings page, you will find the “Advanced mode” toggle at the bottom left corner of the page
- Toggle this setting on or off to change the configuration mode
- When Advanced mode is turned ON, the AI agent enters Advanced mode, allowing you to edit all prompt fields manually.
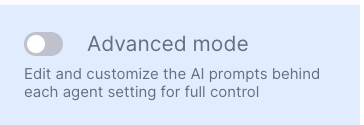
- When Advanced mode is turned OFF, the AI agent is in Basic mode, and all prompts will be replaced with pre-filled, non-editable options, including instructions, guardrails, and actions.
⚠️ Important:
If you’ve made any changes to prompts in Advanced mode and switch back to Basic mode, your custom prompt content will be cleared.
If you turn Advanced mode back on later, all prompts will be reset to default.
What you can configure in “Basic mode”
Once you’ve selected Basic mode, you can continue to set up your AI agent using simplified options across each configuration tab. The setup process remains the same, but instead of editing prompts manually, you’ll select from pre-filled templates.
Here’s what you can configure:
1. Knowledge base
- Add data source that your AI agent will reference when generating replies
- You can upload files, import website URLs, or select existing sources from your Global knowledge base.
- You can learn more how to manage and add data source in our Help Center article on Managing the knowledge base
2. Instructions
- Set your agent’s tone, purpose, and fallback behavior using prefilled options.
- In Basic mode, you can simply choose the “Instructions” and “Guardrails” from a guided list of tone options and agent objectives
3. Actions
- Decide how your AI agent responds to users, exits conversations, or scores leads.
- For “Basic support” templates, the “Calculate lead score” action is default toggled off
- For “Sales growth” templates, the “Calculate lead score” action is default toggled on
- Each action (For example: Send message, Exit conversation, Calculate lead score) comes with preset logic and tone options. Here’s what each action includes:
“Send message” action
This is the core action that allows your AI agent to reply to customer messages using connected knowledge base sources.
In Basic mode, you can configure:
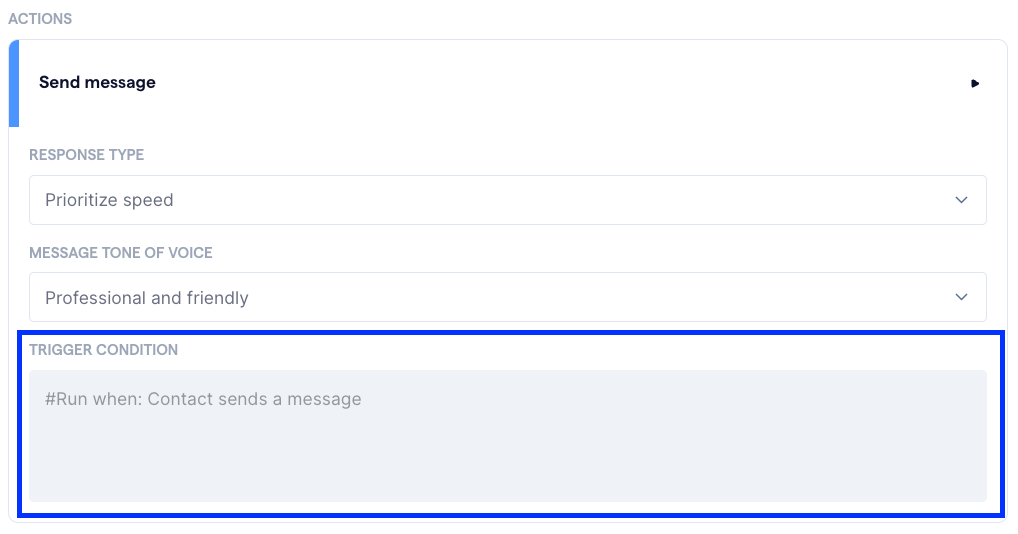
- Response type: Choose how your AI prioritizes speed vs. response depth:
- Prioritize speed
Uses knowledge retrieval to generate fast replies. Best for simple, direct questions or high-volume support workflows. - Prioritize response quality
Uses advanced checks and personalization for smarter replies. Prioritizes helpfulness, nuance, and brand tone — better for complex queries or sales-focused use cases.
- Prioritize speed
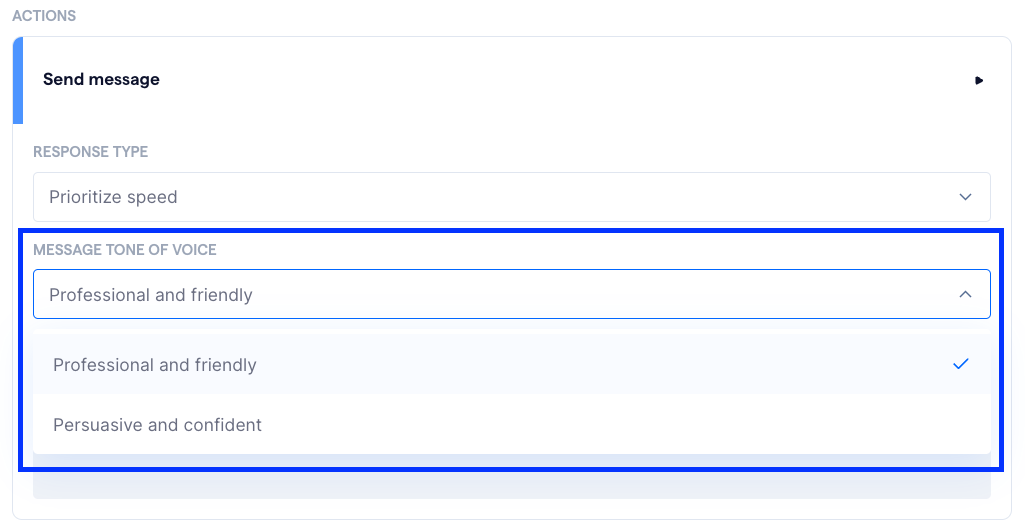
- Message tone of voice: Select how the AI sounds when replying to customers. This setting controls phrasing, sentence structure, and fallback behavior.
Available tone options include:- Professional and friendly
- Persuasive and confident
- Trigger condition: This action is automatically triggered when a customer sends a message. You won’t need to configure conditions in Basic mode.
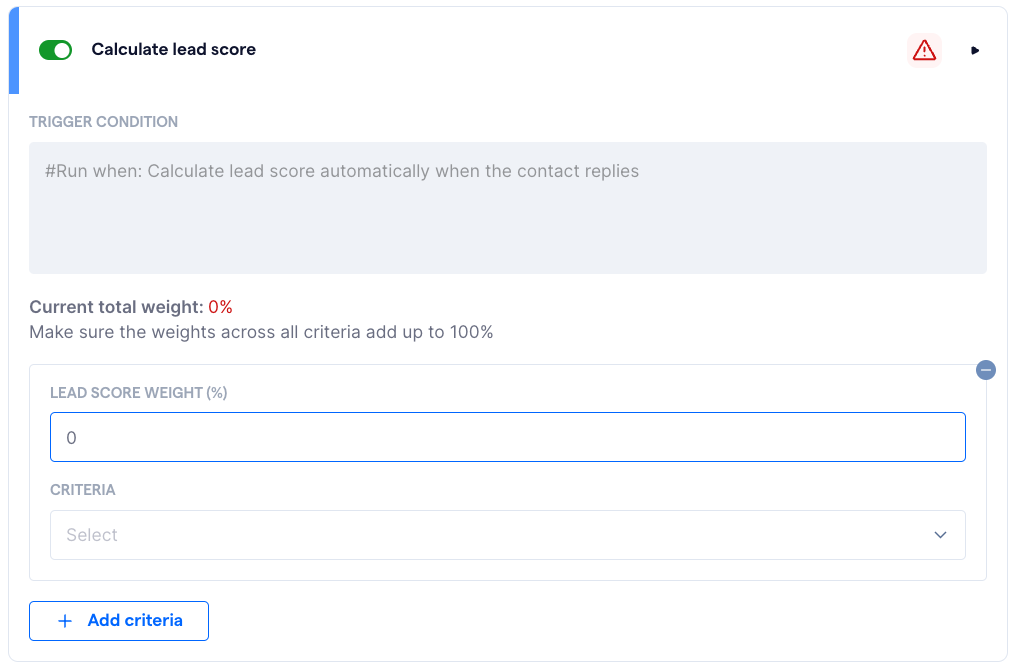
“Calculate lead score”
Note: “Calculate lead score” action is toggled off by default if you chose “Basic support” template when creating an AI agent.
The “Calculate lead score” action helps you identify high-quality leads by analyzing what a customer says — such as interest, urgency, or buying intent. It’s especially useful for sales-focused agents who need to filter serious prospects from general enquiries.
In “Basic mode”, you won’t need to write any custom scoring prompts or logic. Instead, you’ll select from a list of preset scoring criteria and assign a weight (%) to each one, indicating how much it contributes to the overall lead score.
The AI agent will calculate a score between 0 and 100 based on the customer’s message. This score can then be used in downstream actions like Exit conversation or internal handoff.
A few key things to note about Basic mode:
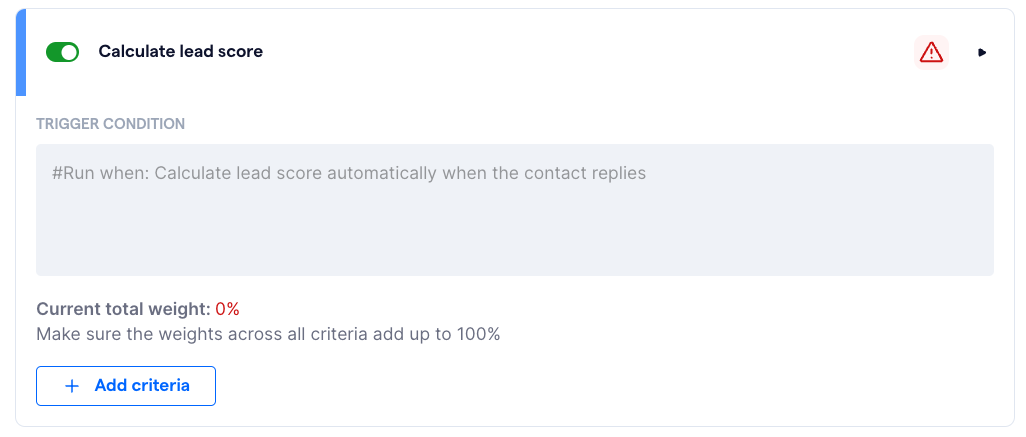
- The trigger condition is fixed: The score is always calculated automatically when the customer replies.
- The scoring logic is pre-set: You won’t be able to edit how each criterion is detected, but you can decide how important each one is by adjusting its weight.
- The AI agent always outputs a single numeric score (0–100): You can use this score to trigger other actions, but not to directly influence how the score is derived.
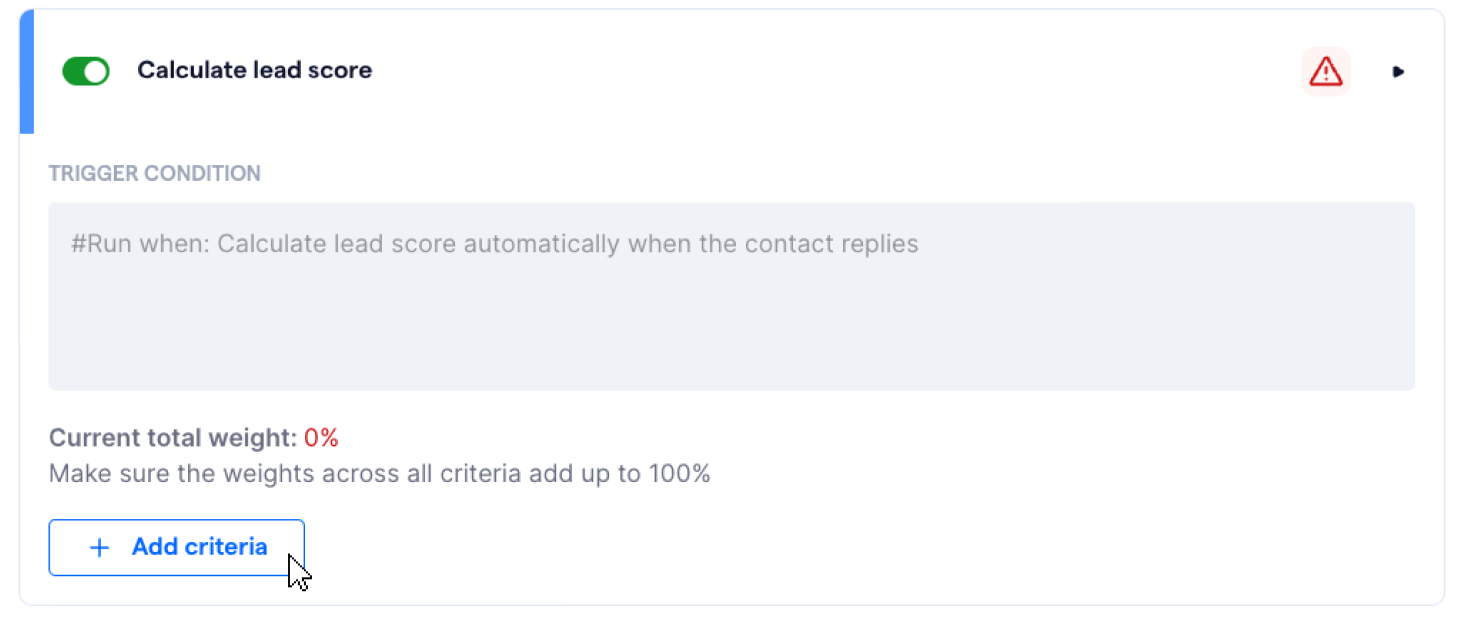
Once you’ve set your criteria and weights, make sure the total adds up to exactly 100% — otherwise, the system won’t generate a score.
You can follow the steps below to add criteria in the “Calculate lead score” action:
- In the “Calculate lead score” section, click on “Add criteria” button
- A new criteria section will appear.
You will be required to:- Set a weight (%): Determines how important that factor is in the overall score.
- Select a predefined criterion from the dropdown list. Options include:
- Shows signs of interest or compares with competitors
For example: “How does this compare to Brand X?”
- Mentions budget, timeline, or shows readiness to buy
For example: “We need this by end of next week. What’s the cost?”
- Asks detailed, informed, or follow-up questions
For example: “Can this integrate with our existing CRM?”
- Expresses positive or enthusiastic tone
For example: “This looks really promising, I’m impressed”
- Shows signs of interest or compares with competitors
- You can use the “+ Add criteria” button to include more scoring factors. Each one must have a valid weight and selected option.
⚠️ Important: The total weight across all active criteria must equal exactly 100%. The system will not calculate a lead score otherwise.
“Exit conversation”
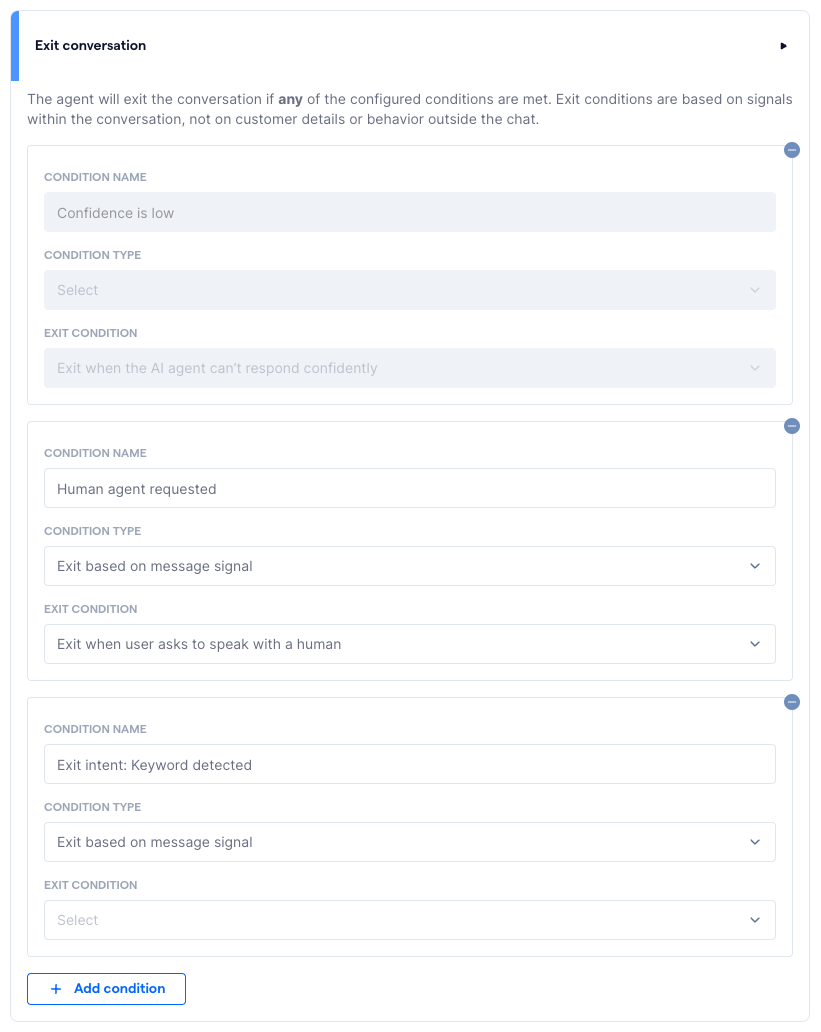
The Exit conversation action allows your AI agent to leave the conversation when certain conditions are met. This ensures a smooth handoff to human agents or a clean exit when the AI can no longer assist confidently.
In Basic mode, you can’t create custom logic or triggers, but you can choose from a predefined list of exit conditions. The AI agent will exit the conversation if any one of the conditions is met.
Note: Exit conditions are based on signals from the customer’s message — not external factors like user profile or contact history.
In Basic mode, the following three conditions are included by default:
-
Confidence is low
- The AI agent will exit when it cannot respond confidently based on the knowledge base.
- This helps avoid misleading replies when the AI is unsure.
-
Human agent requested
- The AI agent will exit when the user explicitly asks to speak with a person.
- This ensures customers can reach your team when they want real-time human help.
-
Keyword detected
- The AI agent will exit when it detects certain exit-related phrases in the customer’s message (e.g. “real agent”, “can I talk to someone”).
- The default exit condition is: Exit when user asks to speak with a human.
You can choose to remove them by clicking on the icon on the right top corner of each condition.
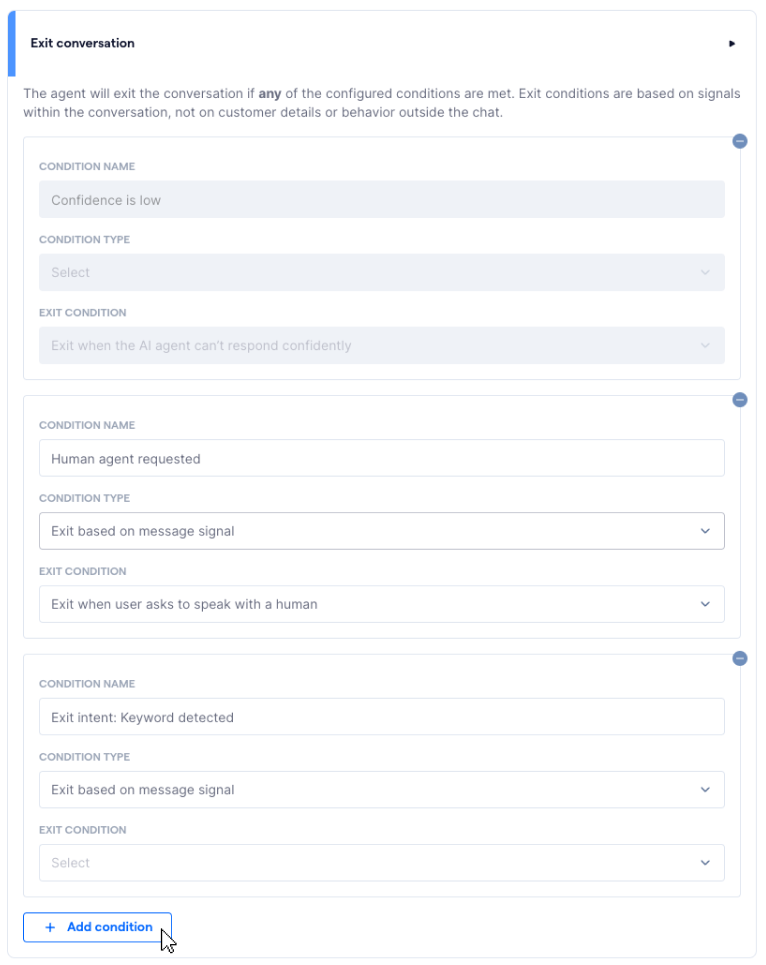
You can add more conditions by following the steps below:
- In the “Exit condition” action section, click on “Add condition” at the bottom
- A new condition will appear, which you can:
- Name the condition (for internal reference)
- Choose the condition type, such as:
- Exit based on message signal
- Exit based on lead score:
Triggered when the customer’s lead score meets a defined threshold. You can select:- Is less than
- Is more than
- Is between
- Then set the numeric values (For example: 0–30 for low-quality leads, or 80–100 for hot leads ready for sales handoff).
- Select from the exit condition dropdown — options are predefined and cannot be customized in Basic mode.
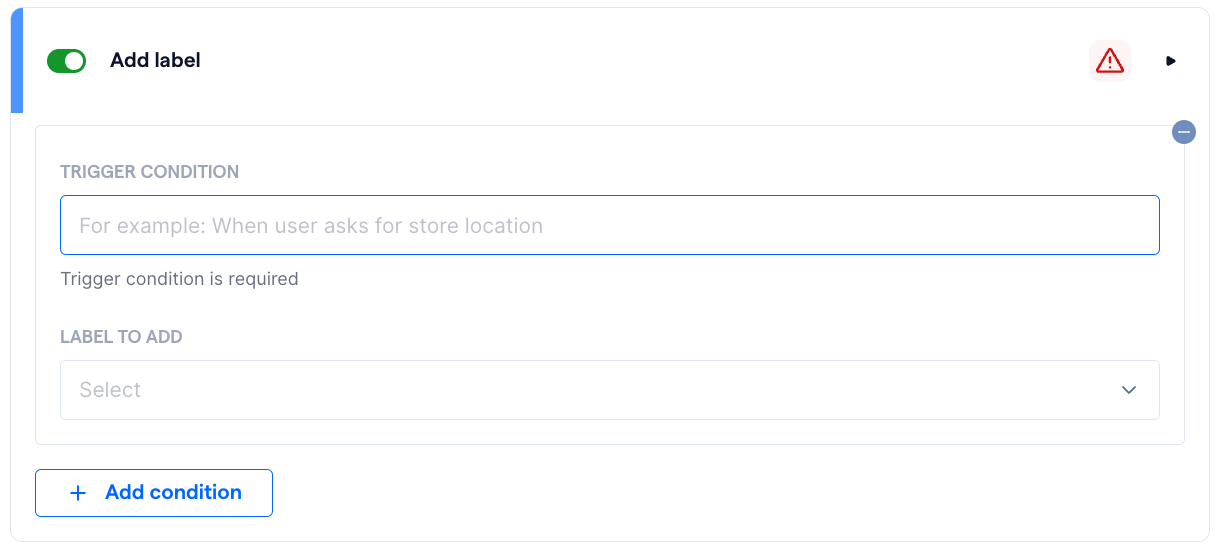
“Add label”
The Add label action allows your AI agent to automatically tag conversations based on what the customer says. Labels help your team organize chats, segment contacts, and trigger downstream workflows like follow-ups or CRM updates.

In Basic mode, this action is optional and toggled off by default — including for both Basic support and Sales growth templates. You can enable it manually if your workflow requires automated labeling.
You can follow the steps below to configure the “Add label” action:
- Toggle on the “Add label” action
- Click “Add condition”
- You will be required to fill in the following details:
- Trigger condition: A short description of the message pattern or intent that should trigger the label. For example: When users asks for store location
- Label to add: Choose from your workspace’s existing labels. The AI agent will apply this label based on the triggered condition.
- You can add multiple label conditions using the “+ Add condition” button.


4. Flow deployment
- Deploy your AI agent into one or more conversation flows using Flow Builder.
- This determines when The AI agent enters a chat, which channel it operates in (e.g. WhatsApp), and how it hands off to humans.
Configuring your AI agent in “Advanced mode”
“Advanced mode” gives you full control and customizations over your AI agent’s behavior. Unlike Basic mode, which uses pre-filled templates, Advanced mode lets you write and edit your own prompts across Instructions, Actions, Guardrails, and Labels — so you can fine-tune tone, logic, and response style to match your workflow.
This mode is recommended for users who are confident in designing prompt-based logic or want to handle more complex use cases.
Turning on/off “Advanced mode”
You can toggle Advanced mode on or off from the agent’s Settings page:
- When “Advanced mode” is ON, all prompt fields become fully editable.
- When “Advanced mode” is OFF, the agent will return to Basic mode using simplified, non-editable templates.
⚠️ Switching off Advanced mode will discard your changes
If you’ve edited any prompts in Advanced mode and turn it off, your changes will be permanently deleted. When you turn Advanced mode back on, all prompts will reset to their default templates — your previous edits will not be recoverable.
A confirmation modal will appear before the switch is applied:
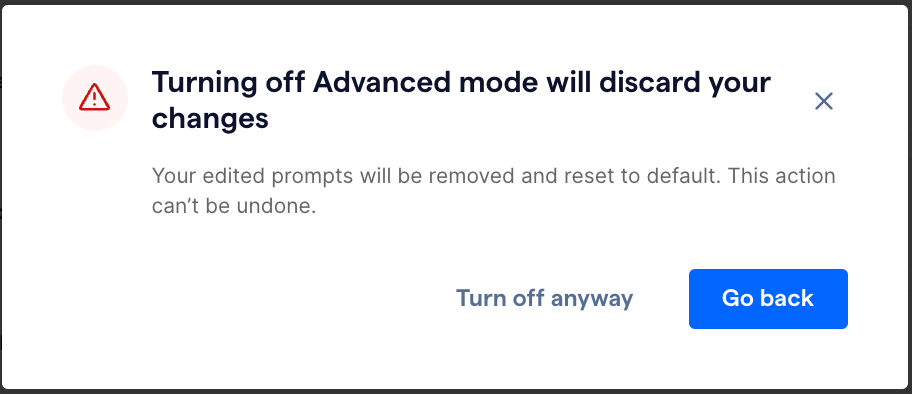
- Click “Go back” to cancel and keep your edits
- Click “Turn off anyway” to confirm and discard all custom prompts
Once you have created your AI agent, you will be redirected to the set up page of The AI agent you have created.
To manage your AI agent’s configurations, you can click “Manage” to update its actions, instructions, or linked knowledge base at any time.
Here is a list of settings you can configure within an AI agent:
- Knowledge base: Link relevant content the AI can reference to generate accurate replies.
- Instructions: Define your agent’s objective, set a welcome message, and add guardrails to guide how the agent should behave in different scenarios.
- Actions: Select what the AI can do in a conversation, such as send messages, score leads, or exit.
- Flow deployment: Deploy your AI agent in Flow Builder to start using it. The agent will only respond in conversations once it’s added to an active flow.
Configuring AI agent's Knowledge base
To generate accurate and relevant replies, your AI agent must be connected to a knowledge base. This knowledge base acts as the central source of truth the agent uses to understand your business, answer customer enquiries, and take appropriate actions.
All AI agents in SleekFlow use the Global knowledge base, which stores all uploaded data sources shared across your workspace. When you add content through an individual AI agent, you’re uploading it to the Global knowledge base — ensuring consistency across agents.
There are 5 options available for adding new sources in the “Configuring AI agent” page:
- File upload
- Index website URL
- Web search
- Custom answers
- Select existing data source from Global knowledge base
To connect a knowledge base to your AI agent:
- In the AgentFlow page, click “Manage” on the AI agent card
- Click “Knowledge base” on the left-sided menu
- You will be redirected to the Knowledge base of the agent
- On this page, you can:
- Choose existing data sources from the Global knowledge base
- Or click “Add source” to upload new content
- A pop-up modal will appear. You can import content by:
- Uploading a file (.PDF, .DOCX, .XLSX, or .JPG)
- Importing from a website URL
- Selecting from existing entries in the Global knowledge base


Uploading files to Global knowledge base
Once you have selected “File upload” in the previous step, you can then follow the steps below to upload files to AI agent’s Knowledge base:
- In the “Import file to Global knowledge base” page, you can upload files in supported formats such as .DOCX, .PDF, .XLSX, or .JPG. Simply drag and drop your files, or select them from your device. Make sure your files meet the required format and size guidelines.
- Once you have reviewed the uploaded files, click “Import”

ℹ️ Note:
When you upload a file from within the AI agent’s Knowledge base page, the content is stored in your e. It will be automatically linked to the AI agent you’re configuring, and can be reused across multiple agents in your workspace.
Learn more about managing the Global knowledge base in our Help Center article.
Indexing website URL as data source (Recommended for accuracy)
🧠 Choose Index in database for speed and accuracy
Use Website URL indexing when your content is stable — like Help Center articles, policy pages, or product descriptions. The AI will store and reference this content directly, leading to faster replies and higher response reliability.
Ideal for evergreen information that doesn’t change often.
Use this option to scan and store static website content ahead of time for faster and more accurate replies.
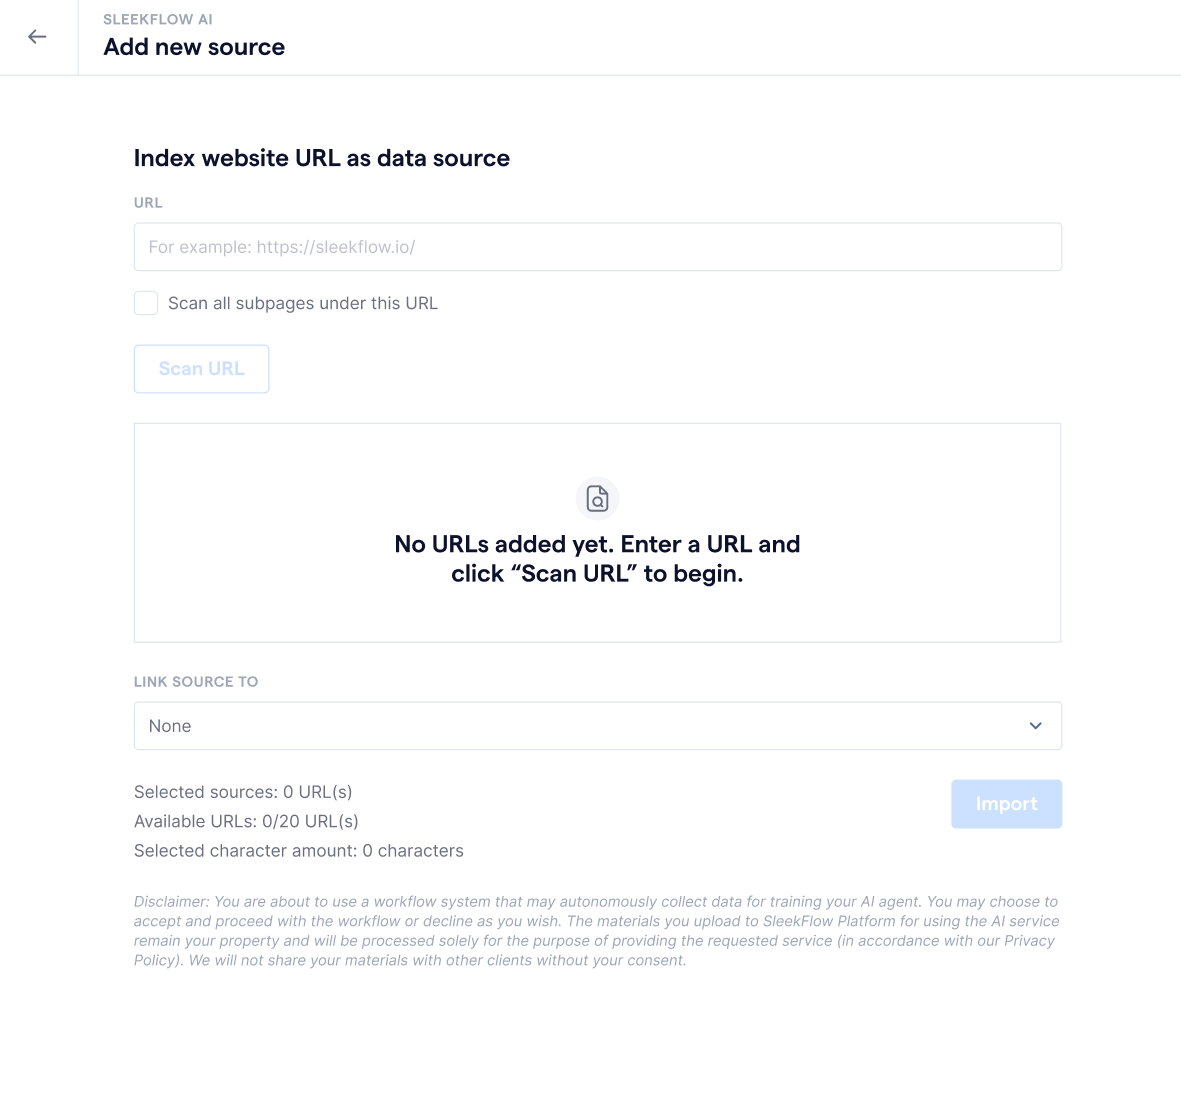
Once you have selected “Website URL indexing” in the previous step, you can then follow the steps below to upload files to AI agent’s Knowledge base:
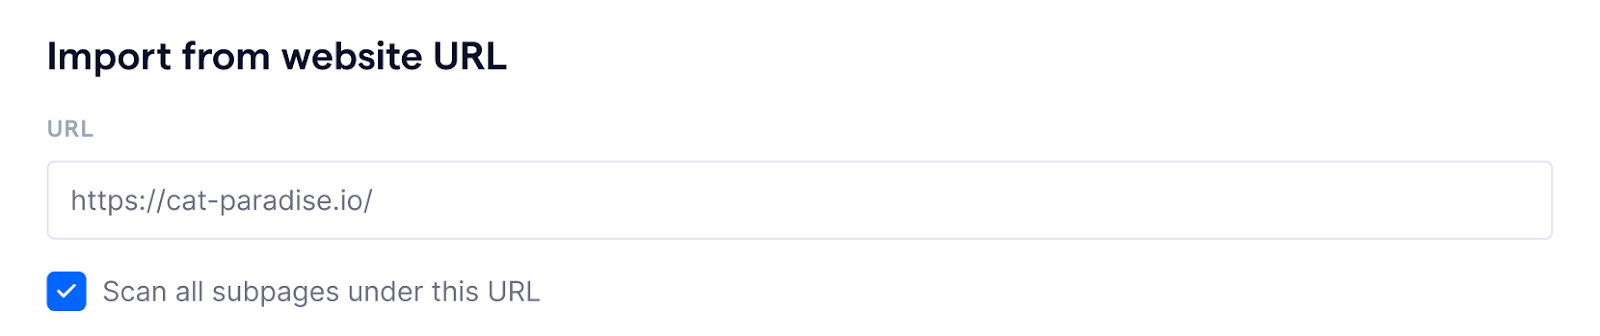
- In the “Index website URL as data source” page, enter the URL that you would like to import to your Global knowledge base. For example: https://sleekflow.io
- (Optional) Select how the URL will be scanned:
- If you wish to scan all the linked subpages under the URL you entered, you can check the box “Scan all subpages under this URL” under the URL field:
- To narrow the scan, fill in the “Include only subpages with these paths” or “Exclude subpages with these paths” fields.
- Example: /blog, /pricing
- Use commas to separate multiple paths
- If you wish to scan all the linked subpages under the URL you entered, you can check the box “Scan all subpages under this URL” under the URL field:
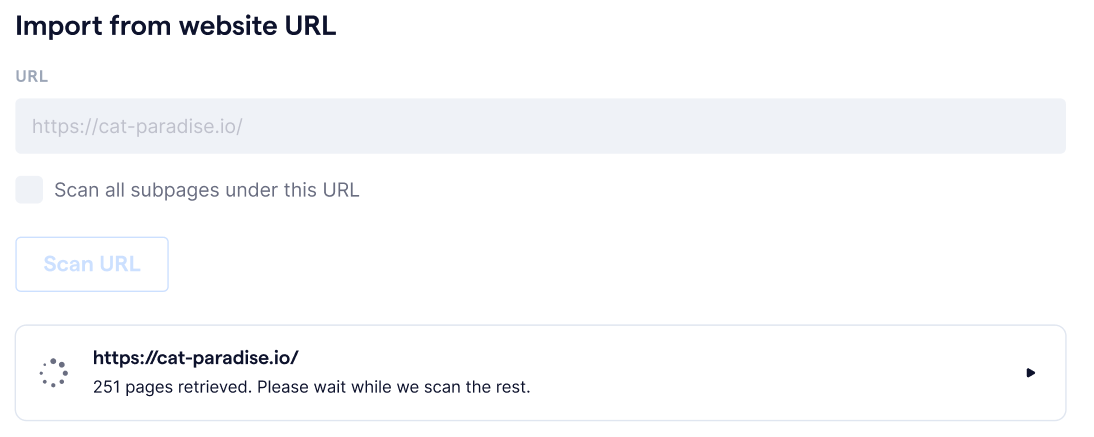
- Next, click “Scan URL”. Note that this may take a moment to scan all pages under the URL you have entered
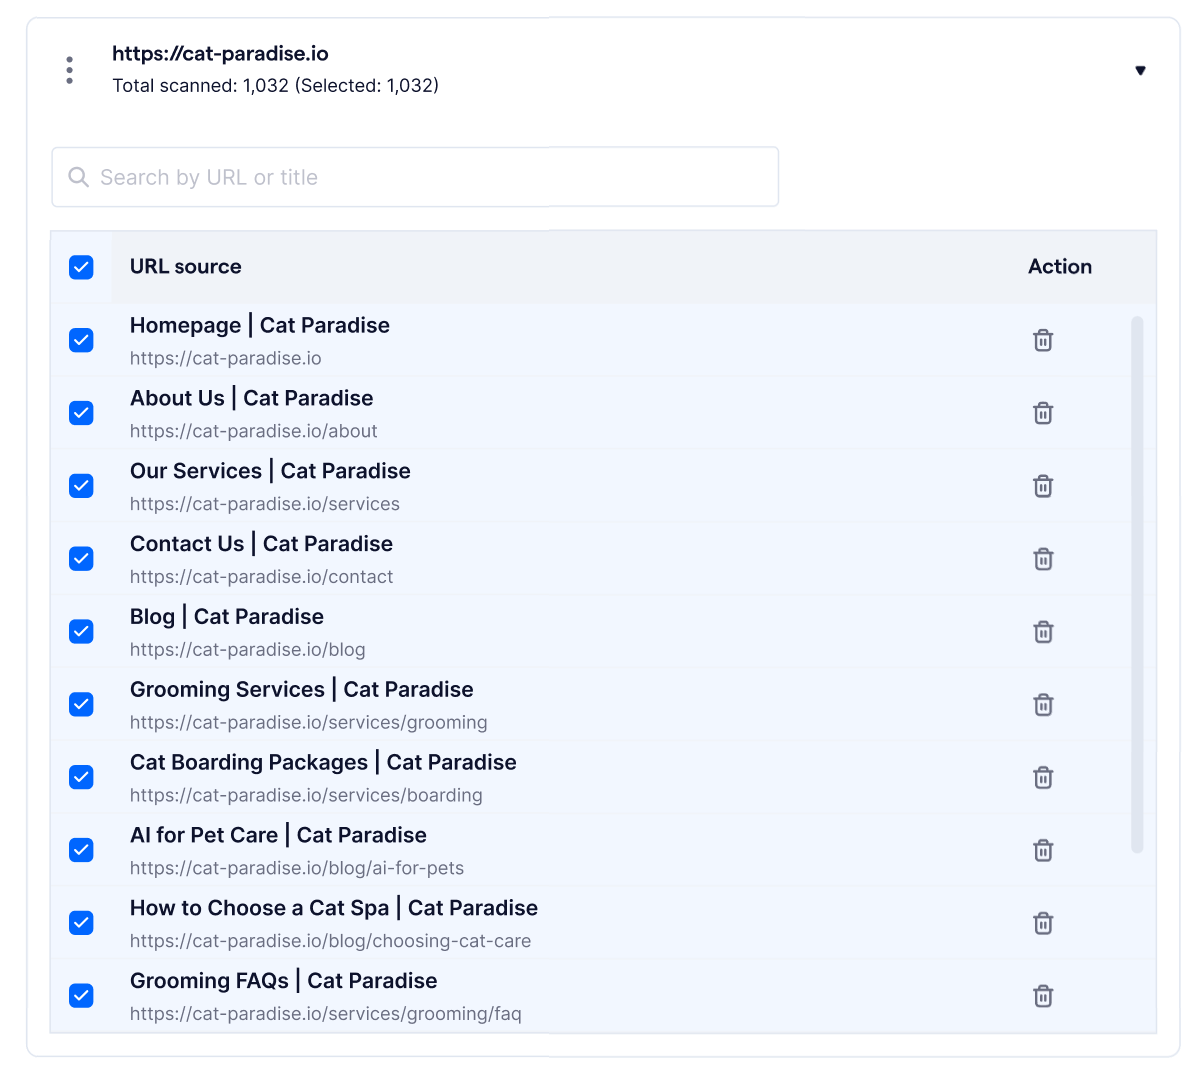
- Once the scan is completed, you will be able to expand the toggle to view all pages scanned under the URL
- Select the pages you want to import. You can use the checkboxes to include/exclude the pages. You can also search by the title or URL.
- Once you have selected the pages that you need to import, you will need to configure how the URL data source be linked to different AI features in SleekFlow. You can link it to:
- Existing AI agents in AgentFlow
- Inbox co-pilot for message suggestions inside the Inbox
- Click “Import”

Once imported, the content is stored in your Global knowledge base and linked to the selected agent or co-pilot. You can reuse the same data source across multiple agents in your workspace.
ℹ️ Note:
When you import a website URL from within the AI agent’s Knowledge base page, the content is stored in your Global knowledge base. It will be automatically linked to the AI agent you’re configuring, and can be reused across multiple agents in your workspace.
Learn more about managing the Global knowledge base in our Help Center article.
Web search as a data source (Recommended for real-time use)
⚡ Choose Web search if your content changes frequently
Use Web search when your website is updated regularly — such as blog posts, real-time pricing, or limited-time offers. This ensures your AI agent always pulls the most current version of the page.
Just note: content is fetched live during each conversation, which may slow down response time and reduce accuracy slightly.
Once you have selected “Website search” in the previous step, you can then follow the steps below to import website URL to AI agent’s Knowledge base:
- In the “Search website in real time as data source” page, enter the URL that you would like to import to your Global knowledge base. For example: https://sleekflow.io
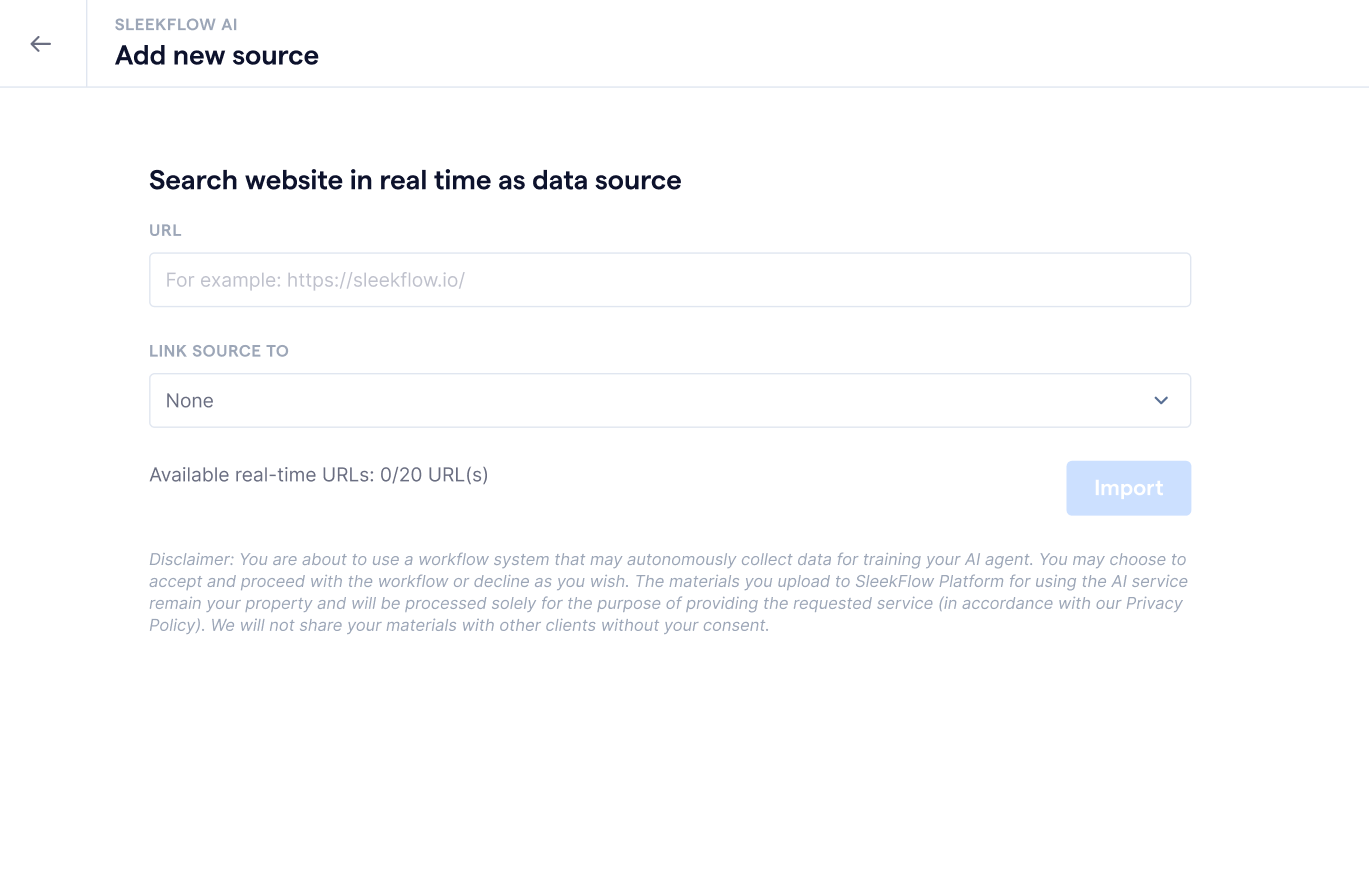
- Once you have entered the URL, you will need to configure how the URL data source be linked to different AI features in SleekFlow. You can link it to:
- Existing AI agents in AgentFlow
- Inbox co-pilot for message suggestions inside the Inbox
- Click “Import”

Once imported, the content is stored in your Global knowledge base and linked to the selected agent or co-pilot. You can reuse the same data source across multiple agents in your workspace.
ℹ️ Note:
When you import a website URL from within the AI agent’s Knowledge base page, the content is stored in your Global knowledge base. It will be automatically linked to the AI agent you’re configuring, and can be reused across multiple agents in your workspace.
Learn more about managing the Global knowledge base in our Help Center article.
Adding custom answers to Global knowledge base
💡 Custom answers are matched by context, not exact keywords
The AI uses large language model (LLM) capabilities to understand the meaning behind a customer’s message — not just the exact words. As long as the message aligns with the intent of your training question, the AI will detect it and respond with your configured answer.
This means you don’t need to list every possible phrasing. Instead, focus on providing clear examples of intent and a strong, reusable answer.
Once you have selected “Custom answers” in the previous step, you can then follow the steps below to add custom answers to AI agent’s Knowledge base:
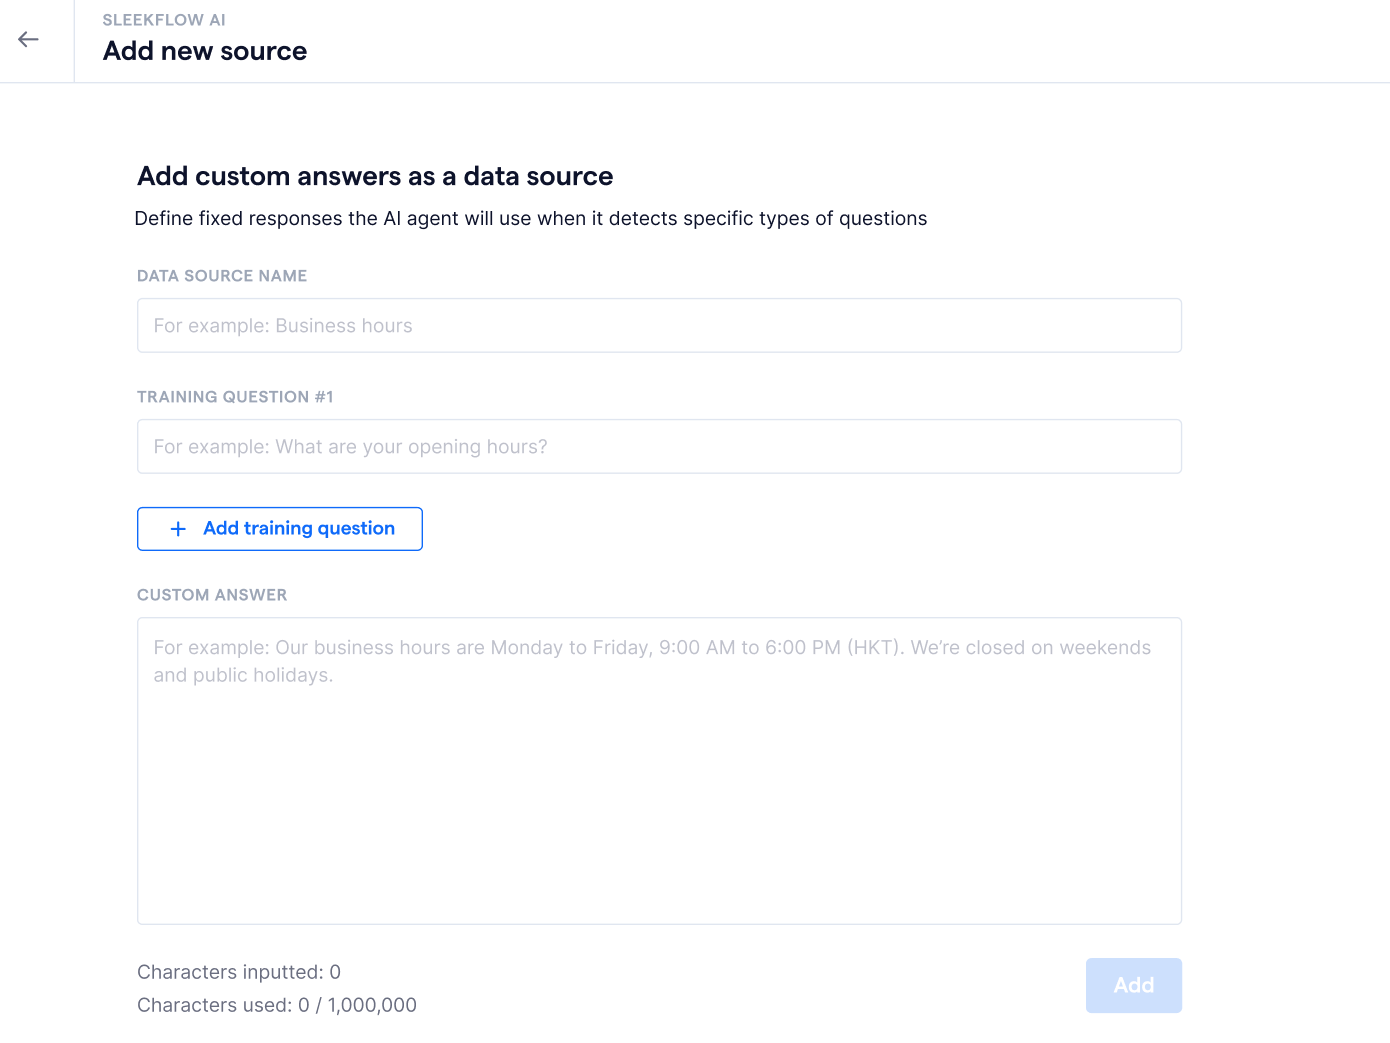
- You will be redirected to the “Add custom answers as a data source” page
- In this page, first fill in the “Data source name”. This name helps you identify the custom answer later and will be shown in your “Global knowledge base” alongside other sources like files or website URLs.
- Next, fill in the following fields:
-
Question
- Write a typical customer question that your AI agent should be able to recognize and respond to. This doesn’t need to be an exact phrase — the AI uses contextual understanding to match similar messages during live conversations. Example: “What’s your refund policy?”
- You can improve accuracy by adding more variations using the “Add training question button”. These help the AI better understand different ways a customer might ask the same thing.
-
Answer
- Provide the full response you want the AI to deliver. This should be clear, accurate, and helpful — including explanations, steps, or policy details as needed. Example: “We accept refund requests within 7 days of purchase. Please contact our team with your order number to start the process.”
-
Question
- Once you have filled in the answer, click “Add”
Selecting data sources from Global knowledge base to an AI agent
Once you have selected “Selected from Global knowledge base” in the previous step, you can then follow the steps below to import website URL to AI agent’s Knowledge base:
- In the “Select data sources for this AI agent” page, you will see the existing data sources in your Global knowledge base
- Click on the checkbox next to the data source you would like to link this AI agent to
- Once you have reviewed the selected data sources, you can click “Select”


Configuring AI agent's Instructions
The Instructions tab defines how your AI agent should behave during conversations — including its purpose, and how to respond in sensitive or unexpected situations. These settings help your AI agent stay aligned with your brand and ensure it engages customers effectively and responsibly.
To configure AI agent’s instructions, you can follow the steps below:
- In the AgentFlow page, click “Manage” on the AI agent card
- Click “Instructions” on the left-sided menu
- You will be redirected to the “Instructions” page
- In this page, you can configure the following:
-
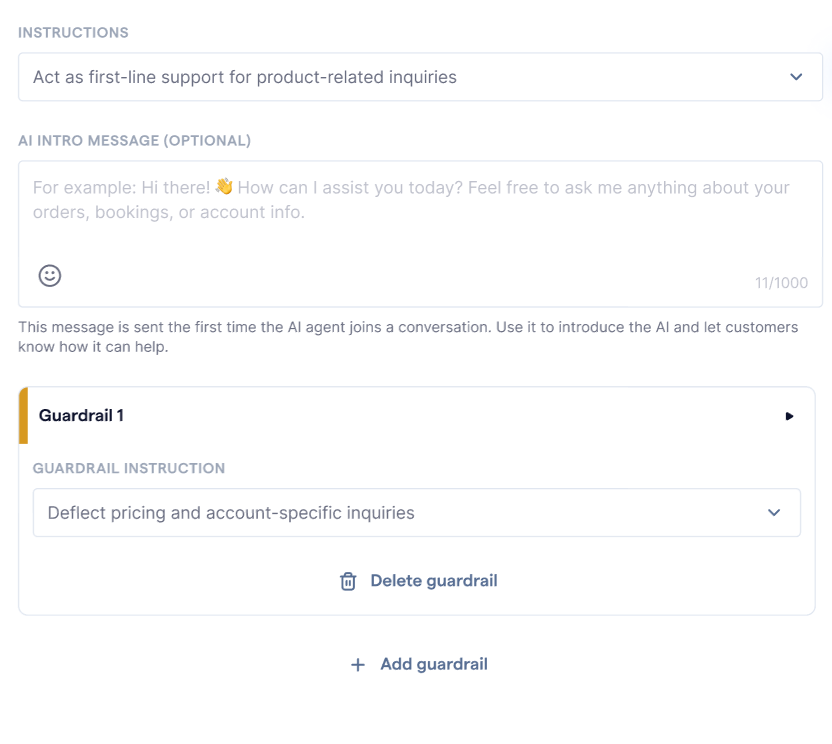
Instructions (overall behavior)
- Define the AI agent’s objective and provide detailed context about your business. You can specify who the agent represents, what types of enquiries it should handle, and how it should communicate (e.g. tone, language style, level of detail). The more specific your instructions, the more accurate and on-brand the AI’s responses will be.
- Example: “You are a friendly and knowledgeable assistant representing Cat Paradise. Our company provides premium cat grooming, boarding, and wellness services. When introducing yourself, say: ‘Hi! I’m from Cat Paradise. I’m here to help you with any questions about our services or products.’ You assist customers with booking spa sessions, explaining our service packages, and answering product-related questions. Use a warm, helpful tone and keep responses concise but informative.”
-
Welcome message
- Write a greeting that appears when a customer first interacts with your AI agent. Use this to set expectations and establish tone.
- Example: “Hi there! I’m here to help with anything about our cat care services, grooming bookings, or product info 🐾”
-
Guardrails
- Guardrails help your AI agent identify and respond appropriately to sensitive or complex topics. They guide how the agent should steer the conversation when certain types of input are detected — but they do not trigger additional actions like exiting or handing off the chat. Each guardrail includes:
- Observe for: Describe what the AI should watch out for. (For example: refund requests, pricing disputes, complaints, personal information)
- How to react: Specify how the AI should respond using tone, phrasing, or clarification questions (For example: acknowledge the concern politely and ask a follow-up question to gather more details)
- You can add multiple guardrails based on different types of sensitive content. For example:
-
Example 1: Order issue
- Observe for: “Questions about refund status or order disputes.”
- How to react: “Apologize for the inconvenience and ask the customer to clarify their order number so you can better understand the issue.”
-
Example 2: Damaged product
- Observe for: “Mentions of product defects or damaged items.”
- How to react: “Acknowledge the issue with empathy and ask the customer to describe the problem or provide a photo if possible.”
-
Example 3: Data privacy concern
- Observe for: “Questions about personal data, privacy, or account security.”
- How to react: “Reassure the customer that their data is protected and direct them to review your company’s privacy policy for more details.”
-
Example 1: Order issue
- To add a guardrail, click “Add guardrail”, fill in both fields
- Guardrails help your AI agent identify and respond appropriately to sensitive or complex topics. They guide how the agent should steer the conversation when certain types of input are detected — but they do not trigger additional actions like exiting or handing off the chat. Each guardrail includes:
-
Instructions (overall behavior)
- Once you’ve finished configuring your AI agent’s instructions, you can test how it responds using the preview panel on the right.
Note: You’ll need to have at least one fully trained knowledge base source before testing is available. If no source is ready, the test panel will remain inactive.
- Once you are done with the configurations, click “Publish” on the top right corner to save the changes


💡 Need help writing strong instructions and prompts?
Read our Best practices guide to learn how to write clear agent objectives, tone settings, and guardrails that align with your business.
Configuring AI agent's Actions
Actions define what your AI agent can do during a conversation — such as replying to customers, scoring leads, or exiting a chat. Each action is powered by a prompt that tells the agent how to respond. You can review and customize these prompts to match your workflow, brand tone, and business objectives.
You can access the AI agent’s Action page by following the steps below:
- In the AgentFlow page, click “Manage” on the AI agent card
- Click “Actions” on the left-sided menu
- You will be redirected to the “Actions” page
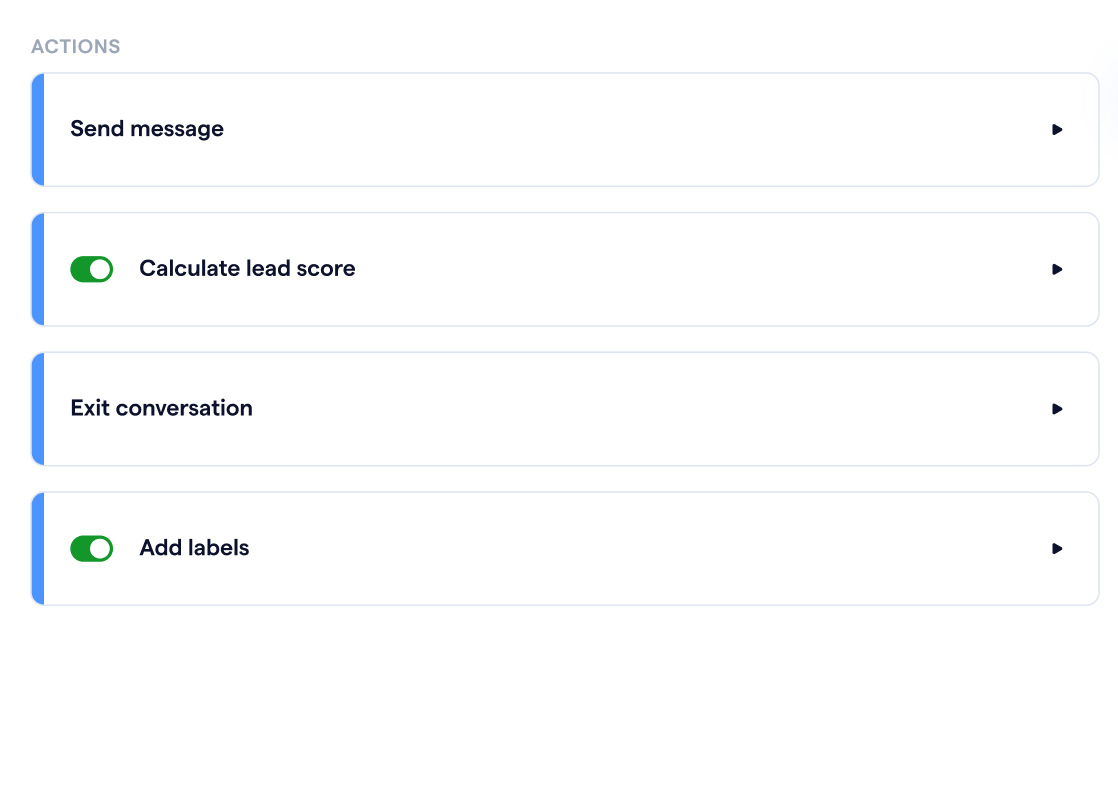
- In this page, you can configure the details of each available action for your AI agent:
- Send message and Exit conversation are required actions — they are enabled by default and cannot be turned off.
- For optional actions like Calculate lead score, and Add labels, you can use the toggle switch to enable or disable them based on your agent’s role.
- Click on any action to view and customize the prompt that controls how the AI performs that task. This lets you fine-tune responses, scoring logic, and internal behavior to match your workflow.

“Send message” action
This is the core action that allows your AI agent to respond to incoming customer messages using the connected knowledge base. It is always enabled and runs automatically when a contact sends a message.

In this action, you can configure the following:
-
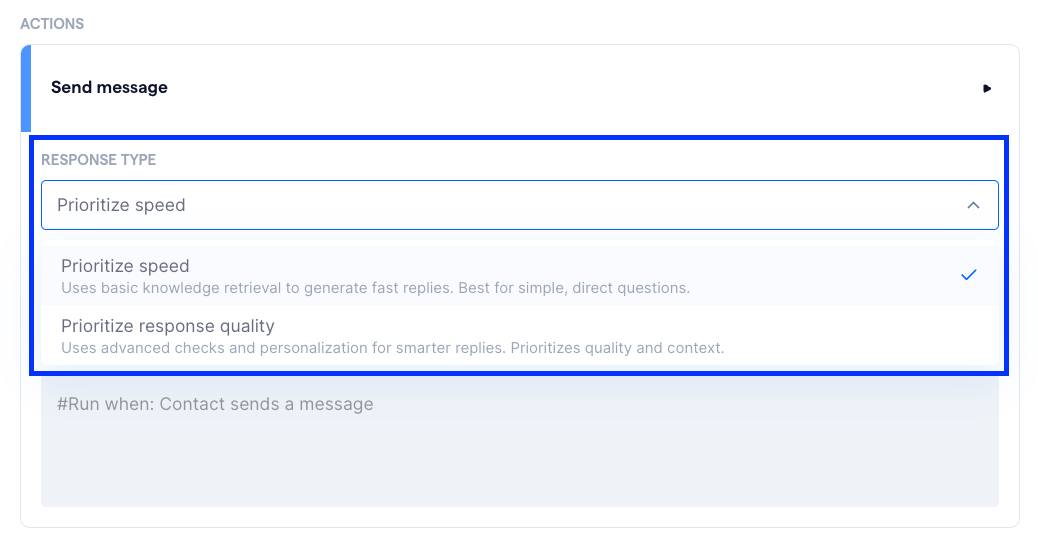
Response type: Choose how your AI agent prioritizes its replies:
- Prioritize speed – Uses basic knowledge retrieval to generate fast responses. Ideal for straightforward questions or high-volume support.
- Prioritize response quality – Uses advanced checks and personalization to generate more thoughtful, context-aware responses. Best for complex or sales-related enquiries.
-
Message tone of voice: Define how the AI should sound and what kind of behavior it should follow when replying to customers. This prompt guides the AI’s reply style, fallback handling, and content framing. You can include tone descriptors such as:
- Friendly and casual
- Polite and professional
- Conversational but confident
-
Trigger condition: Defines when this action is triggered during the conversation — for “Send message,” it runs automatically when a customer sends a message.
- This action automatically runs when the contact sends a message (#Run when: Contact sends a message)
- This condition is fixed and cannot be edited
- Once you have completed configuring the instructions of the AI agent, you can test your AI agent on the right screen to see how it responds
- Once you are done with the configurations, click “Publish” on the top right corner to save the changes
💬 Recommended setup Basic Support agents
Use this setup to handle FAQs and common support enquiries efficiently.
- Response type: Prioritize speed
- Tone of voice: Friendly and polite
💲 Recommended setup for Sales Growth agents
Use this setup to engage leads and uncover sales intent through meaningful dialogue.
- Response type: Prioritize response quality
- Tone of voice: Confident and conversational
“Calculate lead score” action
This action allows your AI agent to evaluate each lead and assign a score between 0 and 100 based on message content, intent, urgency, tone, and fit. It helps your team identify high-quality leads, prioritize follow-ups, and streamline sales qualification.
This action is included by default in the Sales Growth template, but can also be toggled on manually when using other templates like Basic Support.

In this action, you can configure the following:
- Trigger condition: The lead score is calculated automatically whenever the contact replies to the AI agent. You don’t need to configure this manually.
-
Scoring criteria and weights: Define the factors your AI should evaluate when scoring a lead. Each criterion is assigned a percentage weight, which determines how much it contributes to the final score.
- How scoring weights work:
- The AI evaluates each selected criterion based on the customer’s message.
- Each criterion contributes up to its assigned weight toward the total score.
- For example, if “Intent and interest level” is weighted at 40%, it can contribute up to 40 points out of 100.
- The total weight across all criteria must equal exactly 100% to ensure the AI calculates a complete score.
- If a criterion doesn’t apply to your workflow, you can remove it by clicking the “–” button in the top-left corner of the card. You must keep at least 1 active criterion for the lead score to be calculated.
- How scoring weights work:
-
Default example criteria (editable):
- Intent and interest level – Is the lead asking about features or making comparisons?
- Buying signals – Are they inquiring about pricing or expressing urgency?
- Depth and specificity – Are they asking focused, insightful questions?
- Engagement tone – Are they enthusiastic, hesitant, or neutral?
- Customer fit – Does their role or profile align with your ideal customer persona?
- If you need to add more criteria, you can click “Add criteria”
- Once you have completed configuring the instructions of the AI agent, you can test your AI agent on the right screen to see how it responds
- Once you are done with the configurations, click “Publish” on the top right corner to save the changes
⚠️ Important:
The total weight across all lead scoring criteria must equal 100%.
You can adjust the importance of each criterion by changing its percentage, or set it to 0% if you don’t want it to affect the score. The system will not calculate a lead score unless the total adds up to exactly 100%.
“Exit conversations” action
This action allows your AI agent to leave the conversation once a specific condition is met. Exit conditions are based on signals within the conversation — such as certain keywords or low confidence — rather than customer properties outside the chat. This action is always enabled and ensures smooth handoff or clean exits when appropriate.

In this action, you can configure the following:
- Exit conditions: Define specific scenarios where the AI should end the conversation. You can create multiple conditions using natural language triggers such as:
- “Speak to human”
- “Confidence is low”
- “No matching answer found”
- Each condition includes:
- Condition name – A label to help you identify the rule
- Exit condition – A short explanation of what triggers this exit (For example: when the AI is unsure, or the user explicitly asks to talk to a person)
- Condition type – Choose how the exit should be triggered:
- Exit based on message signal: Triggered when specific keywords or patterns appear in the customer’s message (e.g. “Speak to human”, “No matching answer found”)
- Exit based on message signal: Triggered when specific keywords or patterns appear in the customer’s message (e.g. “Speak to human”, “No matching answer found”)
- Exit based on lead score: This condition is triggered when the contact’s lead score meets a specific threshold. The lead score is calculated based on the criteria you’ve configured under the Calculate lead score action — such as intent, urgency, tone, or customer fit. You can set the AI agent to exit the conversation when the score:
- is less than a value
- is more than a value
- is between two values
Use this condition to smoothly hand off hot leads or end conversations that don’t meet your qualification thresholds.
- Once you are done with the configurations, click “Publish” on the top right corner to save the changes


Here are some of the examples of exit conditions:
| Condition name | Exit condition example |
| Confidence is low | When the AI agent can’t answer with confidence based on the knowledge base |
| Speak to human | When customer mentions they want to talk to a human agent |
| End of task | When the AI agent has completed a set of actions of fulfilled its task |
| Hot lead | When the lead shows strong buying intent or reaches a high lead score threshold |
| Cold lead | When the lead shoes low to no interest, based on the lead score calculate from the criteria set in the “Calculate lead score” action. This may also apply when the customer becomes unresponsive after initial engagement. |
💬 Tips for setting up this action for Basic Support agents
Set exit conditions for when the AI cannot answer accurately or when a customer asks to speak to a human.
- Recommended conditions: “Confidence is low”, “Speak to human”
- Consider using keyword detection (e.g. “agent”, “real person”, “help now”) to trigger exits — this is commonly used in basic FAQ bots.
- Use polite, helpful language to let customers know the conversation is ending or being redirected.
💲 Tips for setting up this action for Sales Growth agents
Configure exit points for when a lead has been qualified or if further nurturing should be handled by a human.
- Recommended conditions: “Lead qualified”, “Ask for pricing”
- You can also exit after scoring the lead to keep the handover seamless.
Configuring AI agent's Flow deployment
Once your AI agent is configured, you can deploy it inside a conversation flow to start using it with real customers. The “Flow deployment” tab helps you view and manage all the flows where your AI agent is currently active.
To configure your AI agent’s Flow deployment, you can follow the steps below:
- In the AgentFlow page, click “Manage” on the AI agent card
- Click “Flow deployment” on the left-sided menu
- You will be redirected to the Flow deployment page, where you will see a list of flows where the agent is currently in use. You’ll find details such as:
- Flow name
- Status (Active / Inactive)
- Logs
- Created by / Updated by
- Last updated time

If your agent hasn’t been added to any flows yet, the list will be empty and you’ll see an option to create new flow.

You can follow the steps below to create a flow in Flow Builder and deploy your AI agent:
- In Flow Builder’s editor, click on the “AgentFlow (Beta)” action node to open up its form, which will appear on the right side of the screen
- Select the AI agent you would like to use in this flow
- Select the WhatsApp channel
- Set triggers to determine when the AI joins the conversation
- Define exit conditions and fallback actions to control handover logic
- Click “Save” and then Publish your flow to make the deployment live

📘 Next step:
Explore Best practices for configuring AI agents to keep your agent reliable, helpful, and on-brand.
Testing out your AI agent
After you’ve configured your AI agent, you can use the built-in test panel to try out how it responds in real conversations. This helps you review how well your prompts and knowledge base are working, before deploying the agent in live flows.
You’ll find the Test your AI agent panel on the right side of the configuration screen.
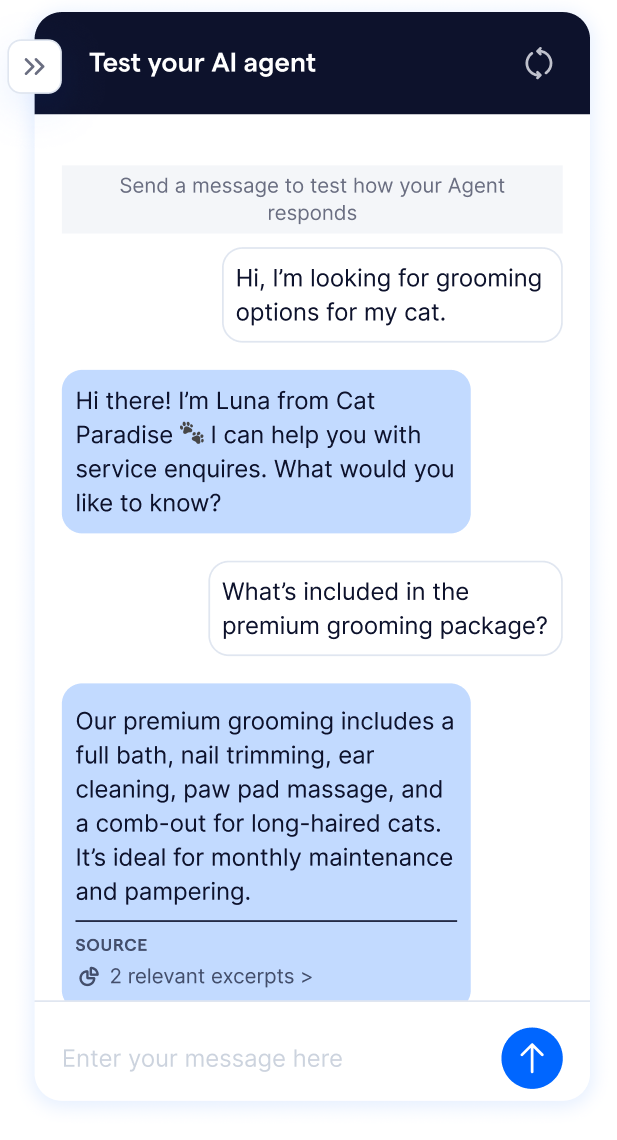
You can:
- Send sample messages as if you were a customer
- See how the AI responds using the connected knowledge base and configured actions
- Quickly spot tone or logic issues before going live
This test environment is designed to reflect real-time behavior based on your current setup.
What you can test in the playground
In the test panel, you can simulate:
- Greeting and welcome flows
- Knowledge-based replies (e.g. product info, FAQs)
- Guardrail behavior (e.g. when the AI should deflect or escalate)
- Prompt tone and response clarity
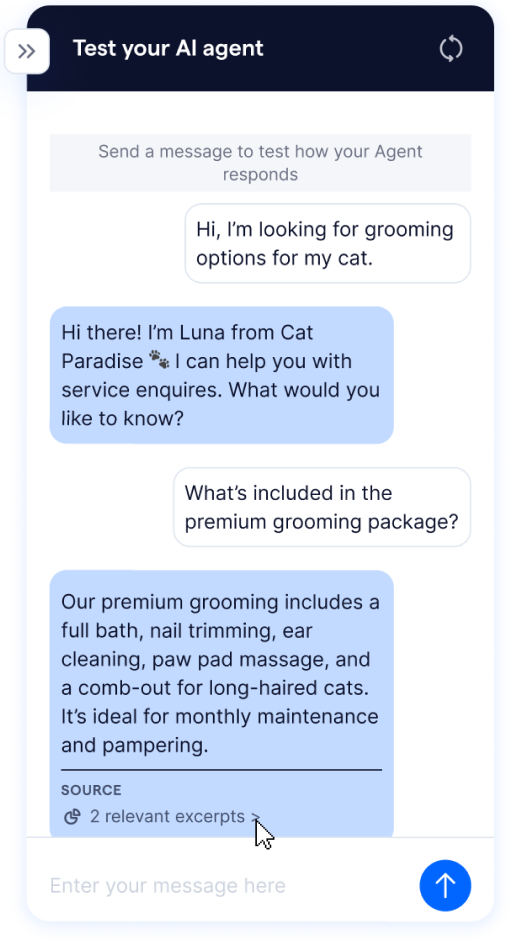
Excerpt-level citation
When the AI generates a response based on your knowledge base, you’ll see a “source” label beneath the message. Click “relevant excerpts” to view the exact chunks of content the AI used.
Each excerpt is a chunk: a small segment of data pulled from your uploaded files or website URLs.
This allows you:
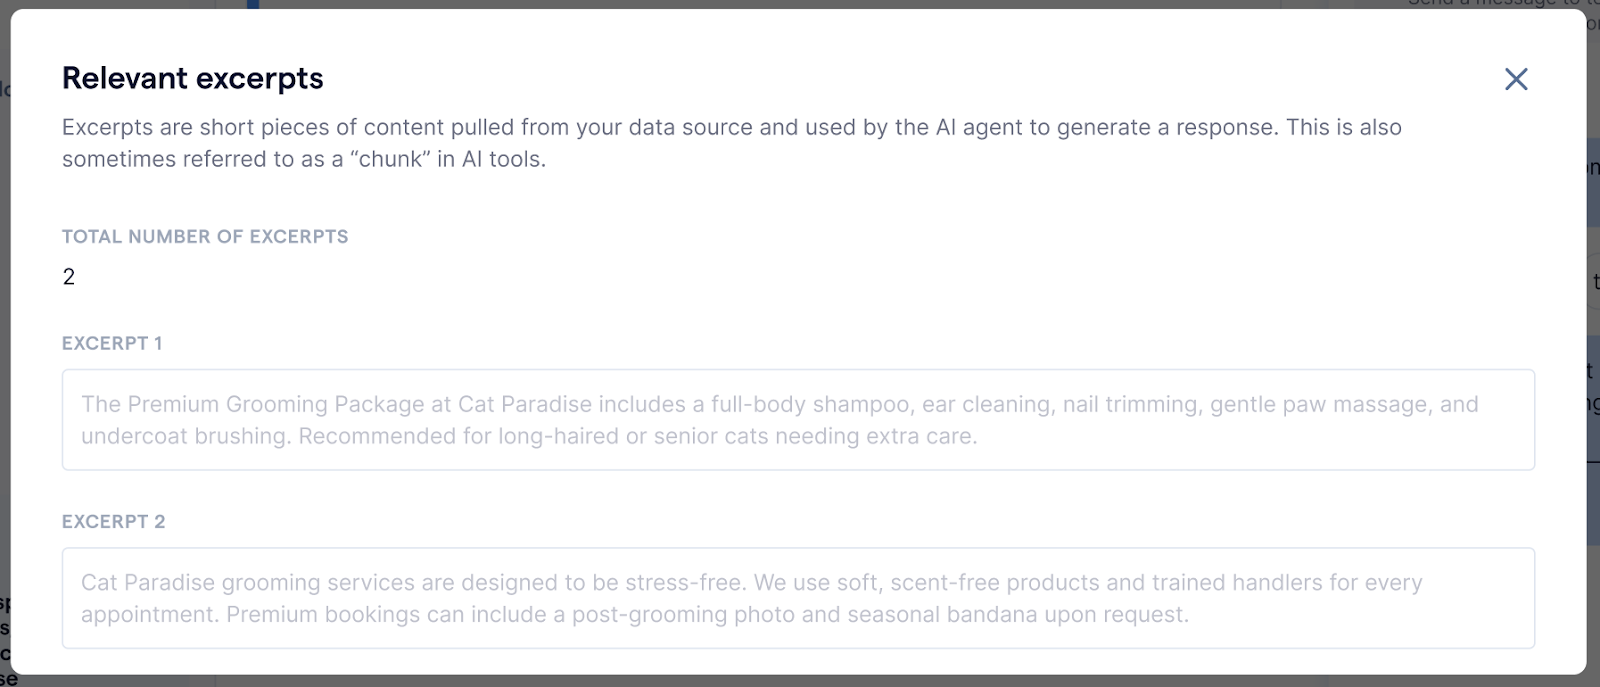
- Verify that the AI is referencing accurate, approved content
- Spot any gaps or outdated information in your source materials
- Understand why the AI responded the way it did