


All action nodes require setting up in a node form, where you specify the parameters for the selected action. In this article, we will guide you on how to set up every “External integration” action node so your flow can execute the appropriate tasks to achieve your desired outcome.
Send triggered message webhook
⚠️ The "Send trigger message webhook" action will only be available for Premium and Enterprise plan users after the Flow Builder beta period
The "Send triggered message webhook" action allows you to send data related to the customer's message that triggered their flow enrollment to an external system.
Prerequisites for using this node are:
-
The trigger node is one of the following
- Incoming message received
- New customer message received
- Outgoing message sent
- The external system is able to receive incoming webhooks from SleekFlow
Set up the "Send triggered message webhook" action node form by following the steps outlined below:
- Set up the node form
-
Preview the webhook payload
Set up the node form
To set up the “Send triggered message webhook” node form:
-
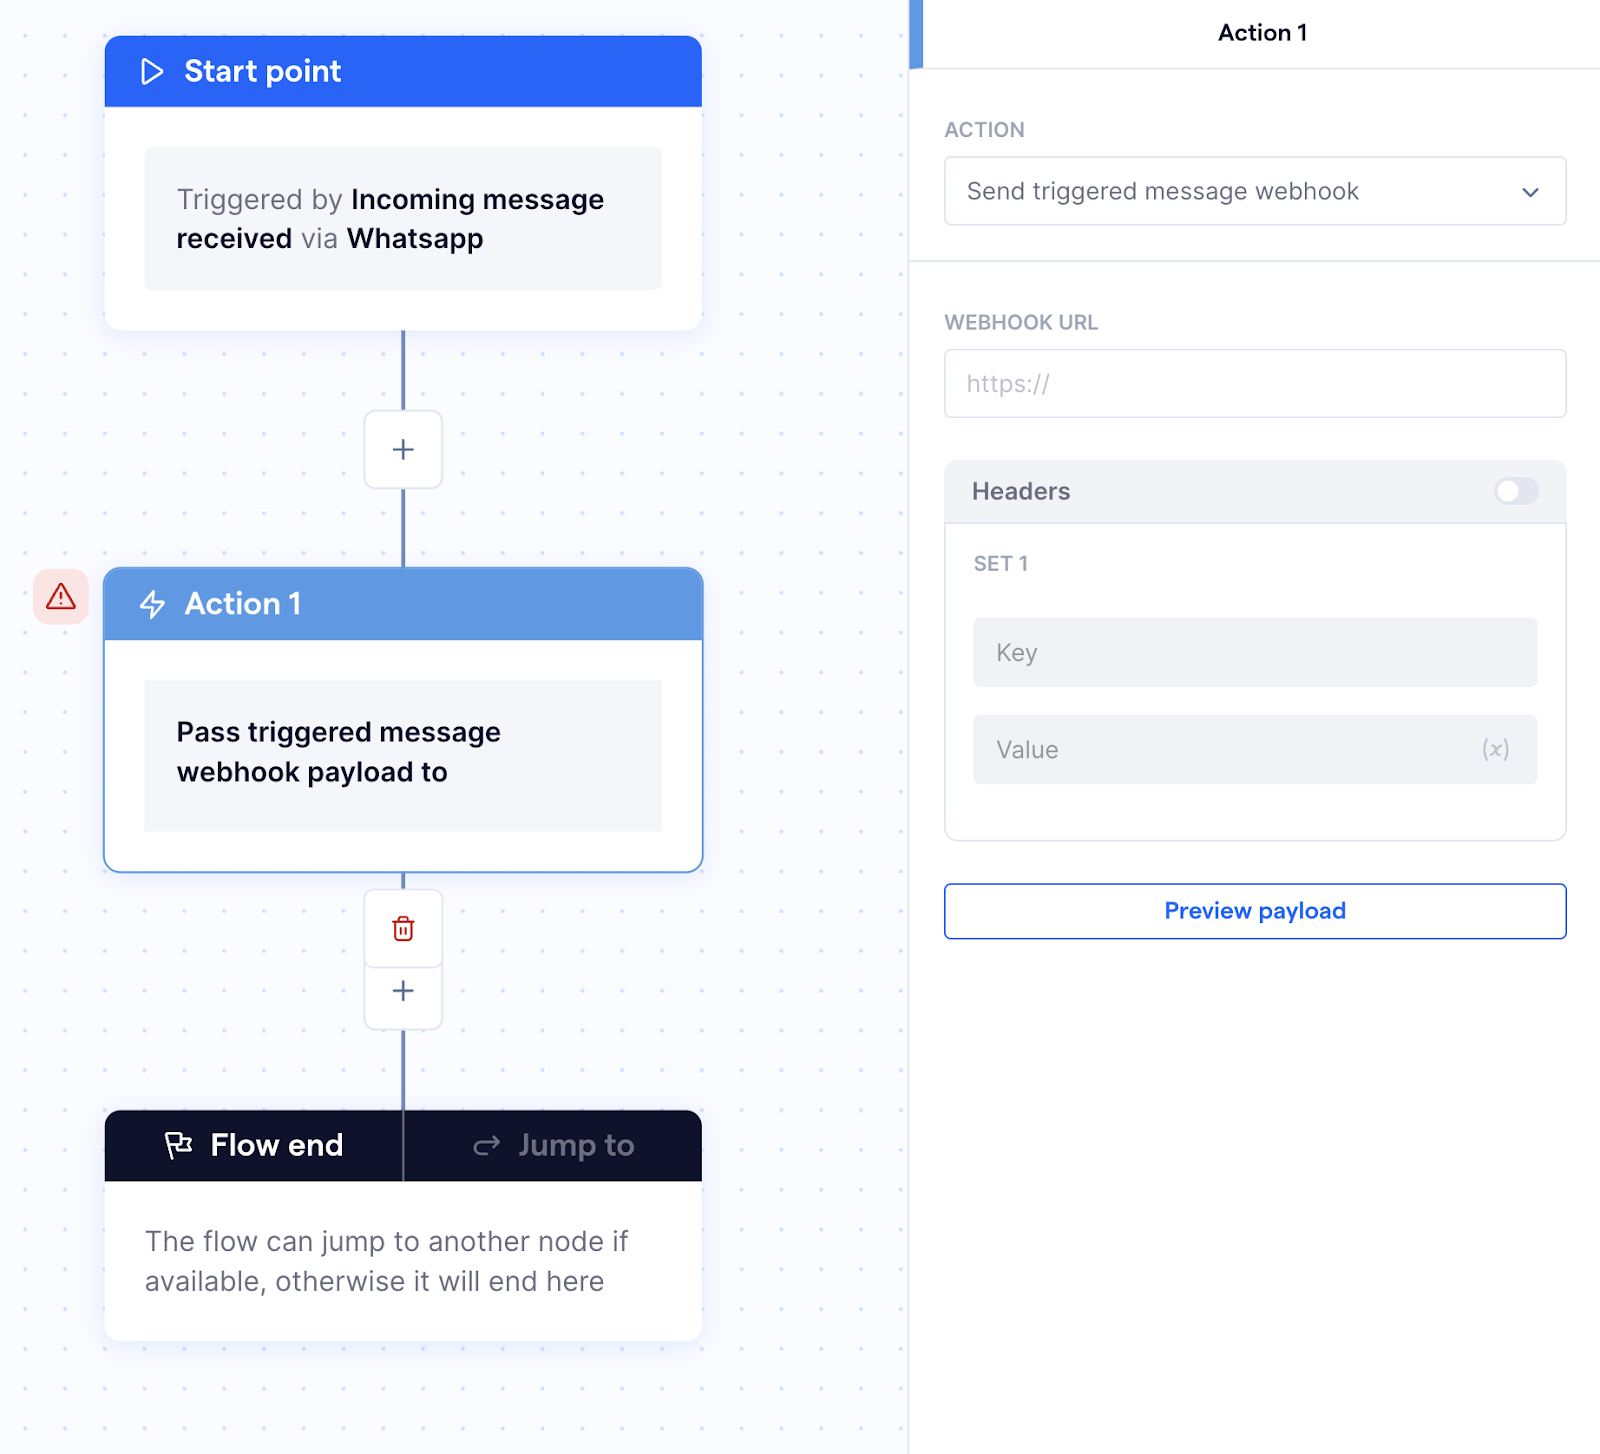
Click on the "Send triggered message webhook" action node to open up its form, which will appear on the right side of the screen
-
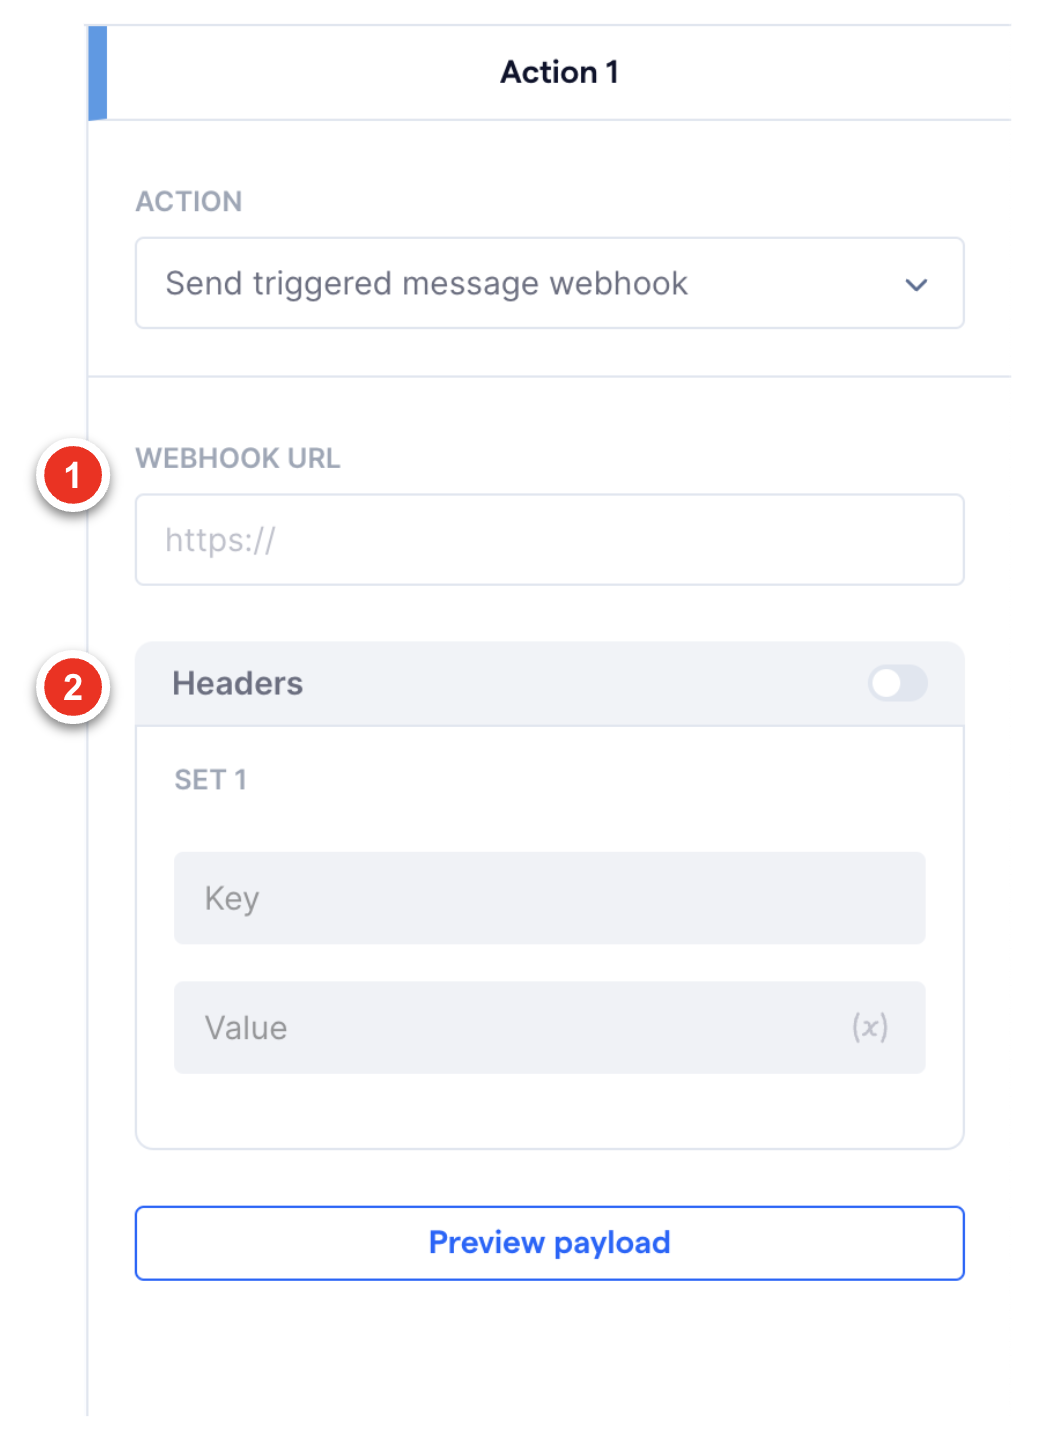
The node form contains the following fields for you to configure in order for SleekFlow to send the webhook payload data of the triggered message to your external system:
1. Webhook URL - Input the webhook URL provided by the external system you
want to send the data to
2. Headers - Enable this to provide any additional data required by the webhook
through the request header. Please refer to your external system's webhook
documentation to see if any additional data needs to be passed through the
request header of your webhook.
Preview the webhook payload
To see a preview of the payload:
-
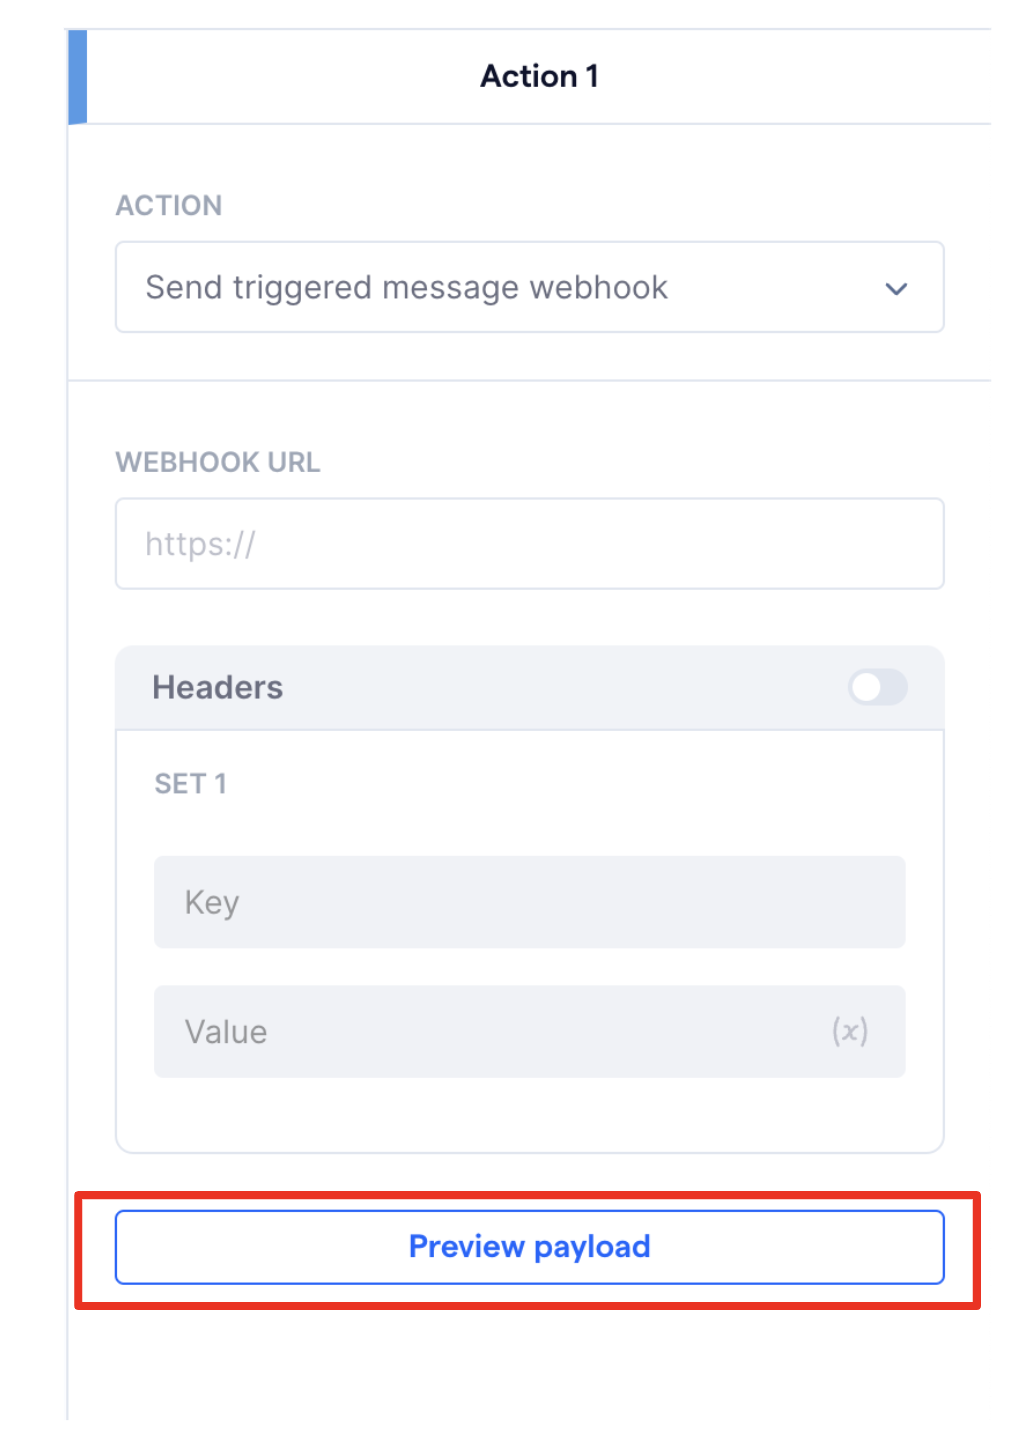
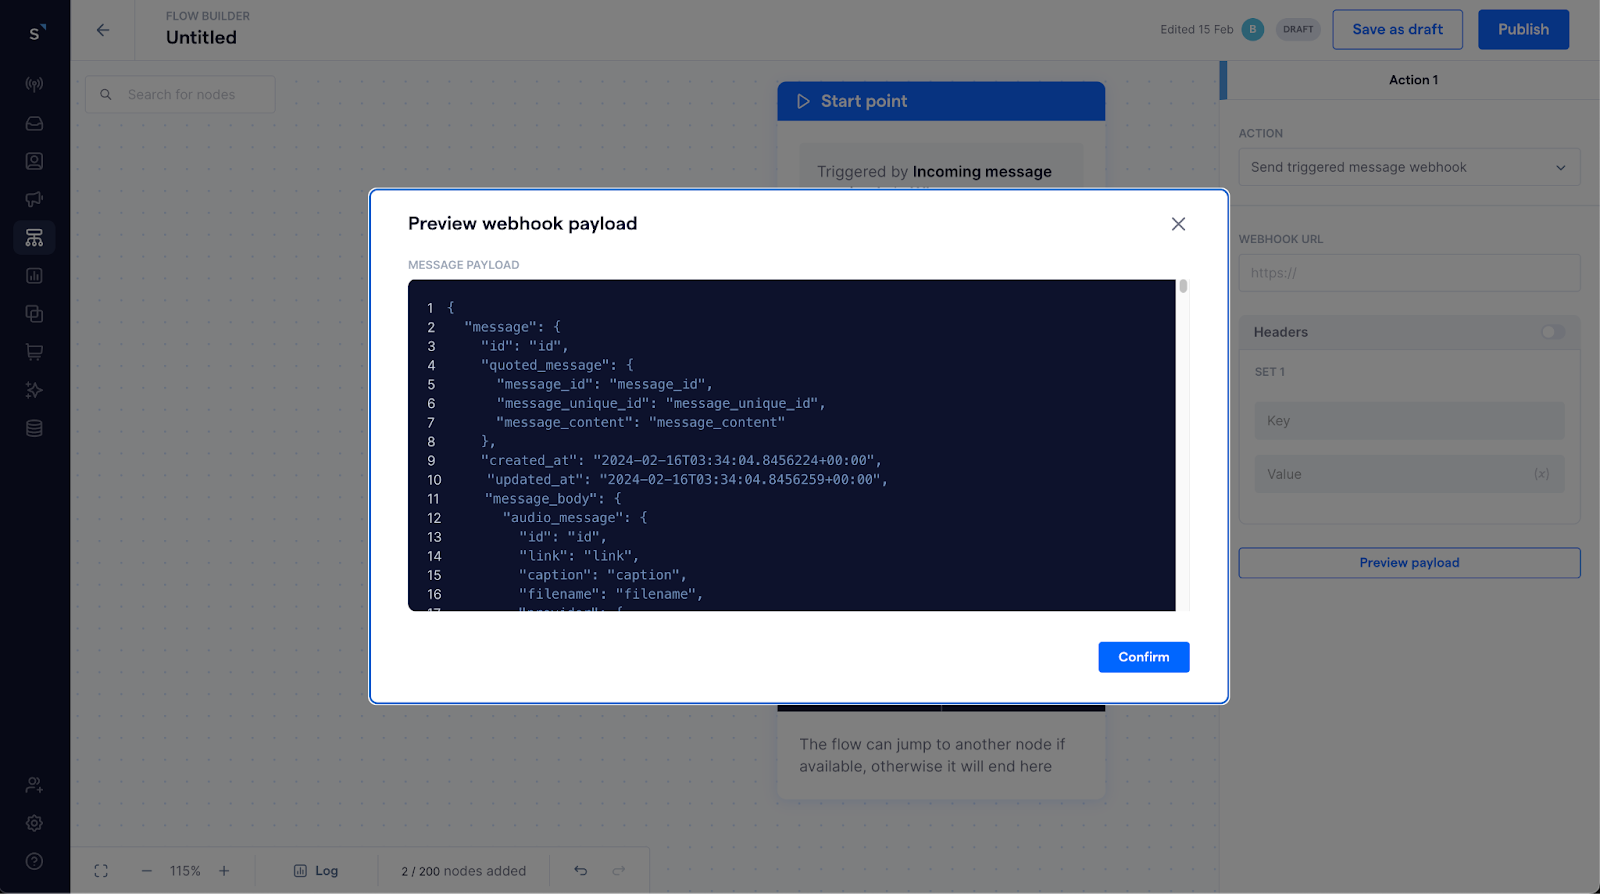
Click on the "Preview payload" button in the node form to see a sample of the contact payload and its parameters that would be sent to your external system’s webhook
-
The modal will display the payload’s data structure in JSON syntax
Differences from message webhooks in SleekFlow 1.0's automation rules
Message webhooks can be sent to external systems from both SleekFlow 1.0's "Automations" and "Flow Builder" in SleekFlow 2.0. However, the syntax and format of the webhook payloads may differ between the two.
The mapping between webhook payloads sent from "Automations" and "Flow Builder" are outlined in the table below:
| Automations payload parameters | Flow Builder payload parameters |
| contactEmail | “Email” under “contact” object |
| whatsappFromId | N/A |
| whatsappFrom | channel_id |
| whatsappFromName | “first_name” & “last_name” under “contact” object, from/to can be determined by is_sent_from_sleekflow, true means outgoing message by company and false means incoming message from customer |
| whatsappToId | N/A |
| whatsappTo | PhoneNumber |
| whatsappToName | “first_name” & “last_name” under “contact” object, from/to can be determined by is_sent_from_sleekflow, true means outgoing message by company and false means incoming message from customer |
| to | PhoneNumber |
| from | channel_id |
| id | message_id |
| companyId | “company_id” under “contact” object (not yet live) |
| conversationId | conversation_id |
| messageUniqueID | message_unique_id |
| channel | channel |
| whatsappSender | can be determined by is_sent_from_sleekflow, true means outgoing message by company and false means incoming message from customer |
| whatsappReceiver | “contact” object |
| messageType | message_type |
| deliveryType | message_delivery_type |
| messageContent | message_content |
| uploadedFiles |
Depends on file type, found in either:
|
| createdAt | created_at |
| updatedAt | updated_at |
| timestamp | message_timestamp (ex: 1704859931) |
| status | message_status |
| channelName | N/A |
| isSentFromSleekflow | is_sent_from_sleekflow |
| isSandbox | “is_sandbox” under “contact” object |
| channelIdentityId | channel_id |
| isFromImport | N/A |
| quotedMsgId | “message_id” under “quoted_message” object |
| quotedMsgBody | “message_content” under “quoted_message” object |
Send contact webhook
⚠️ The "Send contact webhook" action will only be available for Premium and Enterprise plan users after the Flow Builder beta period
The "Send contact webhook" action allows you to send data related to the contact enrolled in the flow to an external system. A prerequisite for using this node is that the external system must be able to receive incoming webhooks from SleekFlow.
Set up the "Send contact webhook" action node form by following the steps outlined below:
- Set up the node form
-
Preview the webhook payload
Set up the node form
To set up the “Send contact webhook” node form:
-
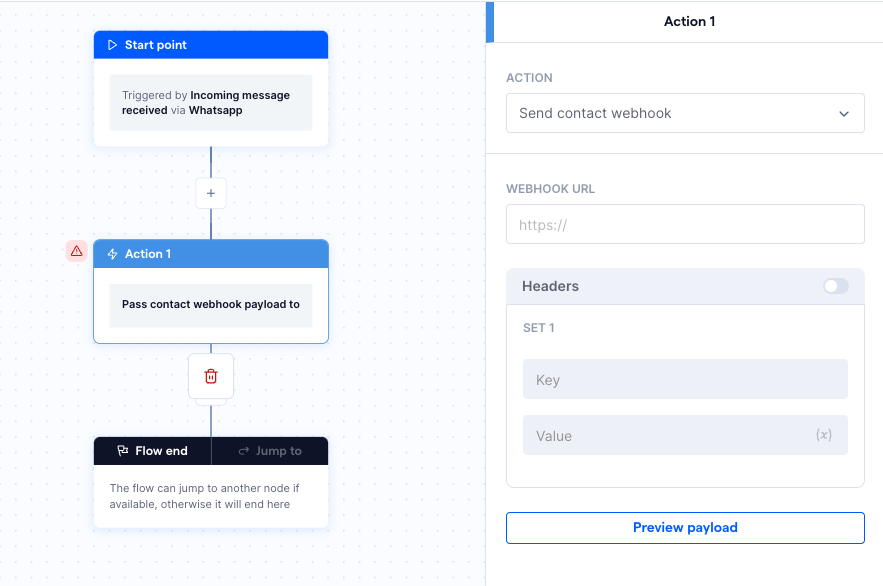
Click on the "Send contact webhook" action node to open up its form, which will appear on the right side of the screen
-
The node form contains the following fields for you to configure in order for SleekFlow to send the webhook payload data of the enrolled contact to your external system:
1. Webhook URL - Input the webhook URL provided by the external system you
want to send the data to
2. Headers - Enable this to provide any additional data required by the webhook
through the request header. Please refer to your external system's webhook
documentation to see if any additional data needs to be passed through the
request header of your webhook.

Preview webhook payload
To see a preview of the payload:
-
Click on the "Preview payload" button in the node form to see a sample of the contact payload and its parameters that would be sent to your external system’s webhook
-
The modal will display the payload’s data structure in JSON syntax


Differences from contact webhooks in SleekFlow 1.0's automation rules
Contact webhooks can be sent to external systems from both SleekFlow 1.0's "Automations" and "Flow Builder" in SleekFlow 2.0. However, the syntax and format of the webhook payloads may differ between the two.
The mapping between webhook payloads sent from "Automations" and "Flow Builder" are outlined in the table below:
| Automations payload parameters | Flow Builder payload parameters |
| id | contact_id |
| labels | labels under the “contact” object |
| contact_field_name | default fields are listed under the “contact” object |
| custom_field_name | custom fields are listed under the “contact” object |
Send HTTP request
⚠️ The "Send HTTP request" action will only be available for Premium and Enterprise plan users after the Flow Builder beta period
The "Send HTTP request" action allows you to send and/or receive data between SleekFlow and the API of your external system. A prerequisite for using this node is that the external system must offer a publicly available API to enable integration with SleekFlow.
Set up the "Send HTTP request" action node form by following the steps outlined below:
- Set up the HTTP request
- Configure the HTTP request body
-
Configure response persistence from HTTP response
Set up the HTTP request
To start setting up the “Send HTTP request” node:
-
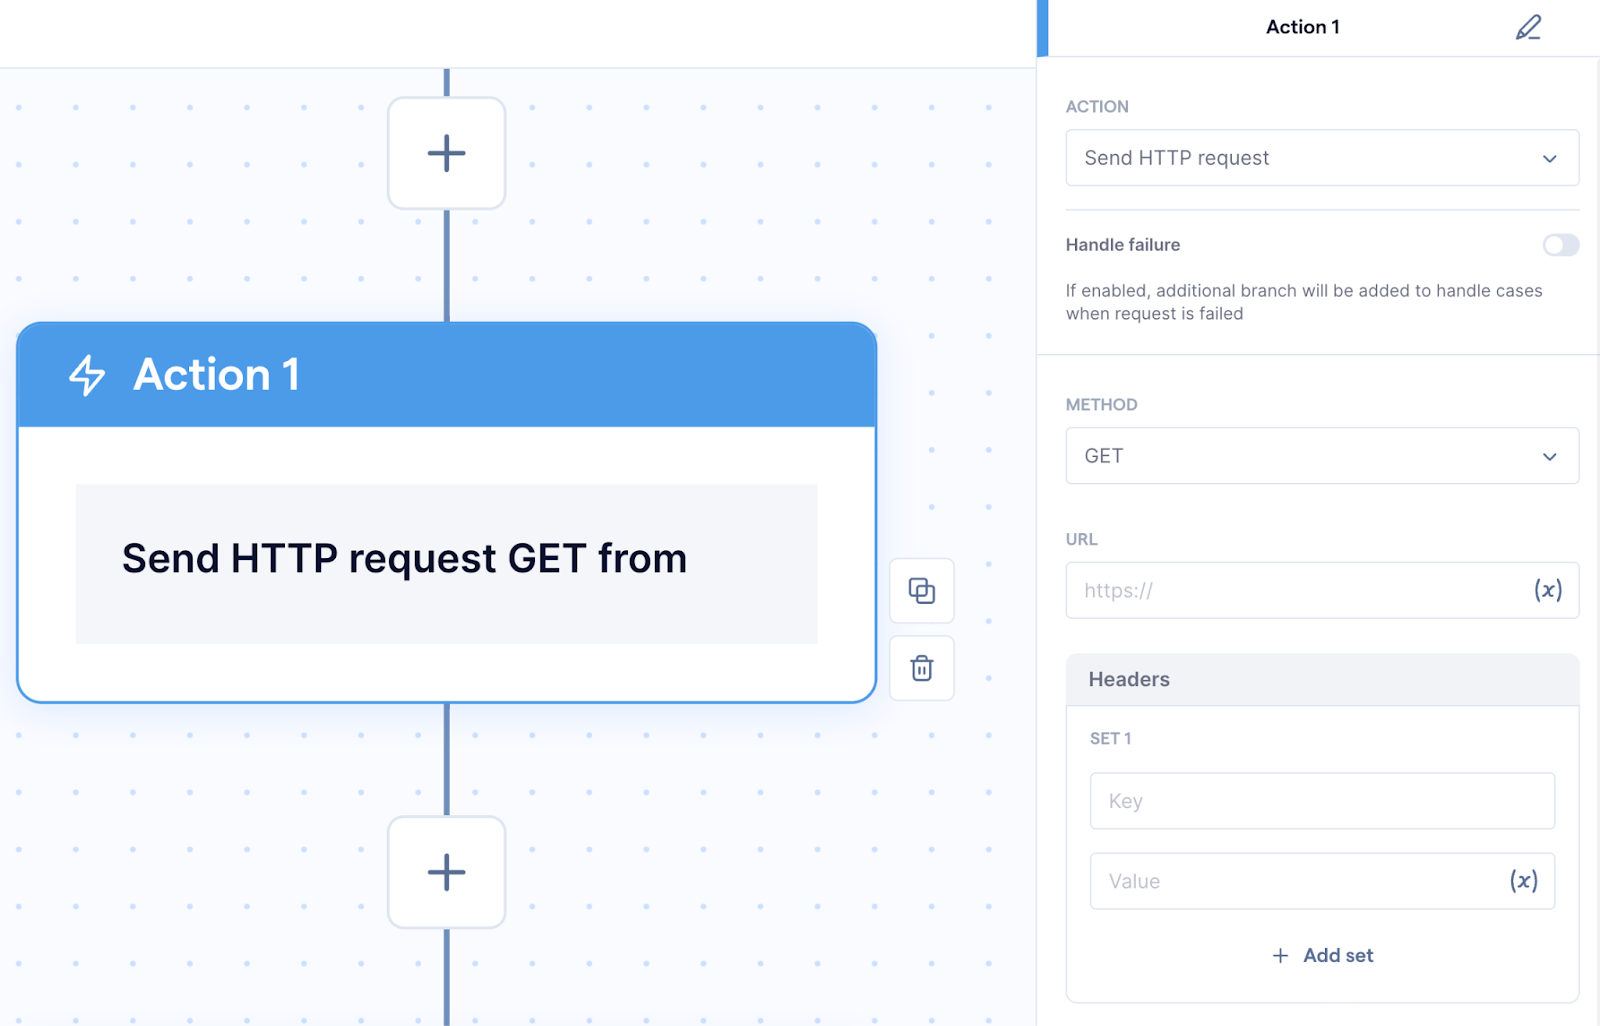
Click on the "Send HTTP request" action node to open up its form, which will appear on the right side of the screen
-
The node form contains the following fields for you to configure in order for SleekFlow to interact with your external system to send and/or fetch data:
1. Handle failure - Enable this to create two branches in the flow, one branch
for if the HTTP response status is successful and the other for when the HTTP
request fails. This will allow you to configure a fallback in case the HTTP request
fails to execute properly.
2. Method - Specify the HTTP method that the API of your external system
expects. Choose "GET" to request data from the API of the external system, or
"POST" to send data from SleekFlow to the external system via its API.
3. URL - Input the URL to access the API of your external system and its various
functions
4. Headers - Configure the required header key-value pairs of the HTTP request
to access the API
5. Query string - Configure the required query string key-value pairs to access
the API

Configure the HTTP request body
ℹ️ The HTTP request "Body" is available only when the "POST" method is configured in the "Send HTTP request" node
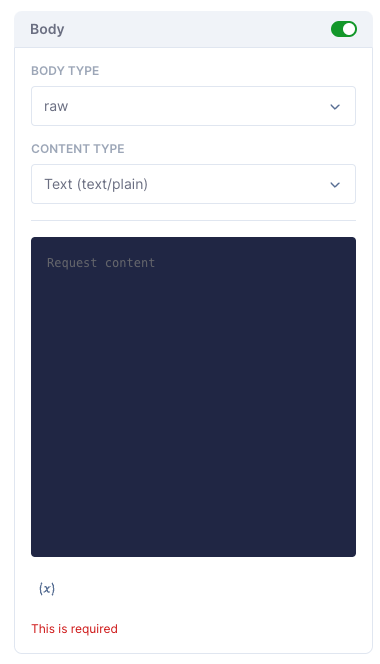
The "Body" section of the node form allows you to configure the data and content type to be sent by the HTTP request to the API server of the external system. Refer to the API documentation of your external system for the specific configuration and parameters required for the integration.
This section has the following fields which you can configure:
-
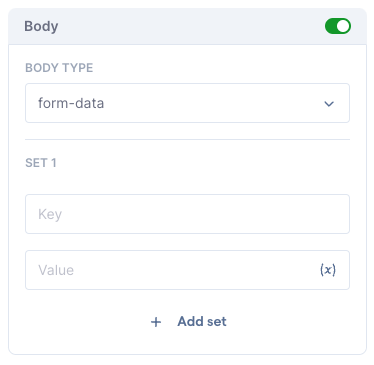
Body type - Specify the body type that the API of your external system accepts. You can configure the content type with the options outlined in the table below:
| Body type | Description |
| raw |
Choose the "raw" body type if your API receives plain text, JSON, or string data. You can input the data into the dark blue “Request content” box with the content type’s syntax |
|
form-data or x-www-form-urlencoded |
Choose the body type that meets the requirement of your API and enter the request content data as key-value pairs If you have more than one set of key-value pair data to append, click on "+ Add set" to add another key-value pair set |

Configure response persistence from HTTP response
The "Save HTTP response" section allows you to save specific data points returned in the API response as a variable to use later on in the flow
This provides you with the flexibility to create tailored interactions with your contacts through dynamic data.
This section requires you to add a key-value pair for each value you want to save, specifying exactly which values provided within the HTTP response you want to save as a variable to use later in the flow. Each key-value pair consists of the following 2 fields:
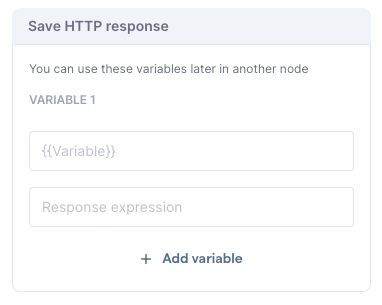
- {{variable}} - Specify the variable name that the system will use to store the data extracted from the HTTP response payload. You can use this variable name in subsequent condition and action nodes within the flow to reference the extracted values. Use the double curly braces when entering the variable name (i.e. {{variable_name}}).
-
$.response_variable - Specify the variable to extract values from within the JSON HTTP response payload received from the API. Please use the JSON dot notation here to specify which field from the HTTP response payload the system should extract.
💡 JSON dot notation explainer
The JSON dot notation is a way to specify a particular field or value within a nested data structure like JSON. It allows you to navigate through the structure by indicating the path to the desired field using dot-separated keys.
Format:
The JSON dot notation begins with a $., followed by all the field names listed in sequential order to navigate through the nested data structure to get to your target field. Each field name specified in the notation is separated by a dot (e.g. $.key1.key2.key3)
Example:
For the payload specified below, the phone number field would be represented like so using the JSON dot notation: $.data.profile.phone
{
"data": {
"id": "12345",
"name": "Bob Chan",
"profile": {
"email": "bob@sleekflow.io",
"phone": "85298007899"
}
}