


Note: Ticketing modules are currently in limited access. Please contact our team to enable this feature for your workspace.
When a customer raises an issue, you can create a ticket to track and manage the problem systematically, instead of relying solely on chat. Tickets help ensure that issues are organized, prioritized, and resolved efficiently.
You can create tickets either manually or automatically within SleekFlow. Once created, tickets can be managed on the Tickets Page or directly in the Inbox.
Overview of ticket properties
Before creating tickets, it’s essential to review the available properties. The table below outlines the required and optional fields you’ll need to complete when setting up a ticket.
*Compulsory field for tickets
| Ticket property | Description |
| Assignee* |
|
| Attachment |
|
| Channel* |
|
| Contact* |
|
| Description |
|
| Due date |
|
| Priority* |
|
| Status* |
|
| Ticket ID |
|
| Ticket title* |
|
| Type |
|
Creating a ticket manually
There are two ways to open the “Create Ticket” dialog to create a ticket. Follow the steps below to access the “Create Ticket” dialog:
Via Inbox
If a customer raises an issue during a conversation, you can create a ticket directly from your inbox by following the steps below:
- Click on the
icon on the left navigation bar to go to Inbox
- Locate the conversation with the contact for whom you want to create a ticket.
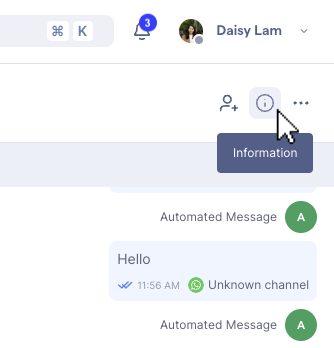
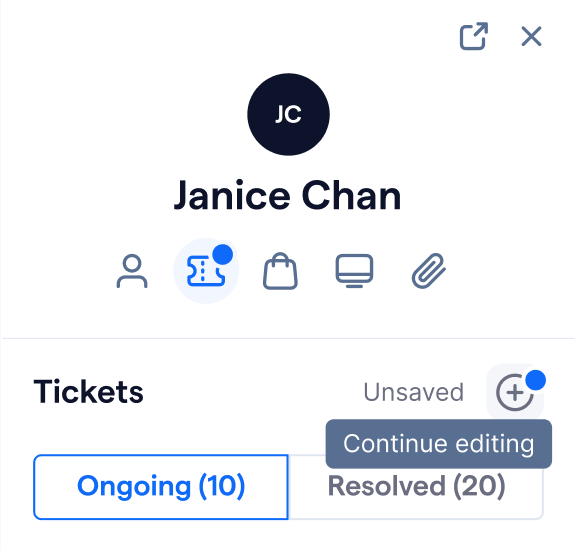
- In the conversation, go to the contact information panel. If the panel is hidden, click the information icon on the top right corner of the conversation control bar.
- Click the Tickets
icon under the contact’s name
- You can see all tickets associated with this contact under this tab. Click on the
icon
- A “Create new ticket” dialog will appear
- Follow the steps here to create a ticket
Via the Ticket page
Aside from opening the “Create new ticket” dialog in Inbox, you can also open it directly in the Ticket page to create a new ticket. Follow the steps below to do so:
- Click the
icon on the left navigation bar to go to the “Ticket” page
- Click the “Create new ticket” button on the right top corner of the page
- A “Create new ticket” dialog will appear
- Follow the steps here to create a ticket
Filling in the create new ticket dialog
Once you have opened the “Create new ticket” dialog, either via Inbox or the Ticket page, you can then fill in the information needed in the dialog.
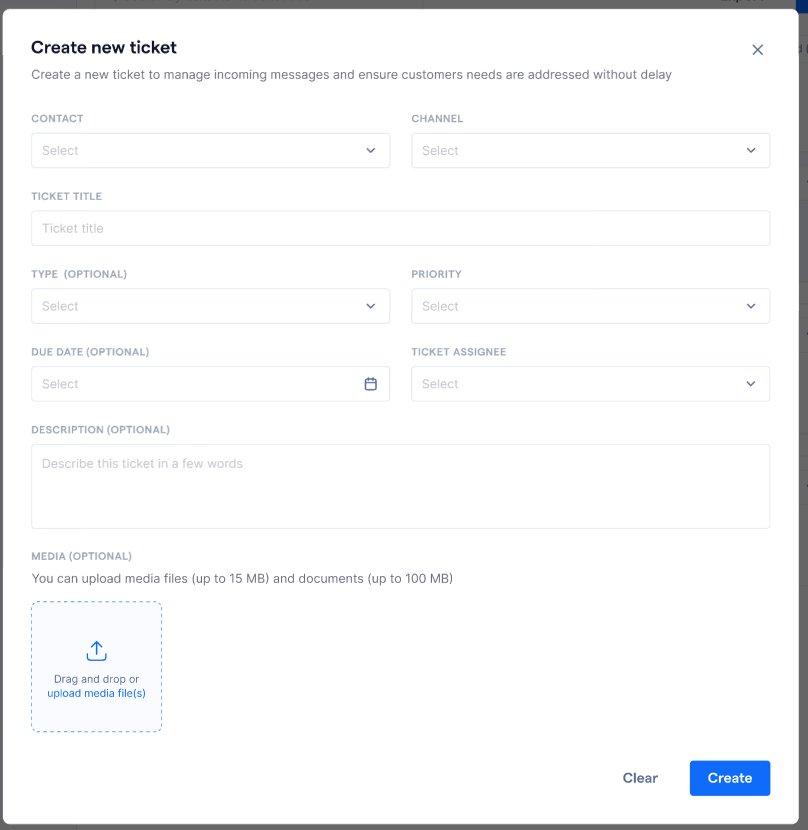
Here are the instructions for filling out the fields in this dialog:
-
Contact and channel (Required)
-
If you are creating a ticket via Inbox, the “Contact” and “Channel” fields will be filled in automatically with the contact information in the conversation. You will not be able to make any changes for the input in “Contact.
- If you are creating a ticket via the “Ticket” page, you will be required to fill in the “Contact” and “Channel”.
-
-
Ticket title (Required)
- A brief summary of the ticket’s purpose
-
Type (Optional)
- Categorizes the ticket (e.g., Question, Task, Incident, Problem)
-
Priority (Required)
- Defines the urgency of the ticket
-
Due date (Optional)
- The date and time by which the ticket should be resolved
-
Ticket assignee (Required)
- The team member responsible for resolving the ticket
-
Description (Optional)
- Detailed information about the issue or request related to the ticket
-
Media (Optional)
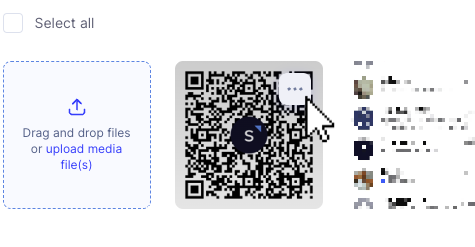
- Files, images, or other media uploaded to the ticket
- You can download or delete files uploaded to the ticket selectively or in bulk.
- To download or delete files selectively
- Hover to the top right of the preview of a file, click the
icon
- Click “Select”
- Then, you can select files individually.
- After choosing the file(s), click “Download” or “Delete” to perform the action.
- Hover to the top right of the preview of a file, click the
- To download or delete files in bulk
- Click “Select all”
- Click “Download” or “Delete” to perform the action.
- To download or delete files selectively


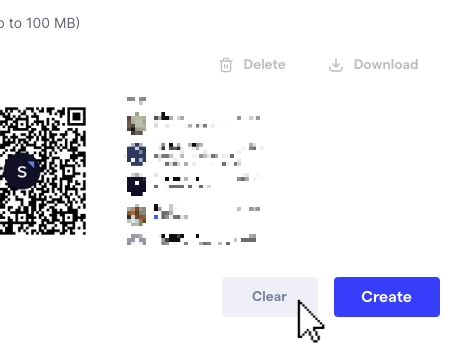
If you want to start over at any point, click “Clear” to erase all input. However, for dialogs that open via Inbox, the input in “Contact” and “Channel” will not be erased.
If you have filled in some information and want to continue creating the ticket later, click the icon in the top right corner. The ticket form will be closed and saved as a temporary draft. You can always navigate back to the Tickets page or the specific contact’s Inbox conversation and click the “Create Ticket” button again to reopen the ticket, as long as the browser tab has not been refreshed.
After filling in all the mandatory fields, click the “Create” button to confirm the creation. A ticket has been created! You can now see it in the ticket list and the contact information panel.