


All trigger nodes require setting up in a node form, where you can further specify the parameters for a flow to be triggered. In this article, we will guide you on how to set up every “Interaction” trigger node so you can initiate your flows based on expected circumstances.
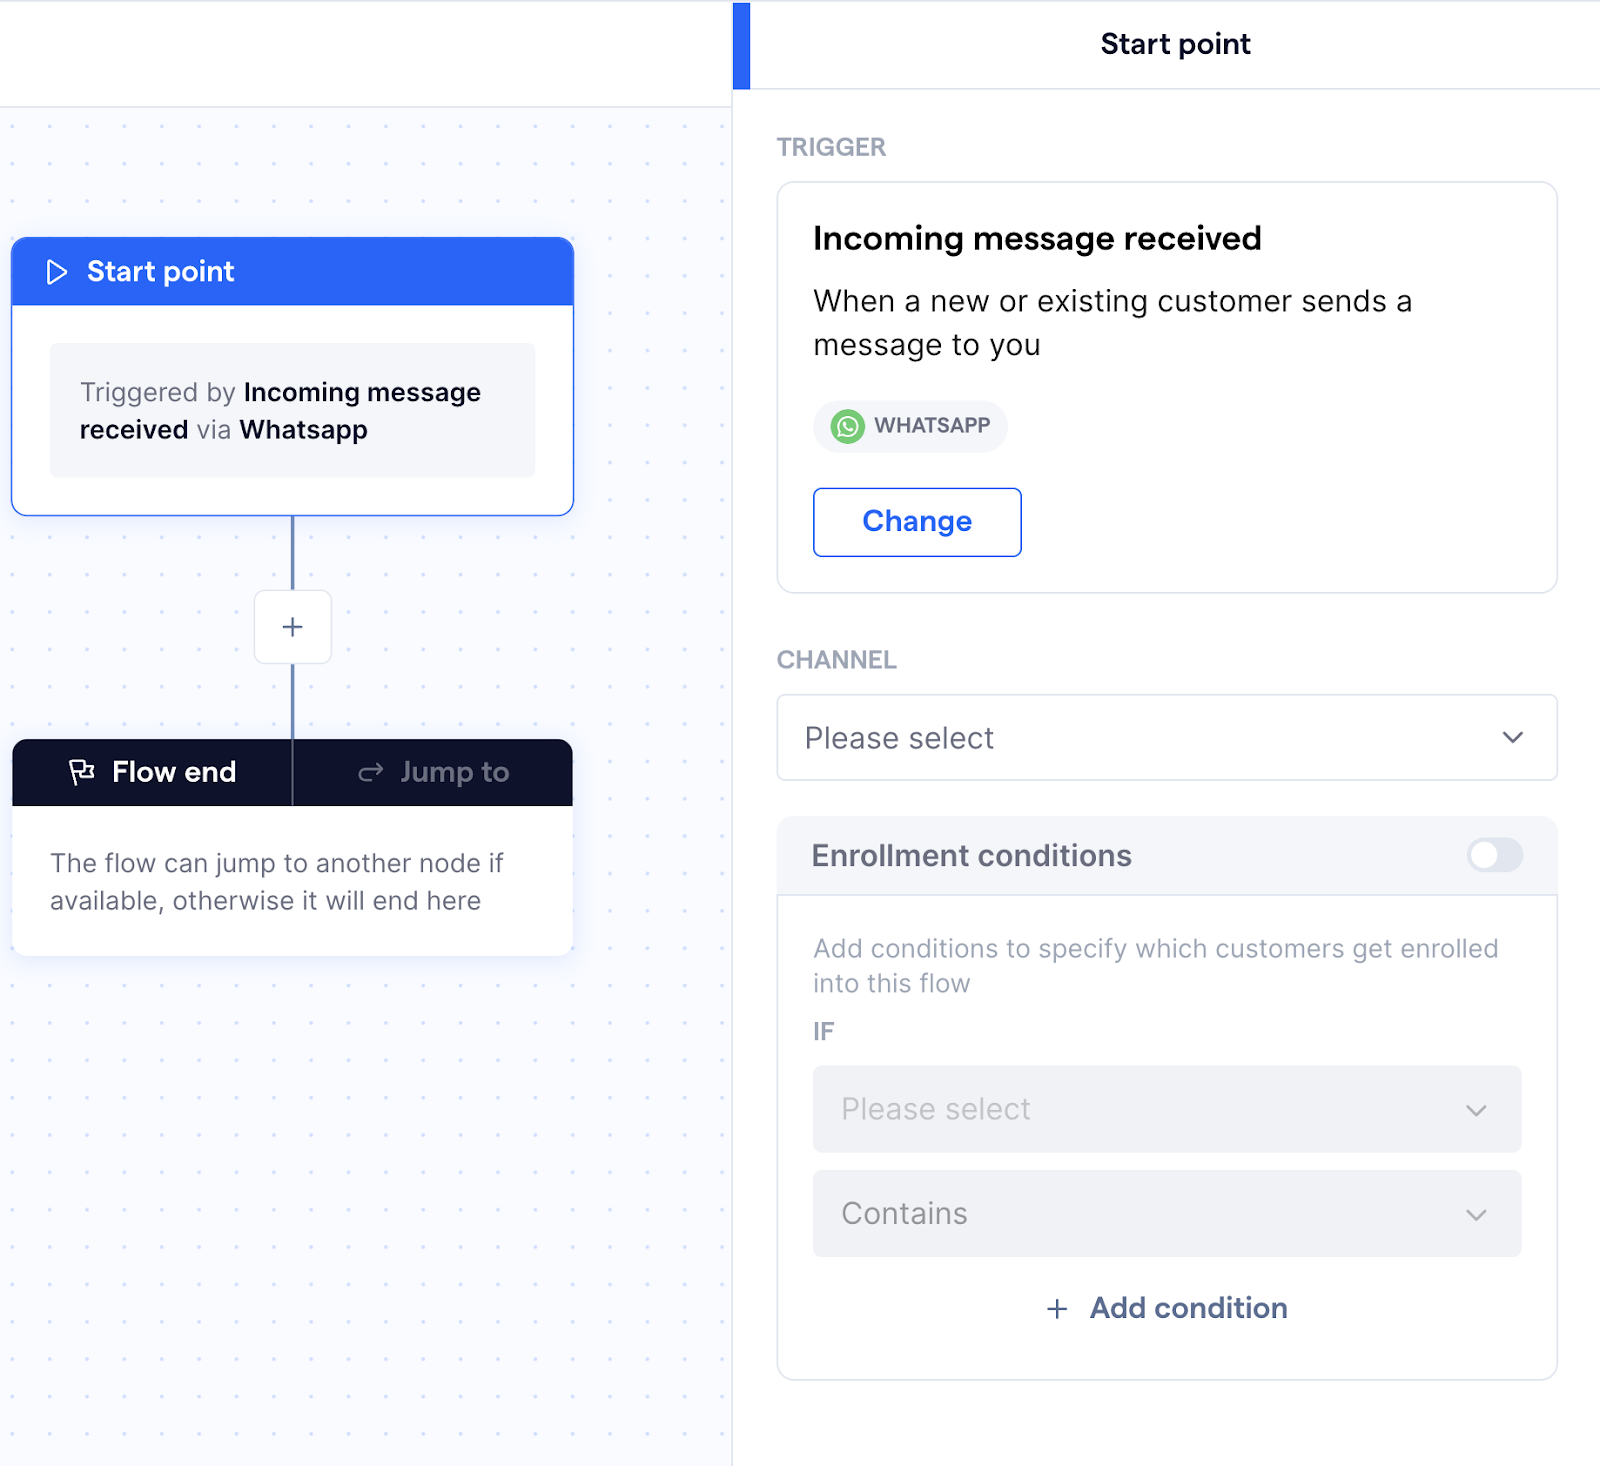
Incoming message received
The "Incoming message received" trigger activates whenever a customer sends a message to you. It allows you to automate your customer service or sales processes by reacting to incoming messages, and can be used to create welcome messages, FAQ bots, lead qualification workflows, and more.
Set up the “Incoming Message Received” node form by following the steps below:
-
Click on the node to open up its form, which will appear on the right side of the screen
-
The node form contains the following fields for you to set up the trigger:
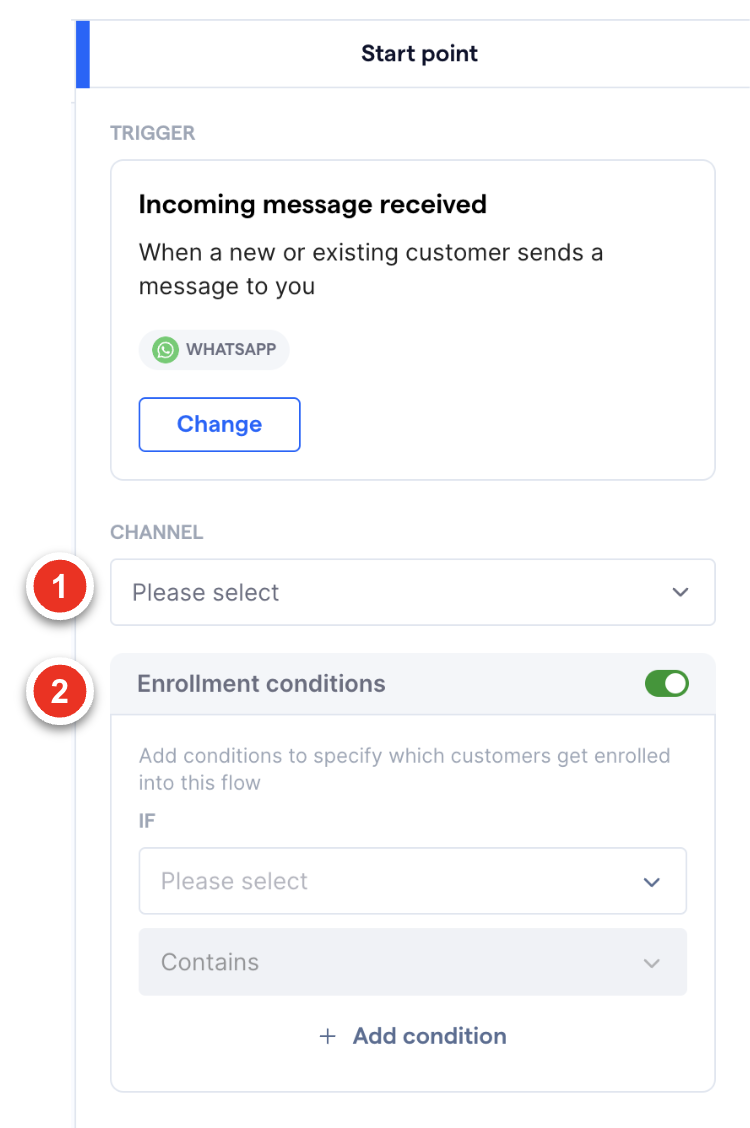
1. Channel - Select the desired messaging channel(s) that will trigger the flow
when a message is received from it
2. Enrollment conditions - When toggled on, you can set specific conditions that
the customer must meet in order to be enrolled into the flow
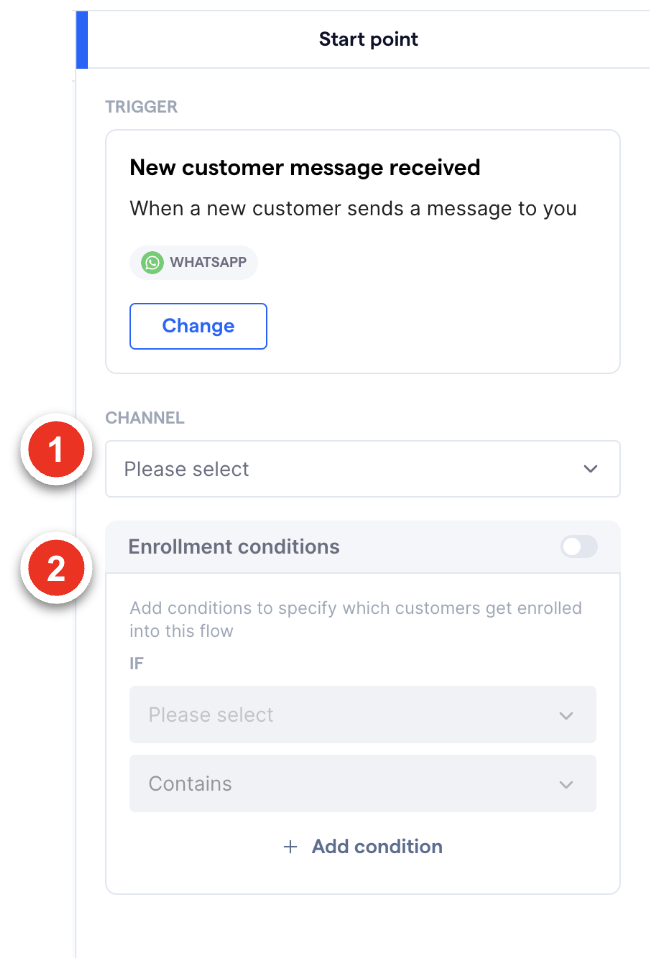
New customer message received
The “New customer message received” trigger targets incoming messages from new customers who have not interacted with your business before. You can use this to provide a personalized onboarding experience or to quickly route new leads to your team.
Set up the "New customer message received" trigger node form by following the steps below:
-
Click on the node to open up its form, which will appear on the right side of the screen
-
The node form contains the following fields for you to set up the trigger:
1. Channel - Select the desired messaging channel(s) that will trigger the flow
when a message is received from it
2. Enrollment conditions - When toggled on, you can set specific conditions that
the customer must meet in order to be enrolled into the flow

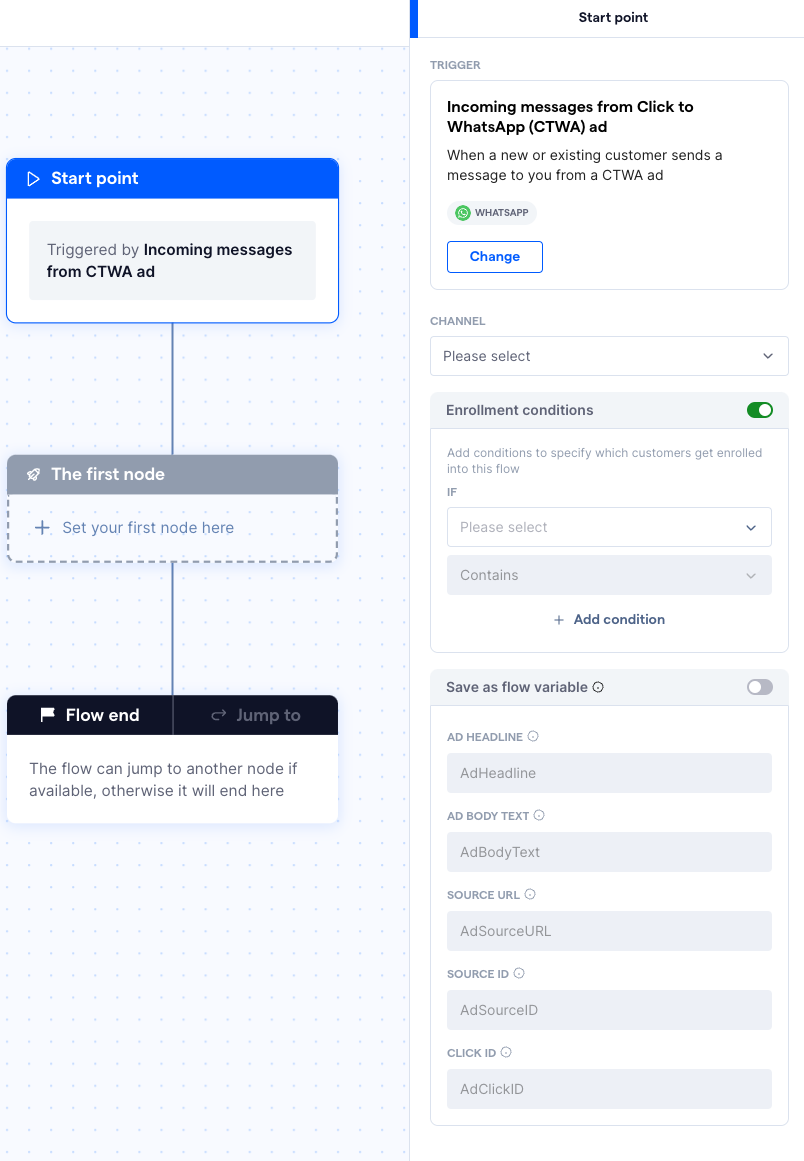
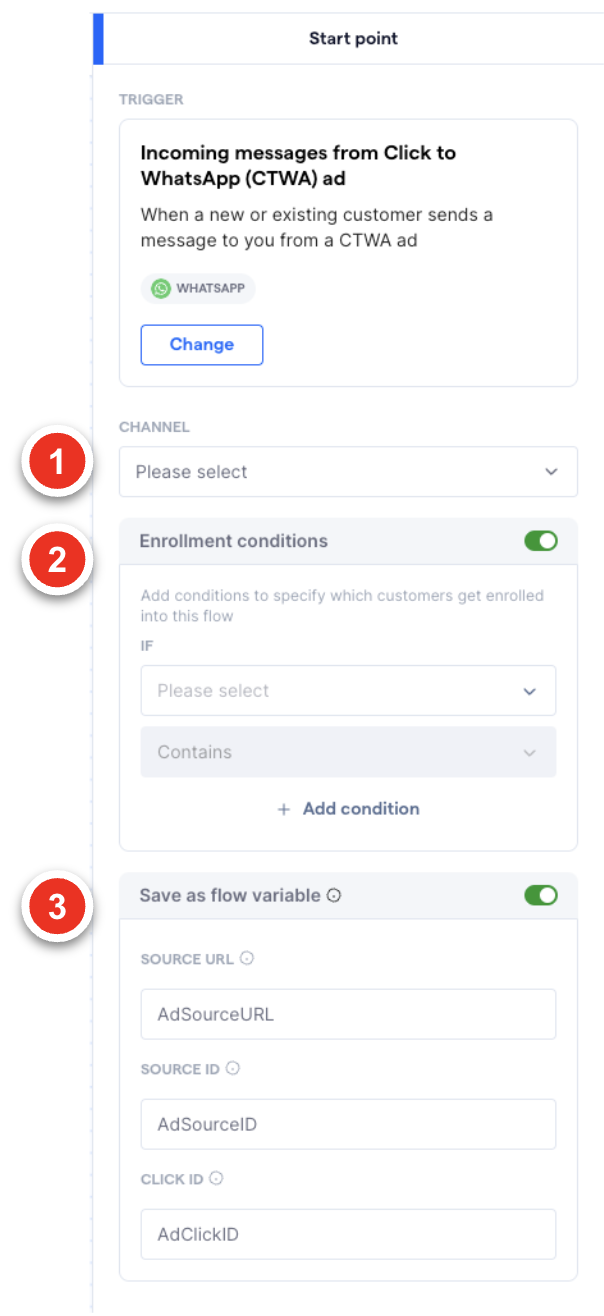
Incoming messages from Click-to-WhatsApp (CTWA) ad
⚠️ The "Incoming messages from Click-to-WhatsApp (CTWA) ad" trigger will only be available for Premium and Enterprise plan users
The "Incoming messages from CTWA ad" trigger is designed for conversations initiated by customers clicking on your Click-to-WhatsApp ads. You can use it to automatically send a welcome message, collect lead information, or direct the customer to a specific conversation flow.
Set up the "Incoming messages from CTWA ad" trigger node form by following the steps below:
-
Click on the node to open up its form, which will appear on the right side of the screen
-
The node form contains the following fields for you to set up the trigger:
-
Channel - Select the desired messaging channel(s) that will trigger the flow
when a message is received from it -
Enrollment conditions - When toggled on, you can set specific conditions that
the customer must meet in order to be enrolled into the flow -
Save as flow variable - When toggled on, any ad-related data will be saved as a flow variable that can be used later on in the flow. You can change the name of the flow variable to your liking. The following data can be obtained from the trigger:
- Ad Headline: Headline title used for the ad to help differentiate between different ads
- Ad Body: Text body used for the ad to offer additional context
- Source URL: URL for the ad or post viewed by the customer
- Source ID: Facebook ID for the ad or post
-
Click ID: Click ID generated by Meta for Click to Whatsapp ads
-
Channel - Select the desired messaging channel(s) that will trigger the flow
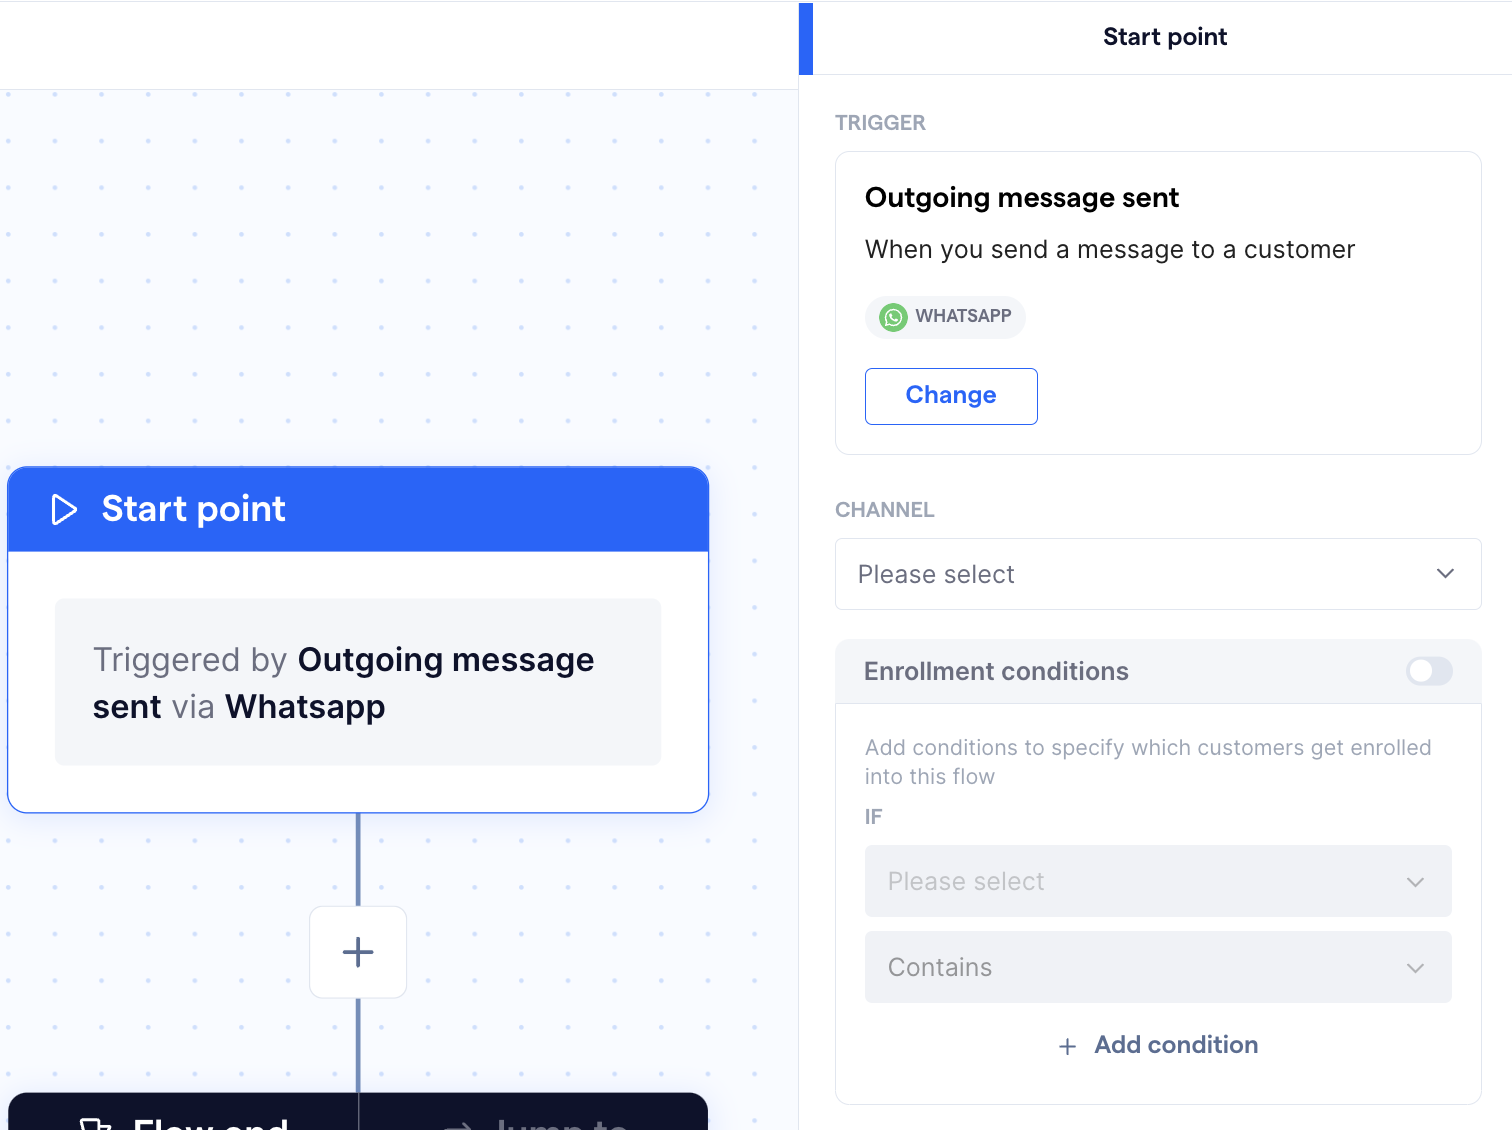
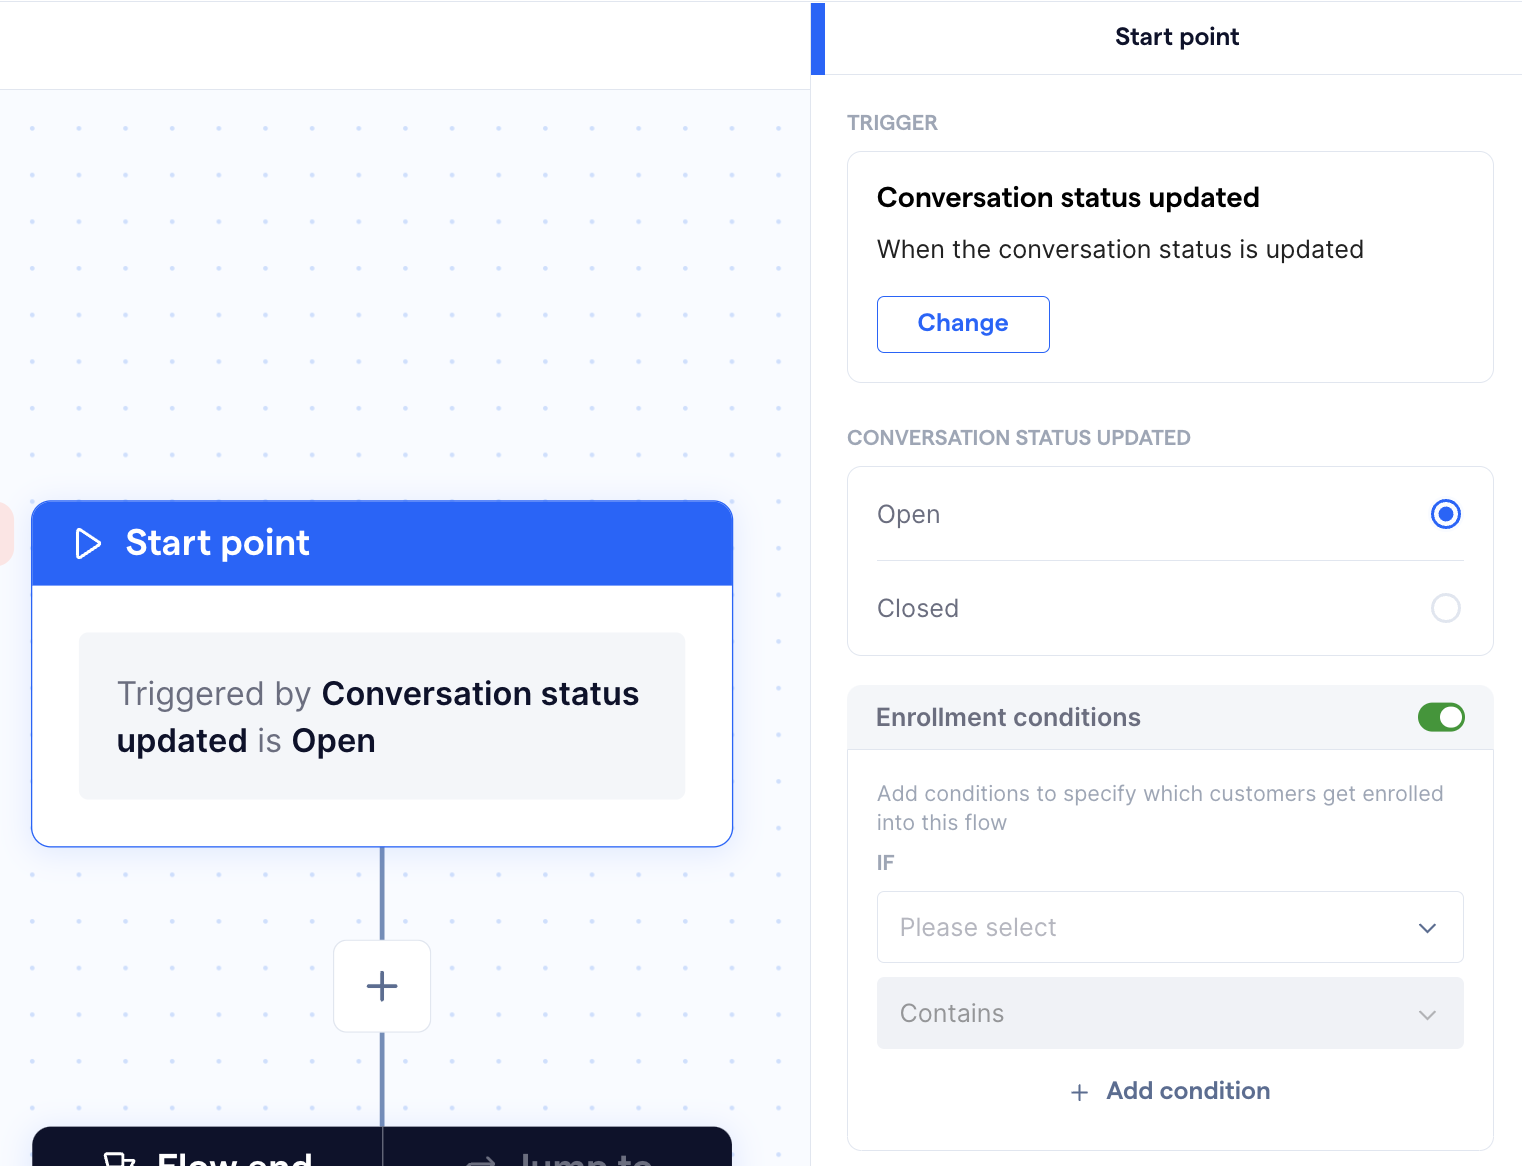
Outgoing message sent
The "Outgoing message sent" trigger is activated when your business sends a message to a customer, allowing you to create post-messaging workflows. You can use this to follow up with customers, provide additional information, or initiate a new sales or support process.
Set up the "Outgoing message sent" trigger node form by following the steps below:
-
Click on the node to open up its form, which will appear on the right side of the screen
-
The node form contains the following fields for you to set up the trigger:
1. Channel - Select the desired messaging channel(s) that will trigger the flow
when an outgoing message is sent from it
2. Enrollment conditions - When toggled on, you can set specific conditions that
the customer must meet in order to be enrolled into the flow
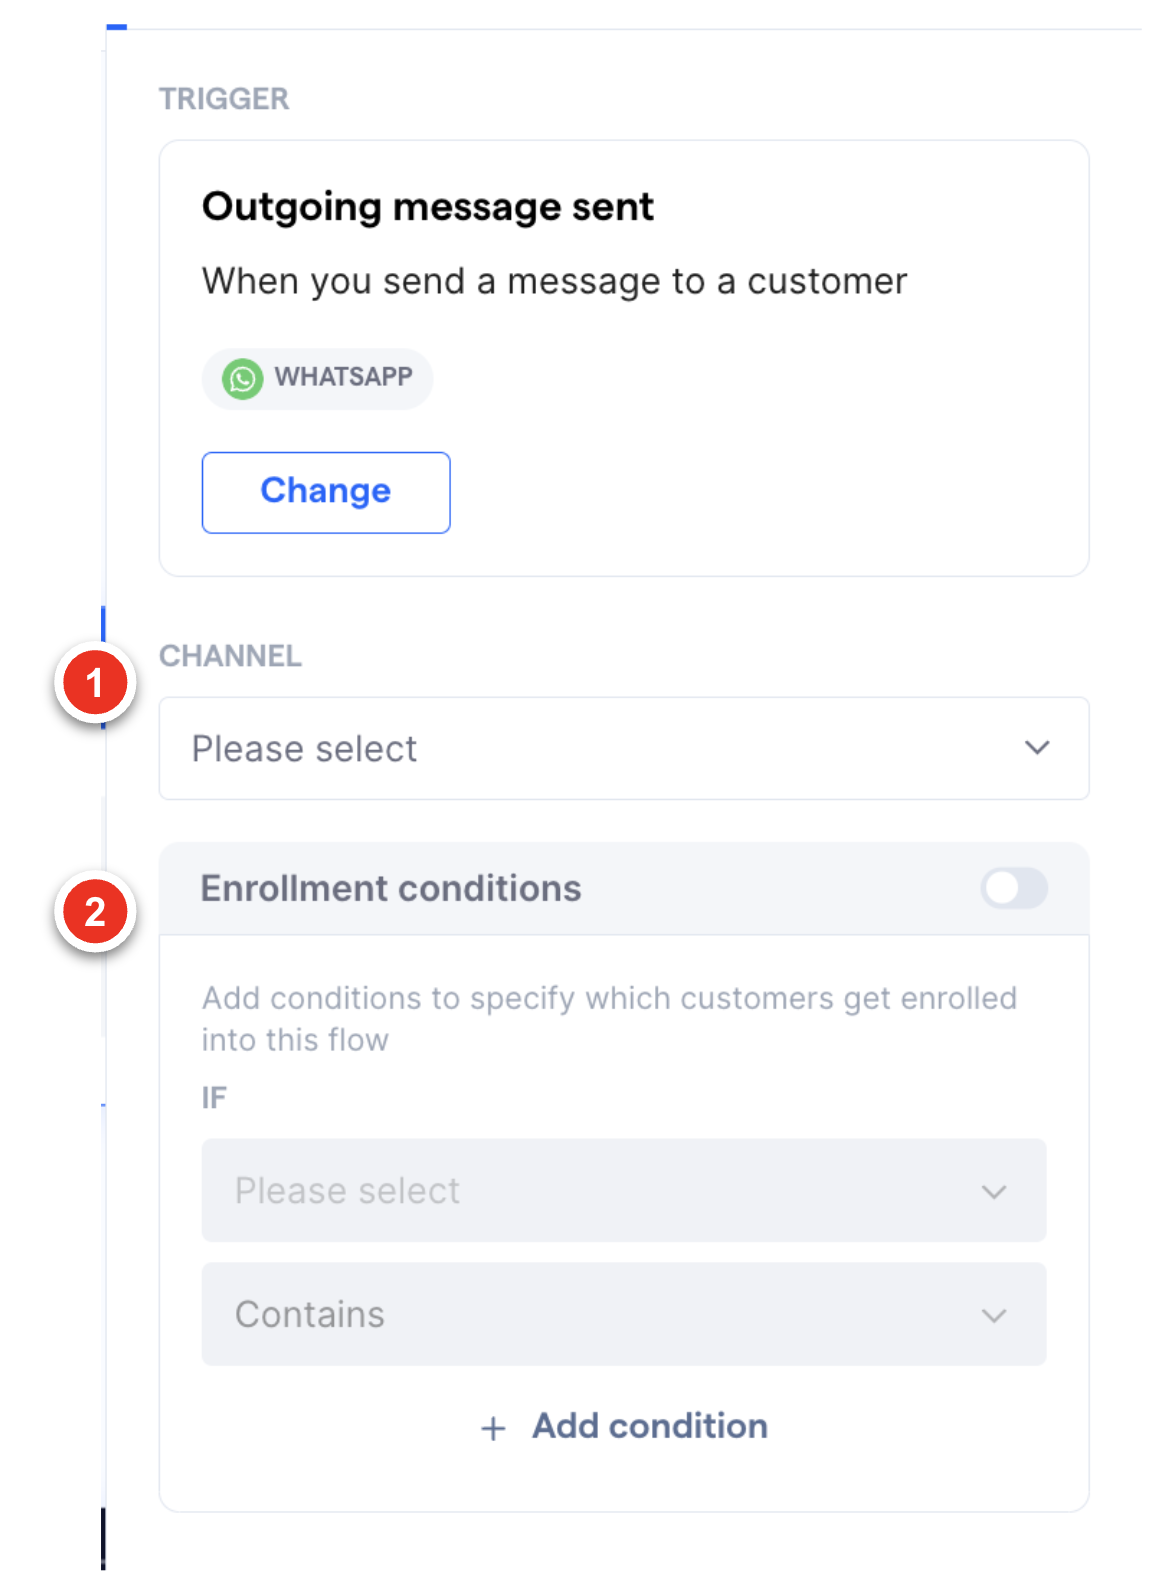
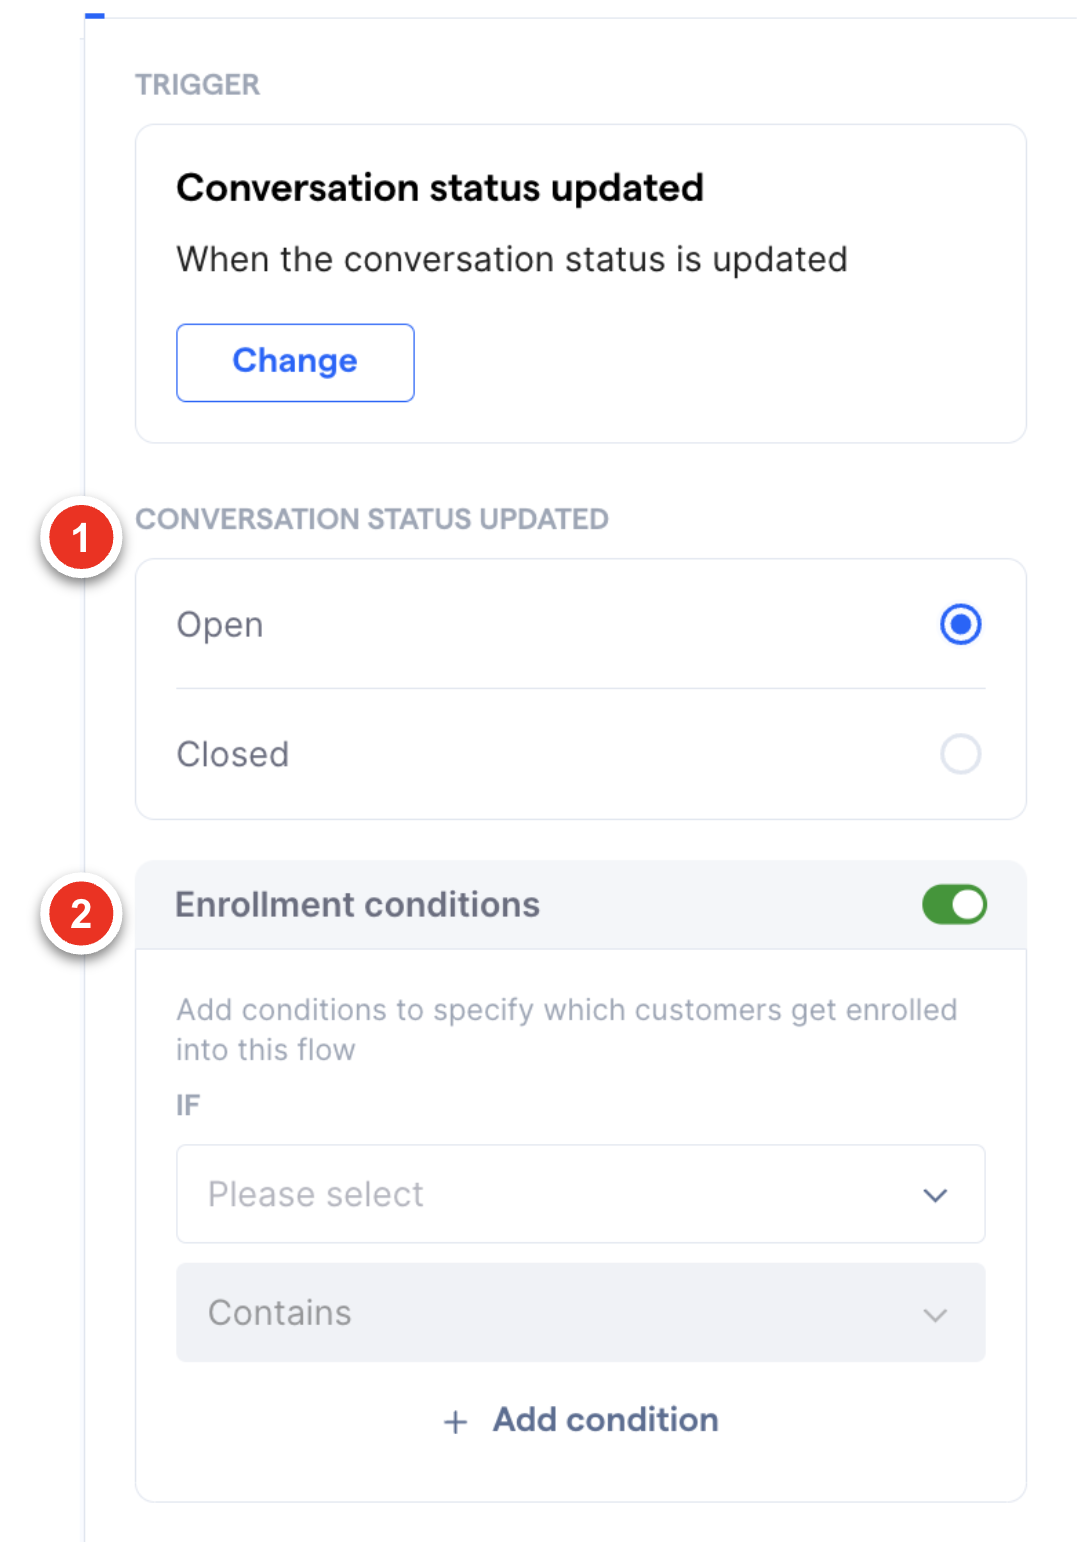
Conversation status updated
The "Conversation status updated" trigger is used to monitor changes of customer conversation statuses, such as when a conversation is marked as "Open" or "Closed". You can use this to automate follow-up actions, update customer records, or notify relevant team members.
Set up the "Conversation status updated" trigger node form by following the steps below:
-
Click on the node to open up its form, which will appear on the right side of the screen
-
The node form contains the following fields for you to set up the trigger:
1. Conversation status updated - Select the conversation status update that will
trigger the flow, so either when a conversation is opened or when it is closed
2. Enrollment conditions - When toggled on, you can set specific conditions that
the customer must meet in order to be enrolled into the flow
WhatsApp message status updated
The “WhatsApp message status updated” trigger allows you to automate actions based on changes to your message delivery status. Whether a WhatsApp message is delivered, read, or fails to send, this trigger ensures you can stay on top of your messaging workflow and respond proactively.
Common use cases for this trigger include:
- Failed delivery handling: Automatically add contacts to a list for follow-up actions when a message fails to deliver
- Data synchronization: Sync message statuses with external platforms via HTTP requests to keep your systems updated in real time
With this trigger, you can streamline your communication processes and improve your response efficiency.
You can set up the "WhatsApp message status updated" trigger node form by following the steps below:
- Click on the node to open up its form, which will appear on the right side of the screen

- The node form contains the following fields for you to set up the trigger:
- WhatsApp channel: Select the WhatsApp channel you would like to set this trigger for
- Message status: You can select “Sent”, “Delivered”, “Read”, “Failed” as the trigger condition of this node
-
Enrollment conditions: When toggled on, you can set specific conditions that the customer must meet in order to be enrolled into the flow
