All trigger nodes require setting up in a node form, where you can further specify the parameters for a flow to be triggered. In this article, we will guide you on how to set up every “Contact” trigger node so you can initiate your flows based on expected circumstances.
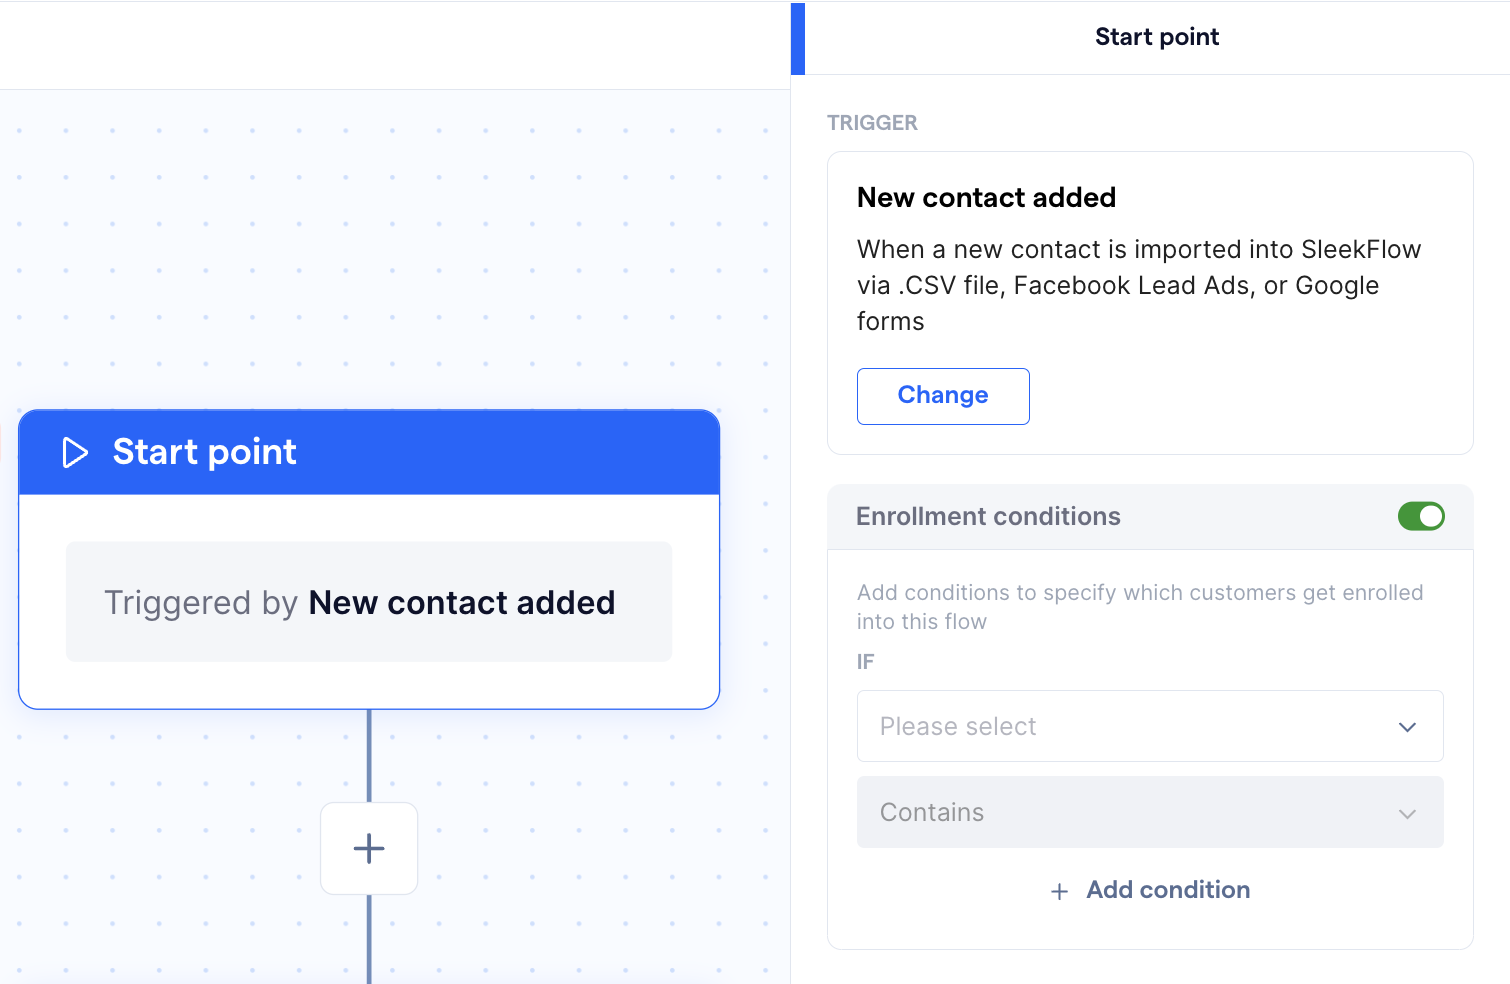
New contact added
This trigger activates when a new contact is added to your Sleekflow account, enabling you to onboard new leads or customers automatically. You can use this to send a welcome message, gather additional information, or assign the new contact to a sales or support team.
Set up the "New contact added" trigger node form by following the steps below:
- Click on the node to open up its form, which will appear on the right side of the screen
- The node form contains the following fields for you to set up the trigger:
1. Enrollment conditions - When toggled on, you can set specific conditions that
the customer must meet as a new contact in order to be enrolled into the flow

Contact property updated
The "Contact property updated" trigger is activated when a new property is added or when a contact property is updated on a contact's profile. You can use this for segmentation, personalization, or to trigger specific workflows based on changes in the contact's information.
Set up the "Contact property updated" trigger node form by following the steps below:
- Click on the node to open up its form, which will appear on the right side of the screen
- The node form contains the following fields for you to set up the trigger:
1. Contact property conditions - Select the properties that will trigger the flow
when they are updated for a contact, and set conditions using operators and
specified values to better target contacts for flow enrollment
2. Enrollment conditions - When toggled on, you can set specific conditions that
the customer must meet in order to be enrolled into the flow


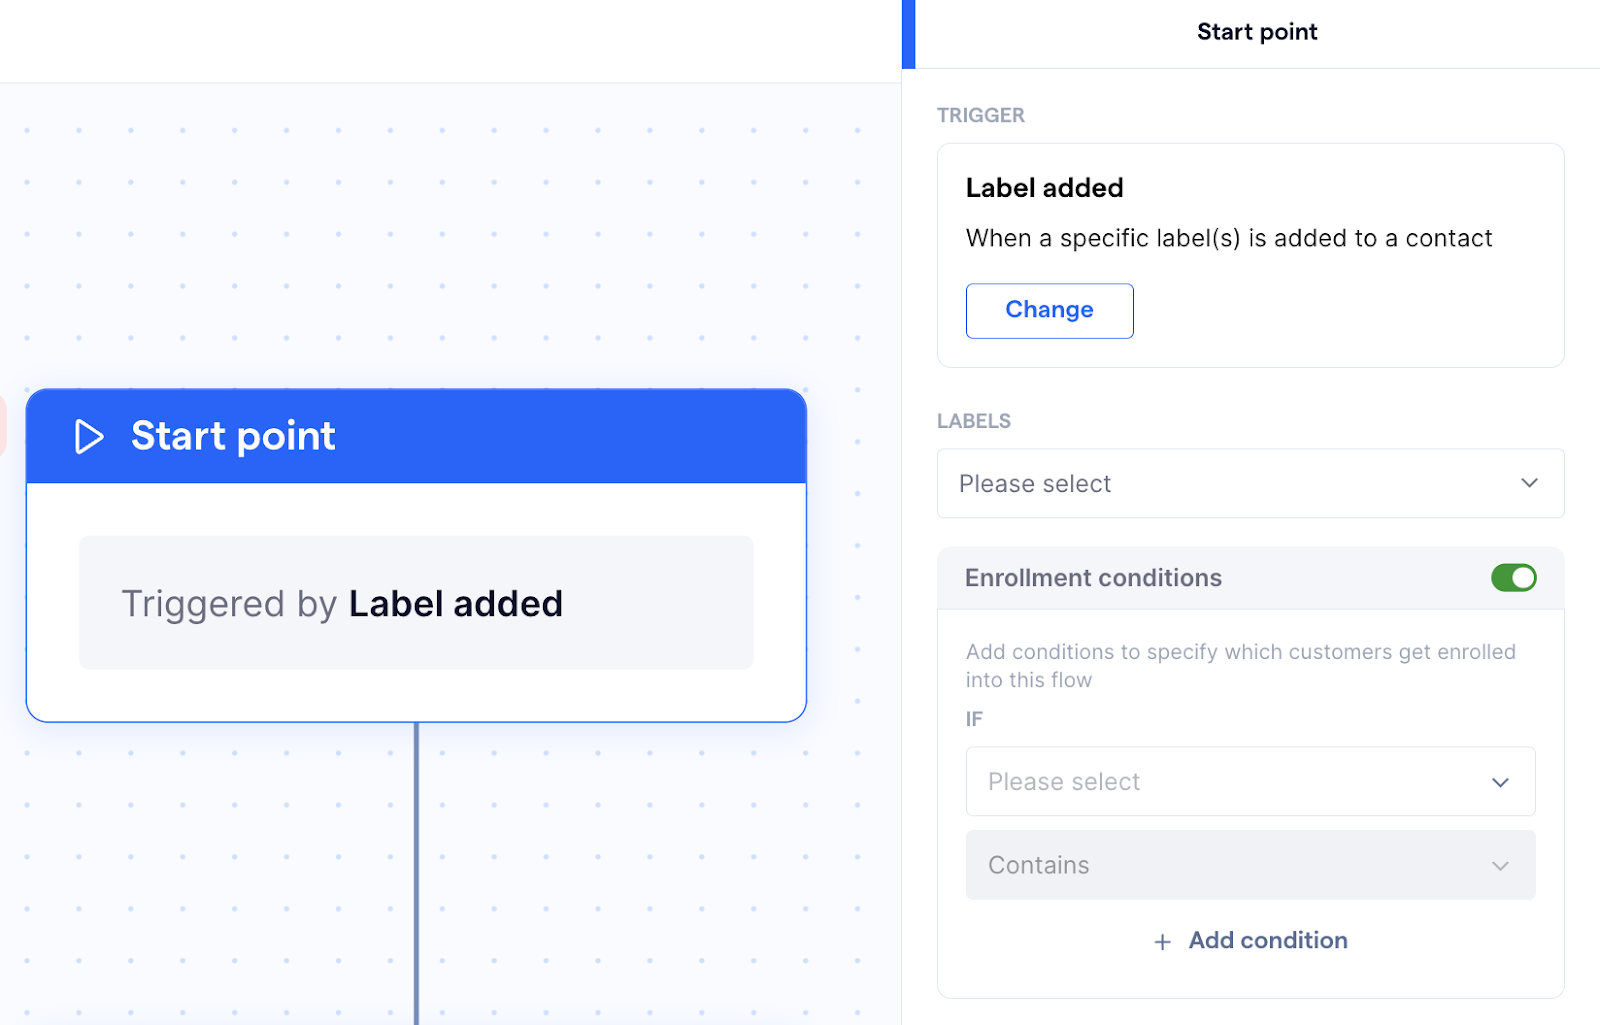
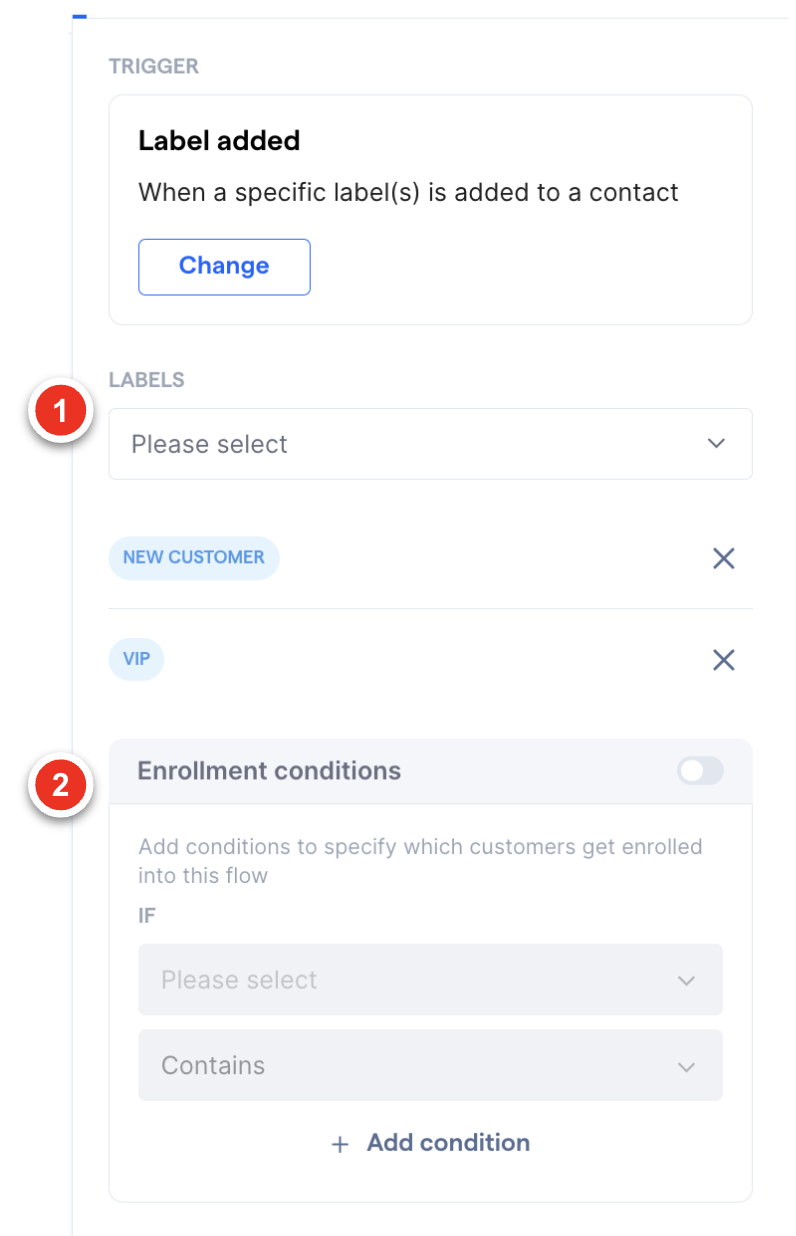
Label added
The "Label added" trigger is used to initiate a workflow when a specific label is added to a contact or conversation. You can use this to automate actions based on customer interaction, conversation topics, or any other relevant criteria.
Set up the "Label added" trigger node form by following the steps below:
- Click on the node to open up its form, which will appear on the right side of the screen
- The node form contains the following fields for you to set up the trigger:
1. Labels - Select the label(s) that will trigger the flow when they are added to a
contact or conversation
2. Enrollment conditions - When toggled on, you can set specific conditions that
the customer must meet in order to be enrolled into the flow
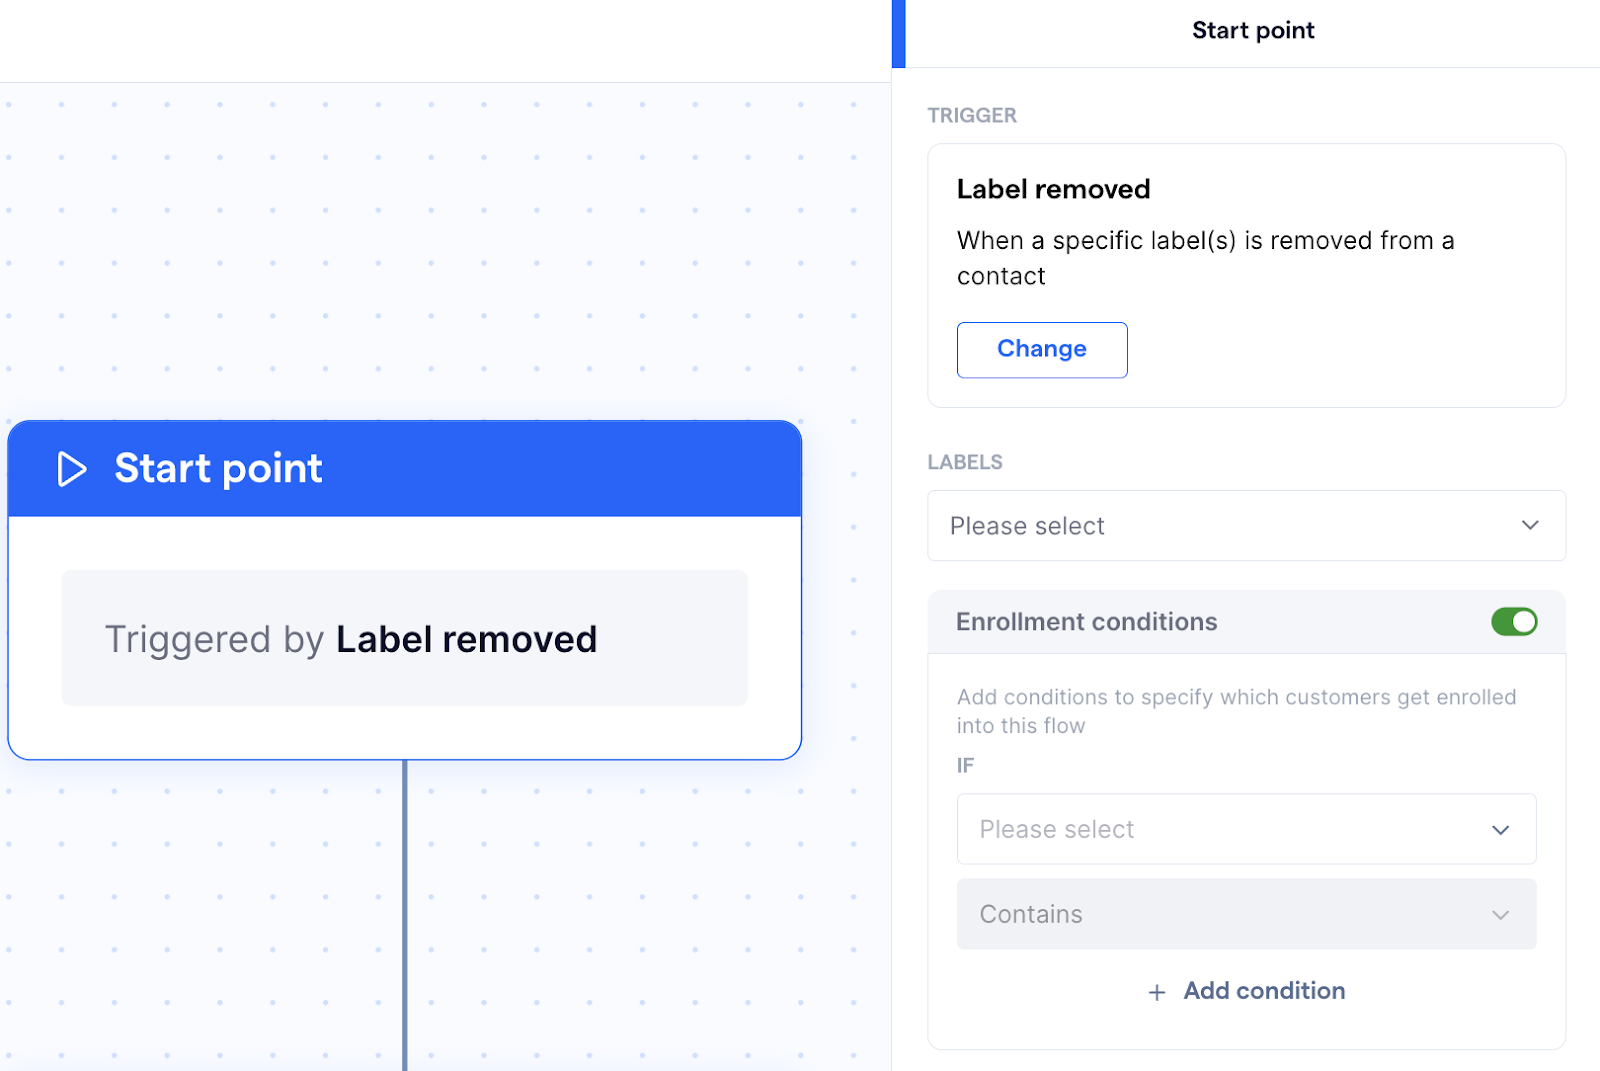
Label removed
The "Label removed" trigger activates when a label is removed from a contact or conversation.
Set up the "Label removed" trigger node form by following the steps below:
- Click on the node to open up its form, which will appear on the right side of the screen
- The node form contains the following fields for you to set up the trigger:
1. Labels - Select the label(s) that will trigger the flow when they are removed
from a contact or conversation
2. Enrollment conditions - When toggled on, you can set specific conditions that
the customer must meet in order to be enrolled into the flow

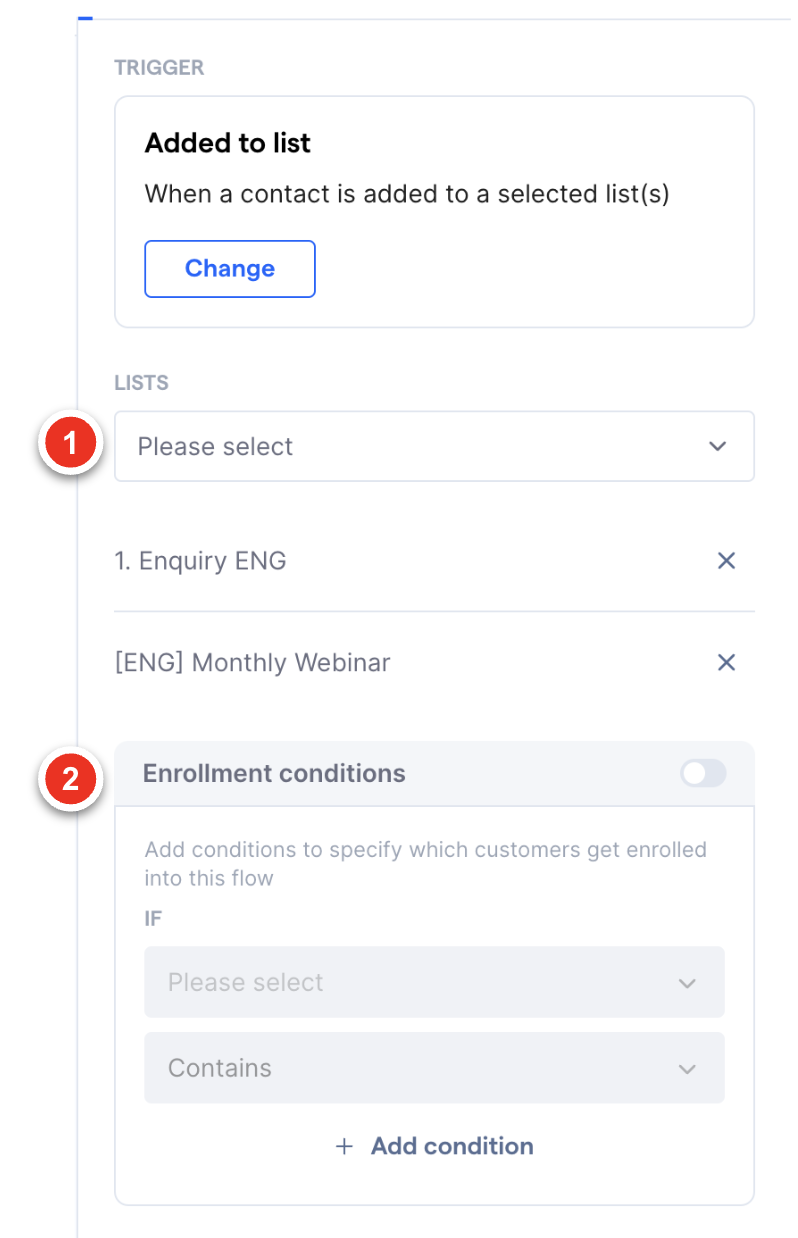
Added to list
The "Added to list" trigger is activated when a contact is added to a specific list in SleekFlow. You can use this to update the customer's profile, send targeted communication, or assign the contact to a sales or support team.
Set up the "Added to list" trigger node form by following the steps below:
- Click on the node to open up its form, which will appear on the right side of the screen
- The node form contains the following fields for you to set up the trigger:
1. Lists - Select the list(s) that will trigger the flow when a contact is added to it
2. Enrollment conditions - When toggled on, you can set specific conditions that
the customer must meet in order to be enrolled into the flow

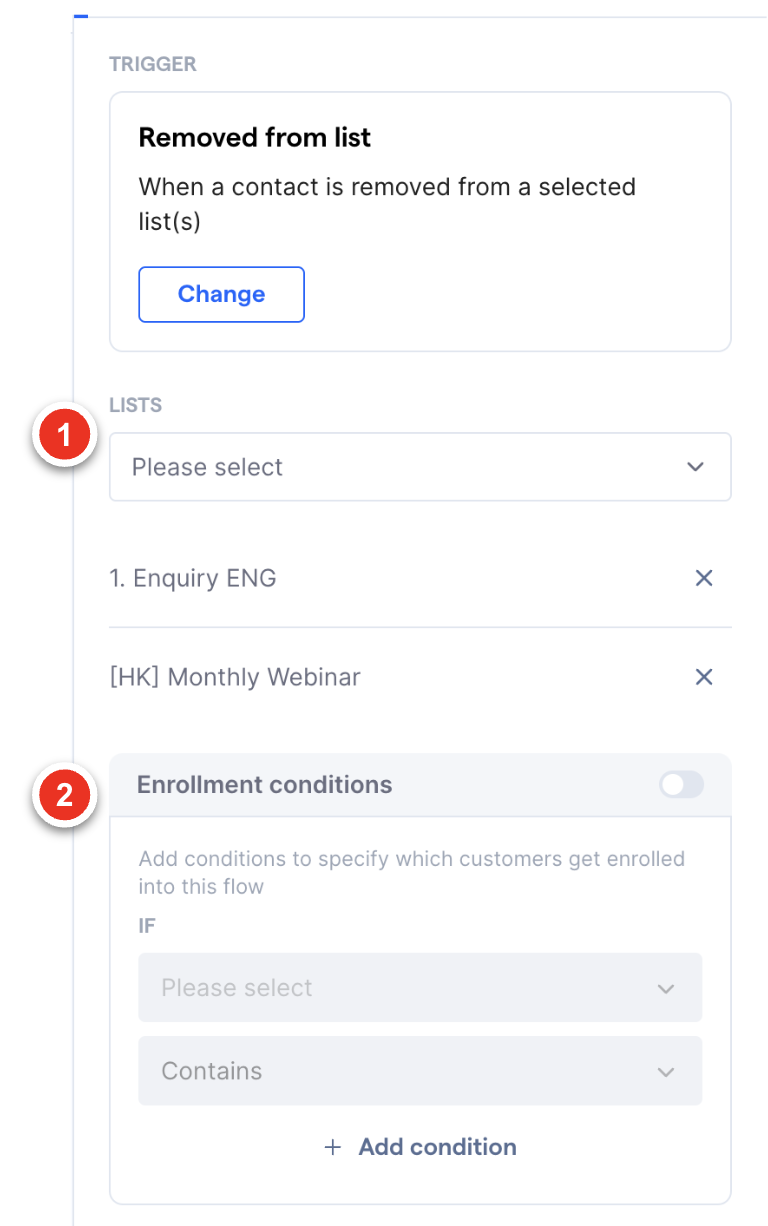
Removed from list
The "Removed from list" trigger activates when a contact is removed from a list. You can use this to clean up customer data, update marketing campaigns, or notify relevant team members.
Set up the "Removed from list" trigger node form by following the steps below:
- Click on the node to open up its form, which will appear on the right side of the screen
- The node form contains the following fields for you to set up the trigger:
1. Lists - Select the list(s) that will trigger the flow when a contact is removed
from it
2. Enrollment conditions - When toggled on, you can set specific conditions that
the customer must meet in order to be enrolled into the flow