


ℹ️ Flow Builder is only accessible to users in Admin roles
This article will outline how to get started with "Flow Builder" and create your first flow.
To access "Flow Builder", click the  icon on the left navigation bar.

Create a new flow
To create your first flow, click on "Create new flow" at the top right of the "Flow Builder" page.

You will then be presented with options to create your new flow, where you can either start from scratch or begin with a pre-designed template as a starting point.
Click the Start from scratch button to build a new flow entirely, or choose from the ten flow templates available. Each template represents a different scenario that you can further customize to suit your needs, and they are:
- Out of business hours: Automate replies for inquiries outside business hours
- Welcome message: Send new customers an automatic welcome message
- Keyword: Automate replies based on keywords in conversations
- Chatbot template: Use chatbot to handle frequently asked questions
- Idle customer: Check in on unresponsive customers during conversations
- Click-WhatsApp Ads follow-up: Automatically engage customers who message your business from a Click-to-WhatsApp ad, enabling follow-up actions and conversation tracking
- Post-broadcast follow-up: Detect keywords in broadcast campaign messages, and initiate personalized follow-up actions and interactions automatically
- Webhook data trigger: Trigger flows and receive customer information with real-time webhook data
- Form submission integration: Gather customer details through conversational prompts and pass information to third-party platforms via HTTP requests
- Data validation integration: Capture customer responses and verify their data accuracy and compliance using an API

Once you select the template of your choice, you would be able to configure the flow name and re-enrollment settings before creating the new flow. Refer to the Re-enrollment Settings article for more details on the specific options available.

Setting up your flow
You will be able to set up your new flow in the flow editor. This guide will outline how to construct and develop your flow.

Start with the trigger node
ℹ️ Learn more about trigger nodes in the Flow triggers article
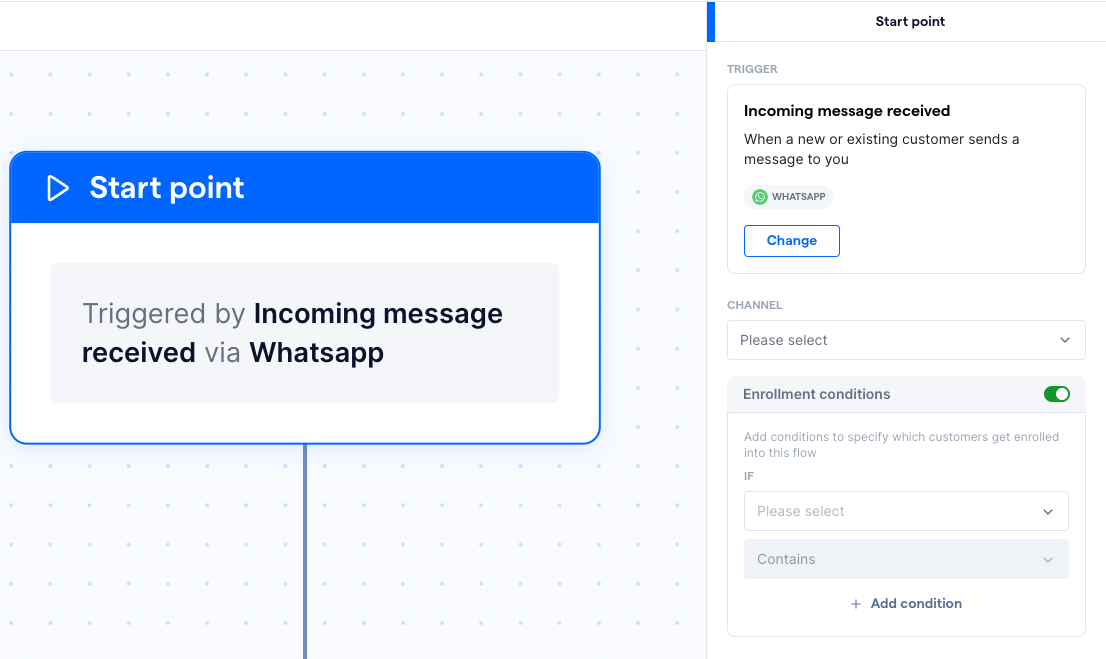
You will first need to configure the start point by choosing the trigger event that will initiate the flow and enroll contacts into it.
To do that, click on the "Start point" node in the flow canvas.

Next, select the trigger event that will initiate the flow.

Once you have selected the trigger for your flow, a trigger configuration form will appear on the right side of the screen. In each trigger form you will be able to configure the “Enrollment conditions”, which are set conditions to filter out or specify which contacts get enrolled into the flow. We highly recommend you specify the "Enrollment conditions", as they guarantee the enrollment of the flow’s target contacts.
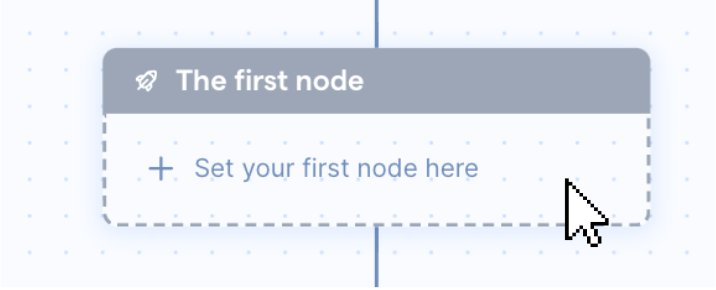
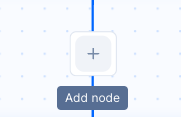
Add your first node
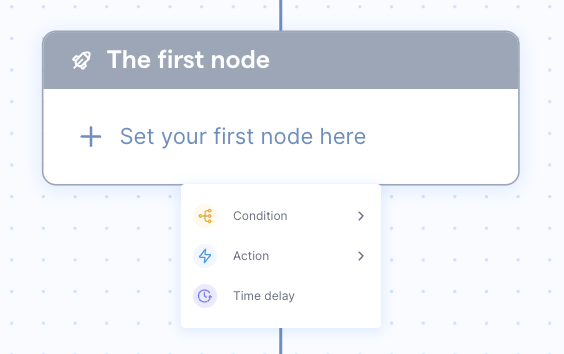
Add your first node below the “Start point” by clicking on "The first node" in the flow canvas.
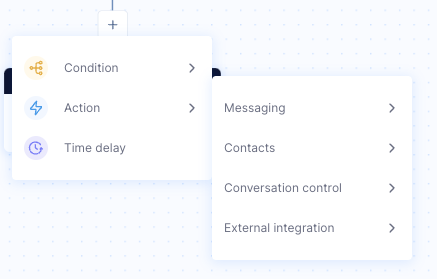
You can then choose from the dropdown to add a "Condition", "Action", or "Time delay" node into your flow.
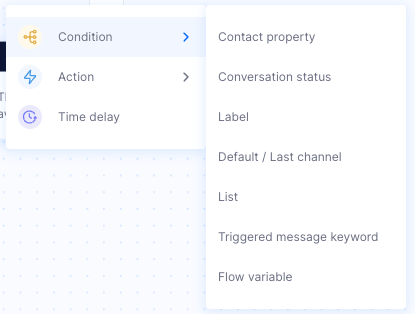
Branch with condition nodes
ℹ️ Learn more about condition nodes in the Flow conditions article
Add a condition node into the flow to branch the flow based on the configured conditions.
Once you have chosen the condition of your choice, a branch will be inserted into the flow along with a "Condition" and "Else" node.
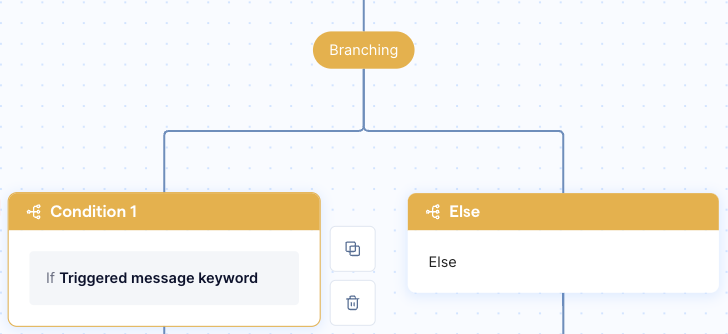
You can configure the condition node via the form on the right-hand side of the screen, where you can set the conditions that enrolled contacts need to fulfill before they can continue to the following node.
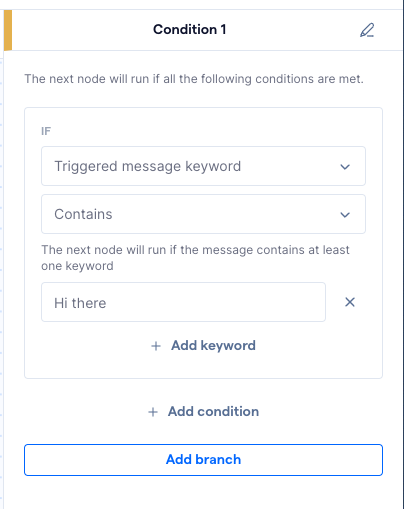
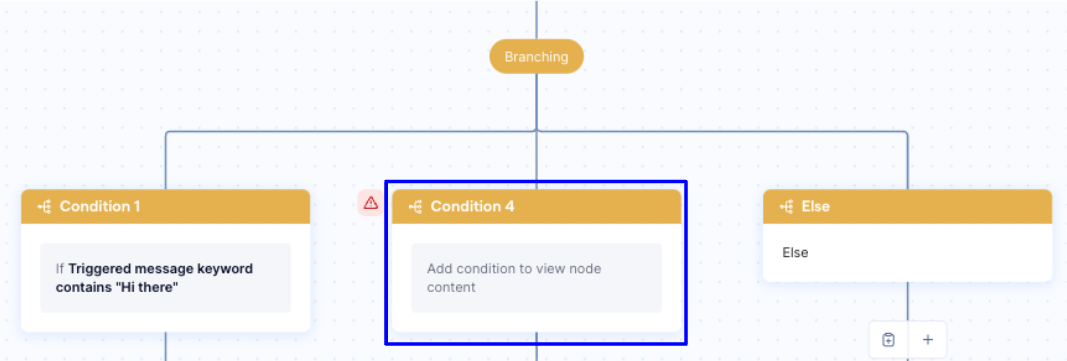
You can click "Add branch" in the node form to add another condition as a branch. Enrolled contacts will continue down all the adjacent branches until they hit one of the branch’s conditions. You can set the condition of the new condition node by clicking on the node and configuring its settings in its node form.

If the enrolled contact did not meet any of the conditions across the configured branches, they will then continue their journey down the "Else" branch.
Perform tasks with action nodes
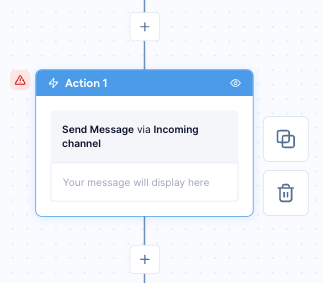
Add additional nodes to the flow by clicking on the "Add node" button between nodes in the flow canvas.
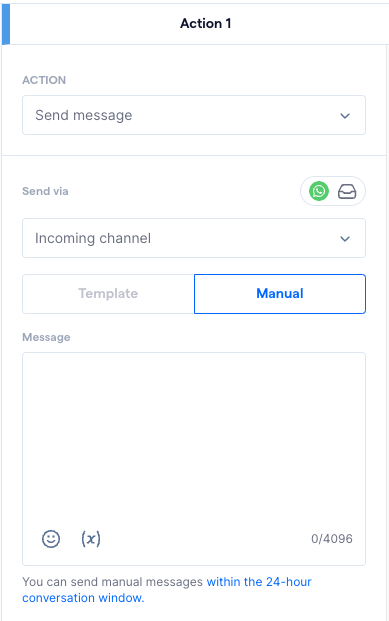
You can add an "Action" node to configure specific tasks that the system will carry out on enrolled contacts.
ℹ️ Learn more about action nodes in the Flow actions article
Once you have chosen the action of your choice, the action node will be inserted into the flow. You can configure the settings of the action node in its node form that will be displayed on the right-hand side of the screen.
Pause with time delay nodes
ℹ️ Learn more about time delay nodes in the Other flow nodes article
You can add “Time delay” nodes into your flow to pause it for a certain amount of time before continuing to the next node.

You can set the wait time duration in the time delay node’s form at the right-hand side of the screen.

End of your flow
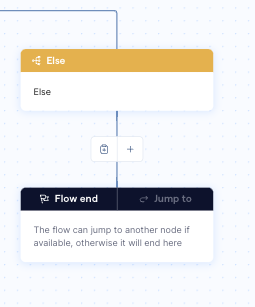
Flow end
You will see a "Flow end" node at the end of every branch in your flow. This marks the end of the flow where enrolled contacts will complete and exit the flow.

Jump to
You can convert the “Flow end” node into a “Jump to” node by clicking the “Jump to” tab at the top of the node.

In the node form, you can select from a list of action or time delay nodes that exist within the flow to direct enrolled contacts to and continue through the flow.

Publish your flow
⚠️ If you publish a new version of an active flow, or save an active flow as a draft, all contacts who currently have active enrollments within the flow will be removed from it
Once you have completed constructing your flow, you can choose to either save the flow as a draft or publish and activate the flow.
Click on “Save as draft” to save any changes to the flow and continue working on it later.
To activate and run your flow, click “Publish” and the flow will be live. After a flow is published, any contact that meets its trigger conditions will be enrolled into it.
