


Before you can use the WhatsApp Business API or other Meta business features with SleekFlow, your business must complete Facebook Business Verification. This verifies your organization’s legitimacy and unlocks advanced messaging capabilities.
There are two ways to complete Meta’s business verification:
- Submit your documents directly on SleekFlow: SleekFlow will review and help fast-track your submission to Meta.
- Complete verification on Meta Business Manager: Manually apply for business verification on Meta
This guide walks you through the step-by-step process of submitting your business verification.
Benefits and use cases
Why you need to verify your business:
- Access the WhatsApp Business API: Verification is required to activate the WhatsApp Business API account for more features (e.g. Higher messaging limit, WhatsApp Flow, eligible for applying Blue Tick Verification Badge).
- Improve platform trust: Verified businesses are seen as more legitimate by Meta, which may reduce risk of disruption or rejection.
- Enable advanced Meta services: Some Facebook and Instagram features (e.g. Higher ads spend limit) require verification.
Common use cases:
- Connecting WhatsApp API via SleekFlow: Business verification is a prerequisite before your phone number can go live.
- Blast WhatsApp Broadcast marketing campaign: Increase message limit from 250 template message per day to >1,000 to blast messages at scale.
- Become an Official Business Account (Blue tick badge): Protect your brand and increase your WhatsApp account credibility for your customer with a blue tick badge.
- Running click-to-WhatsApp ads: Ensures your business is eligible to advertise with WhatsApp integrations.
⚠️ What to prepare before you start
Before starting the verification process, make sure you have the following:
- Official business registration document: For example: BR, ACRA, or SSM — must include your legal business name and registration number
- Utility bill or phone bill: Required if your business registration document doesn’t show your phone number or address
- Access to your business email or phone: You’ll need to receive and enter a confirmation code
- Correct business details: Double-check your company name, address, and registration number to avoid rejection due to typos or mismatches
Verify your business on Meta through SleekFlow
You can now upload your verification documents directly within SleekFlow to help speed up Meta’s approval process. SleekFlow team will review your submission to ensure all required information matches your business account before forwarding it to Meta for final verification.
⚠️ Approval is determined entirely by Meta. SleekFlow’s review only helps ensure your documents are complete and ready for fast-track processing.
To submit your documents:
-
Navigate to the “Channels” page, click on WhatsApp Official API and go to the “Accounts” tab

- Under Facebook Business Account, click “Get verified”

- In the pop-up window, review the instructions and upload your documents. Please note you can upload maximum 3 files, 5 MB each.

- Click “Submit” once all documents are uploaded.
- SleekFlow will review your documents. If approved, they’ll be sent to Meta for verification.
- You’ll receive updates in SleekFlow once the verification status changes.
Possible reasons for verification failure
Your application might be rejects based on the following common reasons:
- Mismatched business name: The name on your documents doesn’t exactly match your Meta Business Manager or WhatsApp Business Account name.
- Incomplete documents: Missing required details such as address, registration number, or legal name.
- Unsupported document type: Self-filed tax forms or non-official documents are not accepted.
- Exceeded verification attempts: You can only attempt verification a limited number of times via SleekFlow. Continue verification directly in Meta Business Manager by clicking “Submit on Meta”.

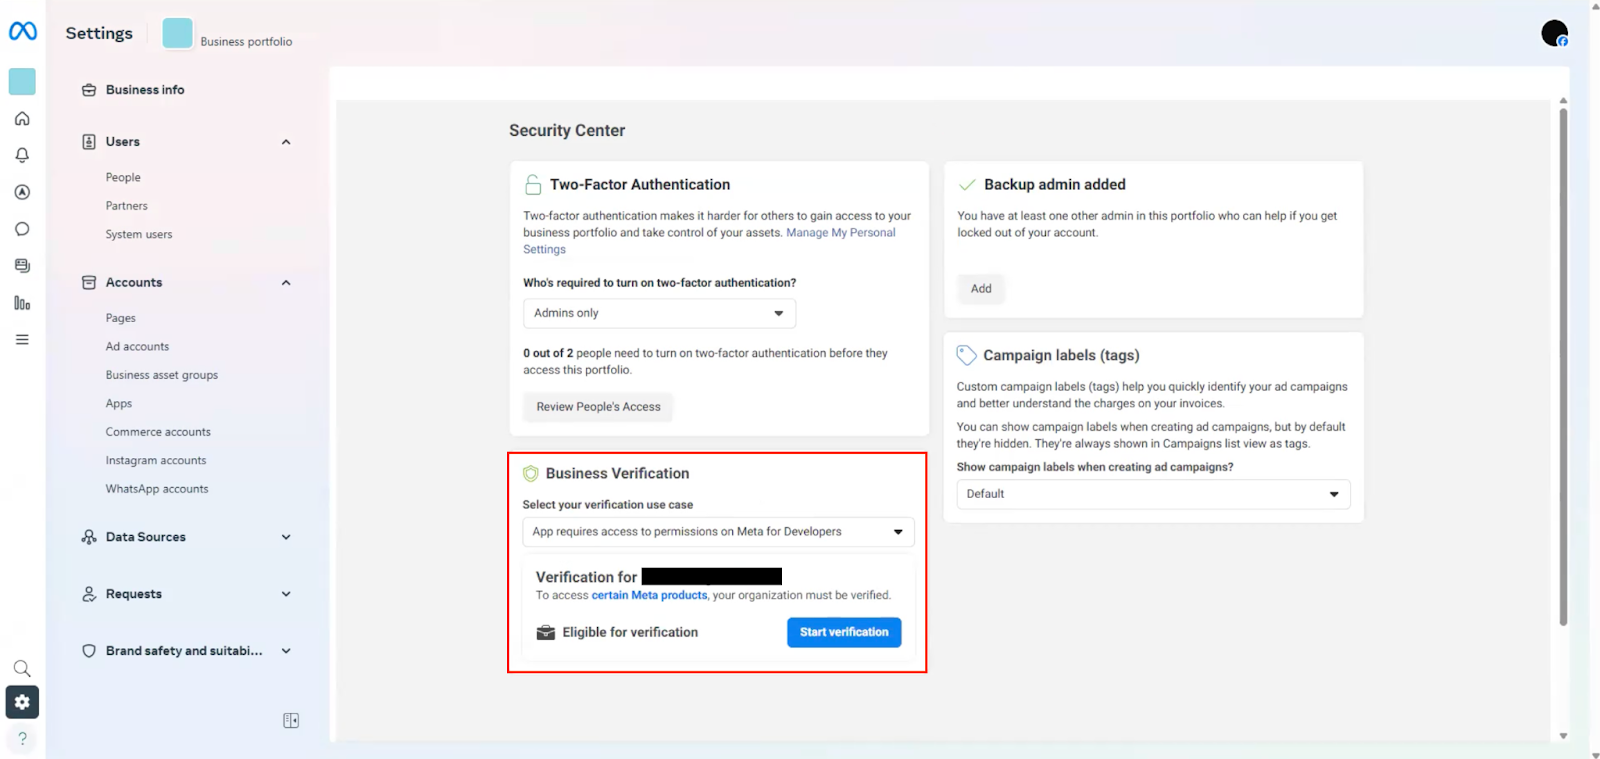
How to complete Facebook Business verification
You can follow the steps below to complete the Facebook Business verification process:
-
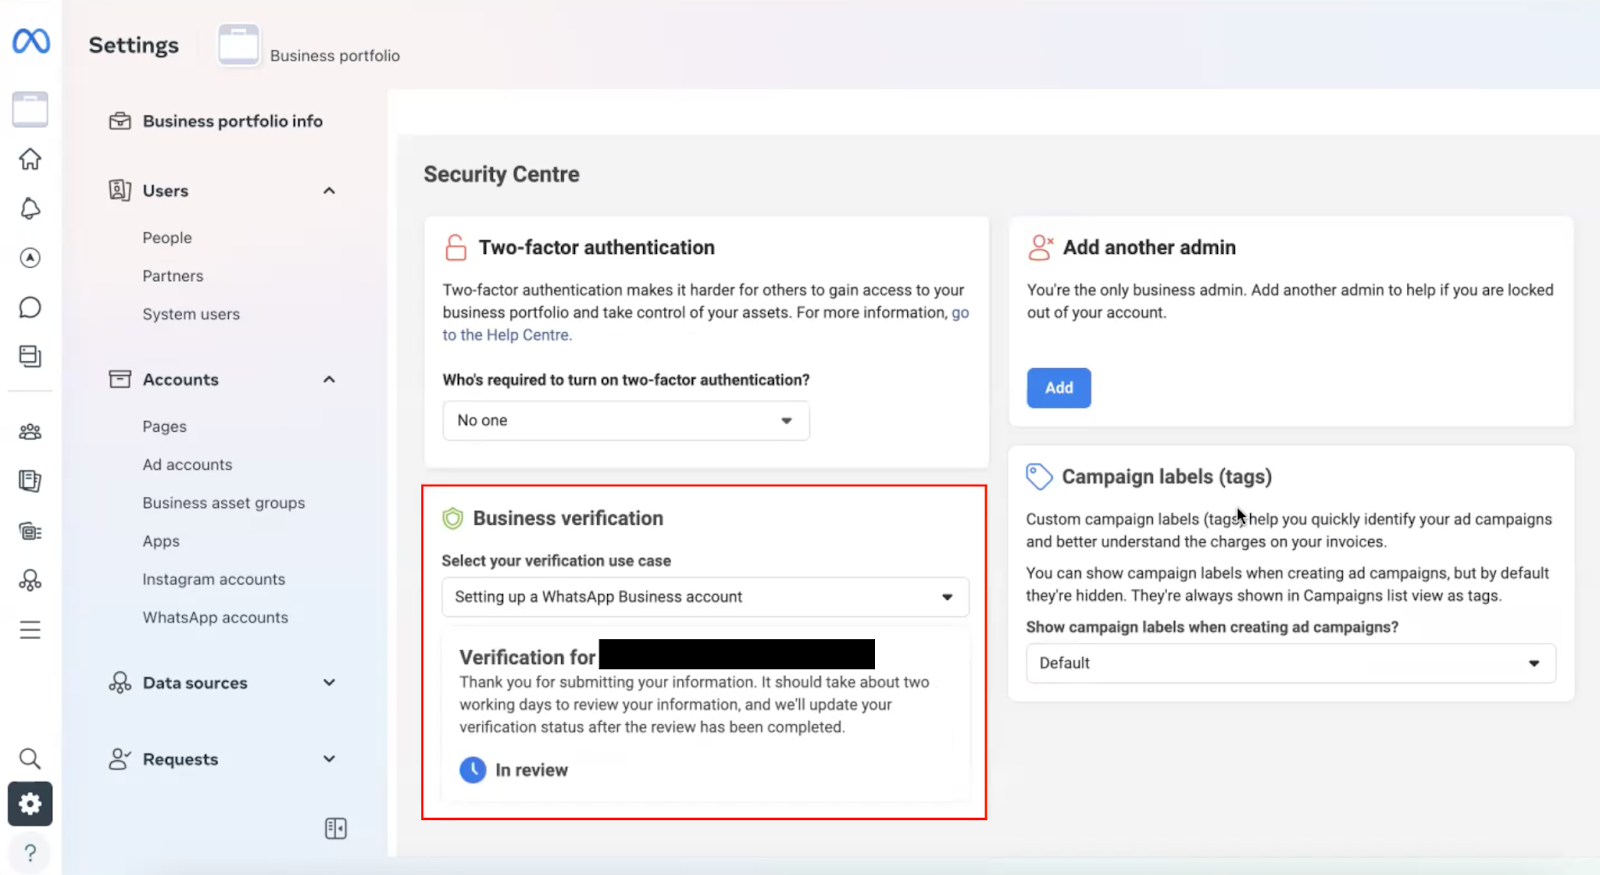
Once you’ve signed up for the WhatsApp Business API, log in to Meta Business Manager, navigate to “Business Settings”, and go to the “Security Centre”. you’ll see the “Start Verification” button — click it to begin
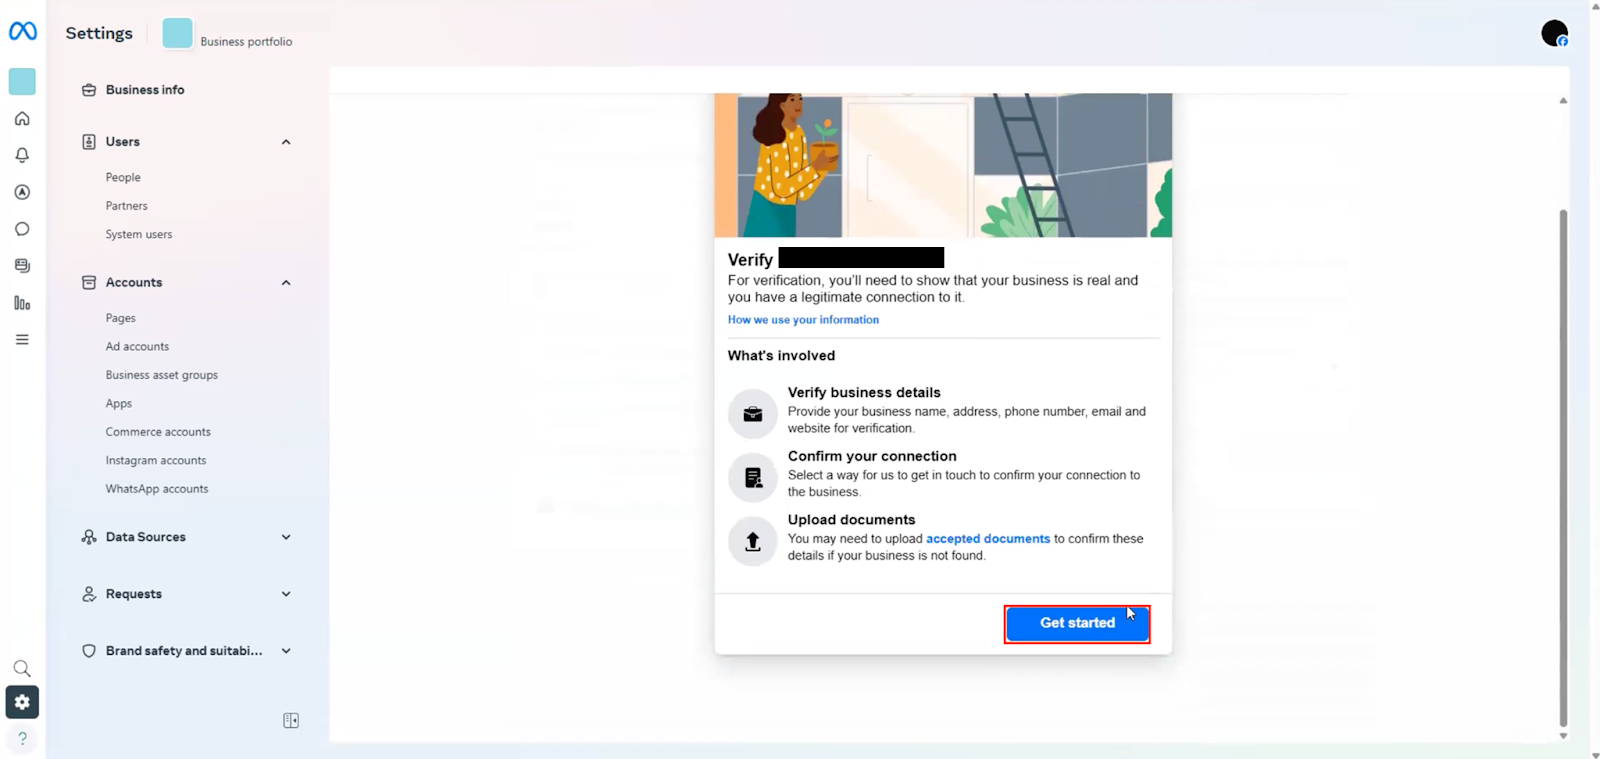
-
Click “Get started”
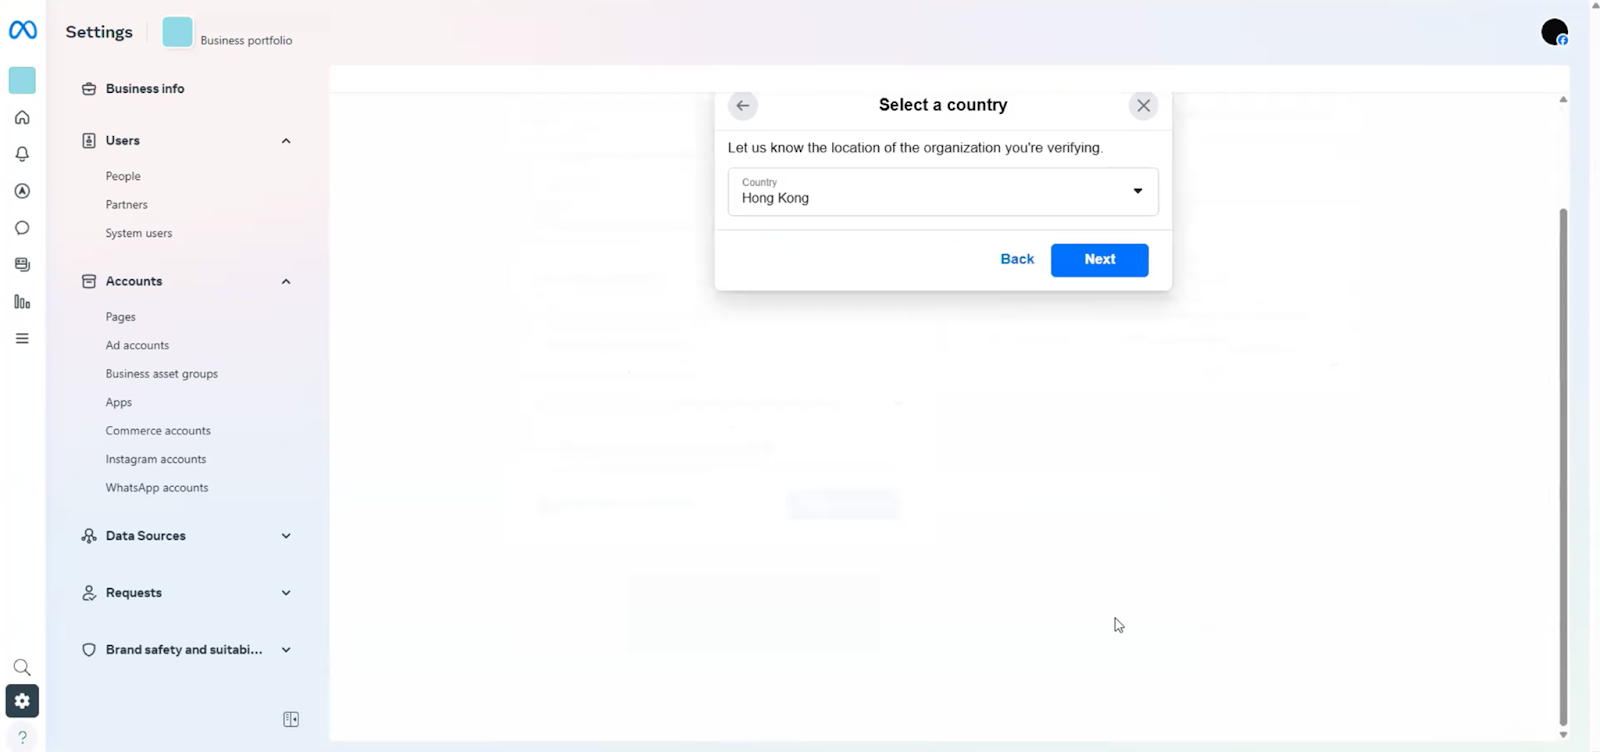
-
Choose the country where your organization is legally registered.
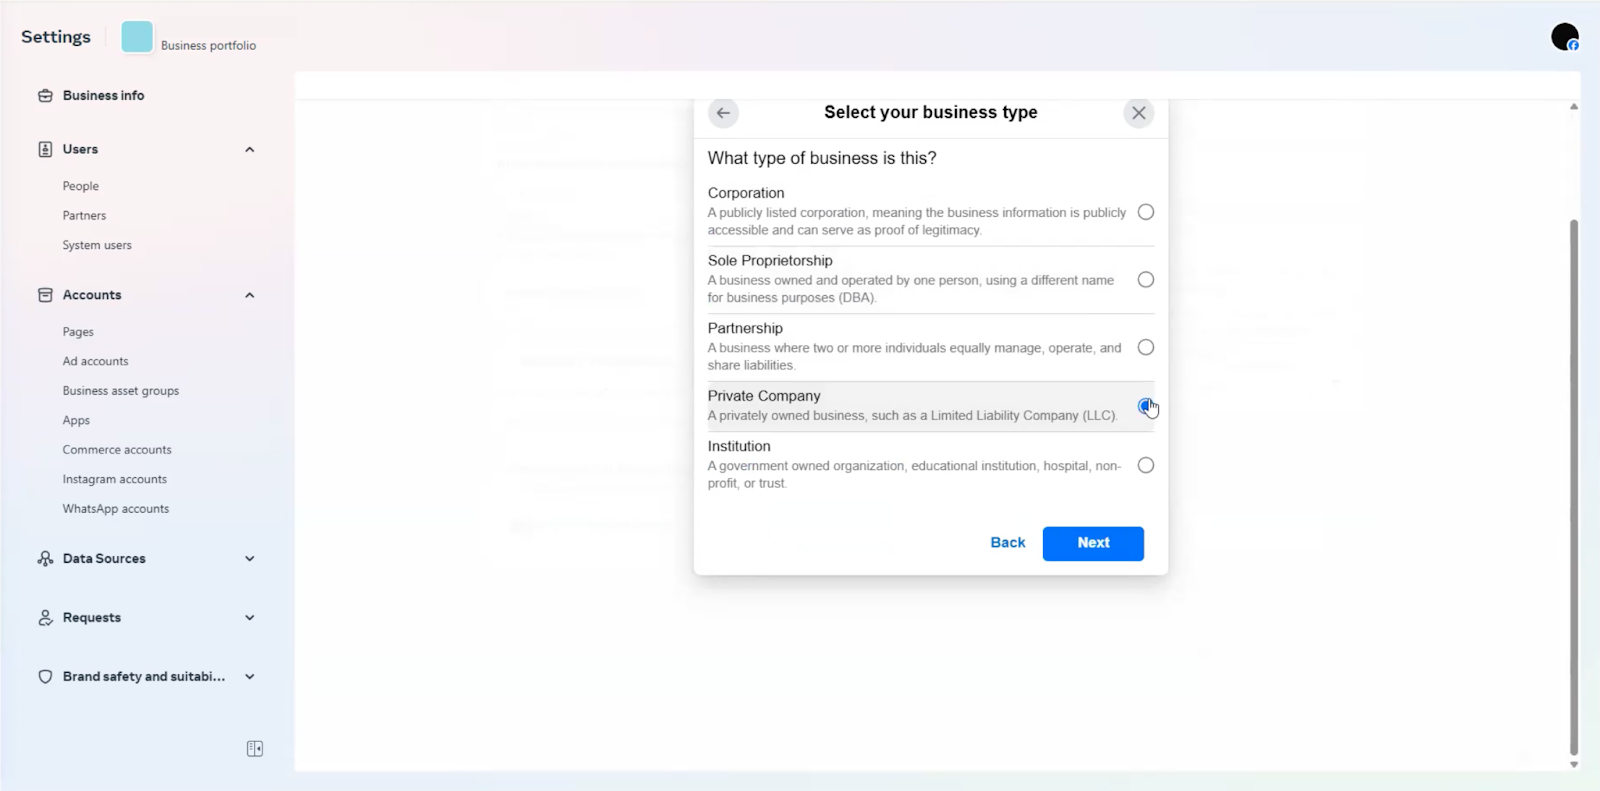
-
Select the appropriate business type:
- Corporation – For businesses listed on a stock exchange
- Sole Proprietorship – For one-person businesses
- Partnership – If owned and managed by partners
- Private Company – e.g. Sdn Bhd, LLC
-
Institution – For government, education, or nonprofit entities
-
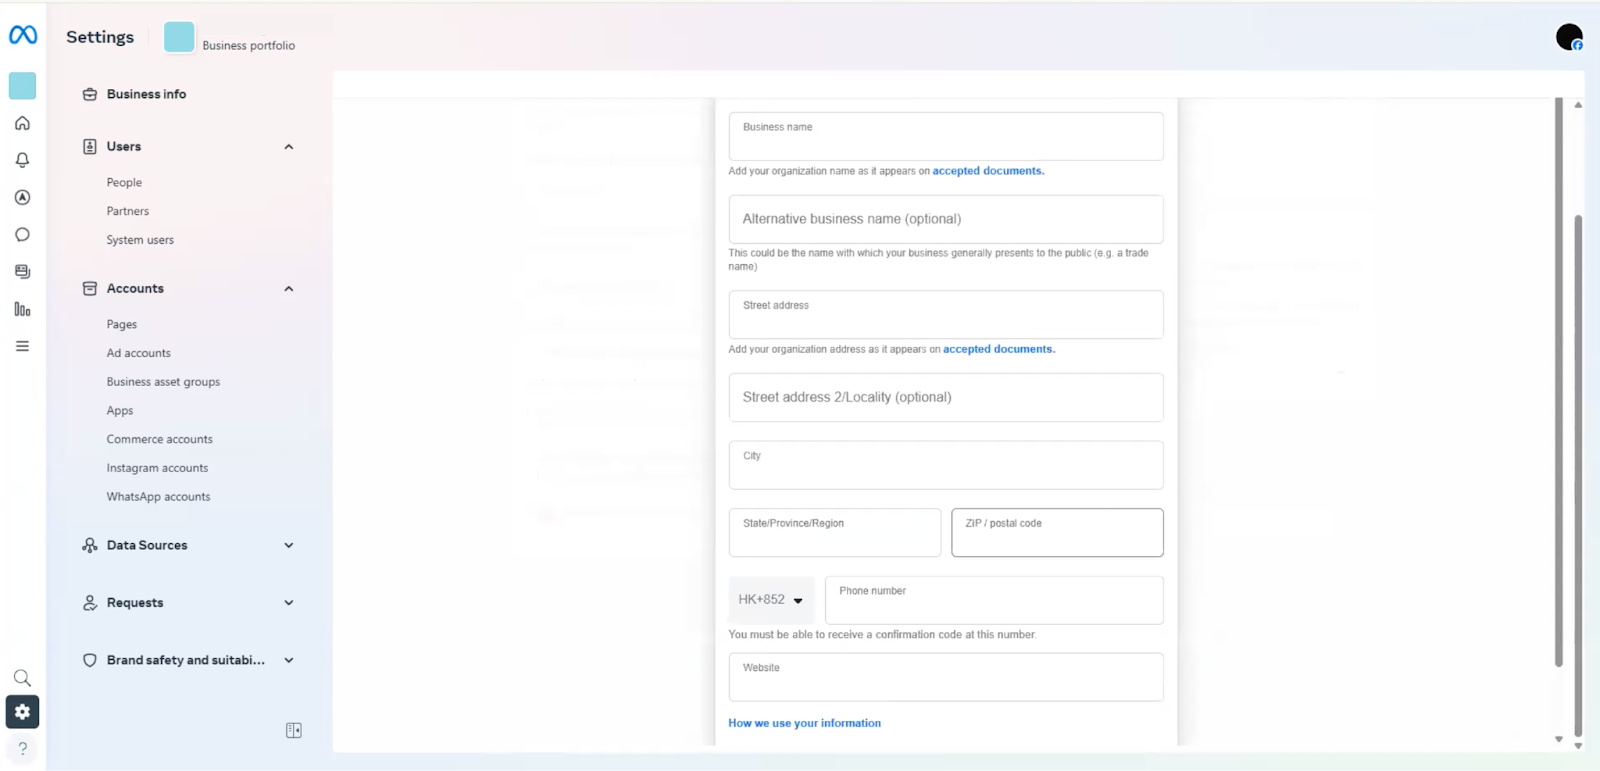
Review your organization’s details. If you’ve already filled out your Business Info, the fields will appear pre-filled. Double-check all information carefully.
-
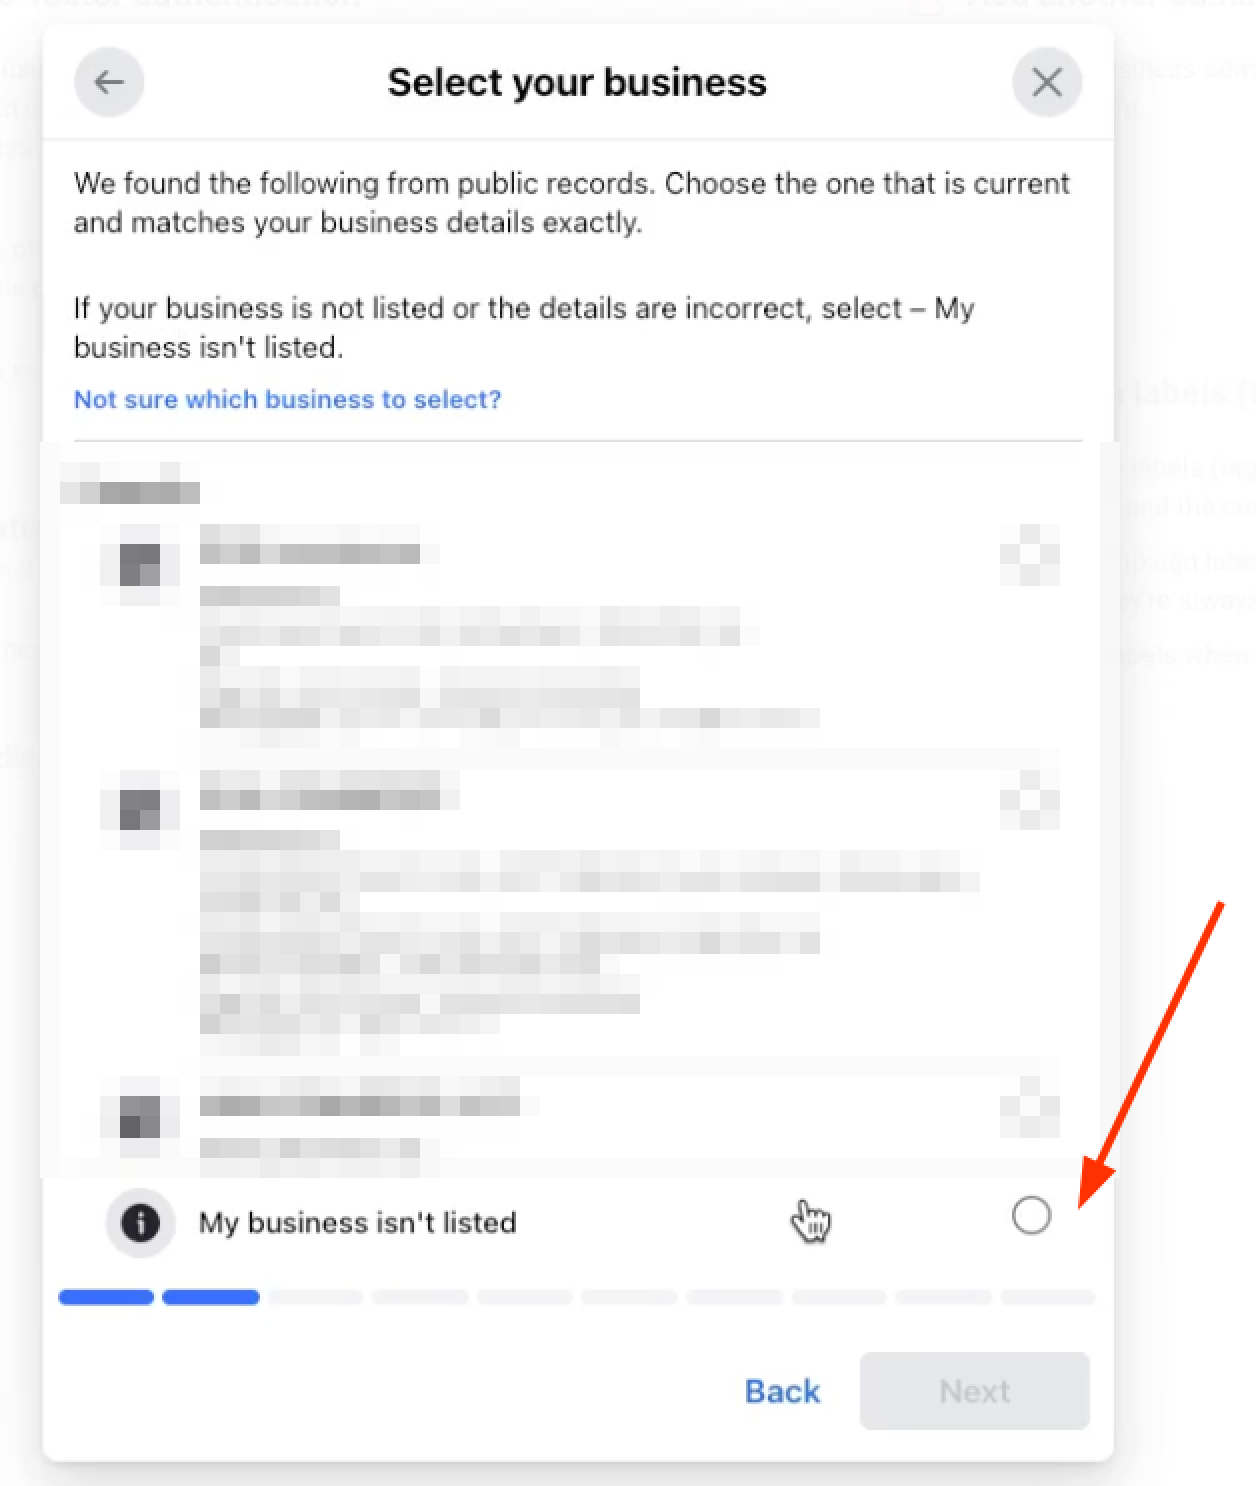
✅ Always choose “My Business Isn’t Listed” — even if your name appears — to avoid errors caused by typos or partial matches.
-
✅ Always choose “My Business Isn’t Listed” — even if your name appears — to avoid errors caused by typos or partial matches.
-
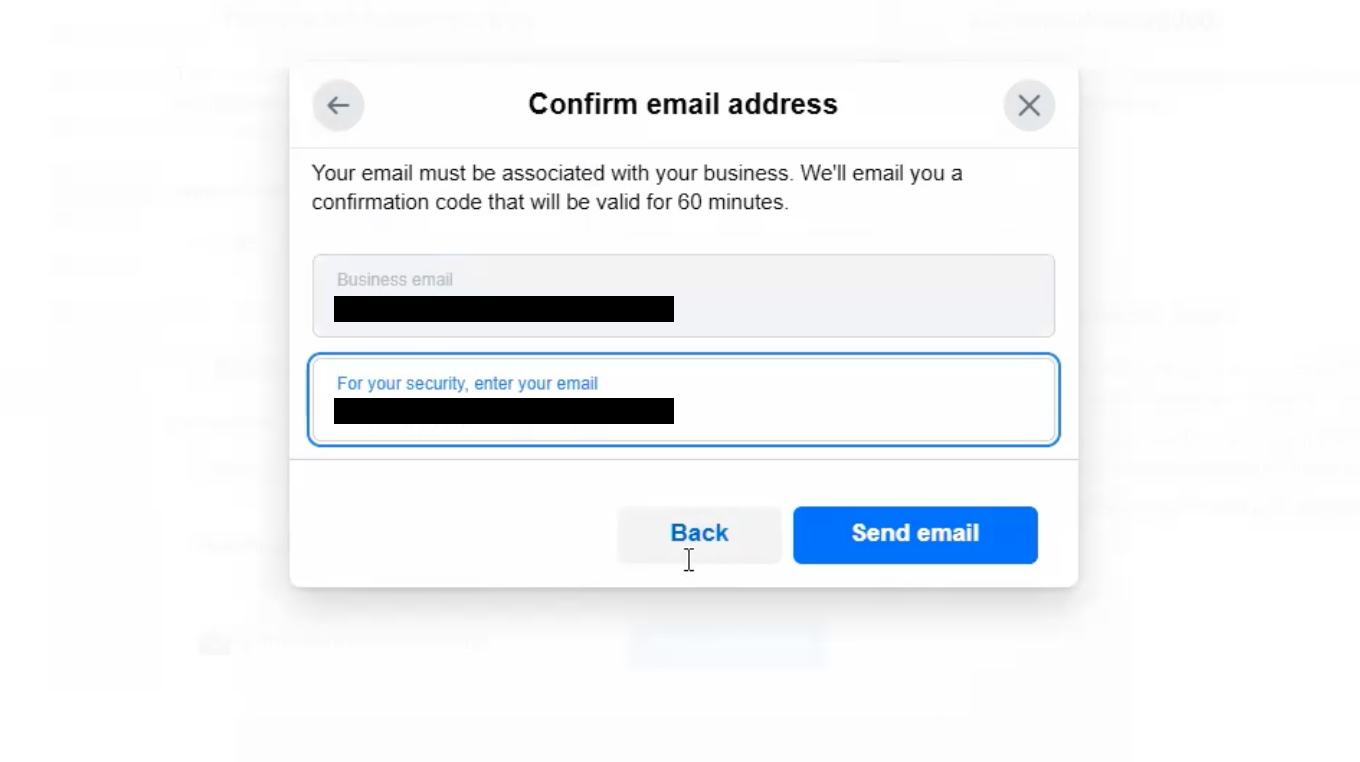
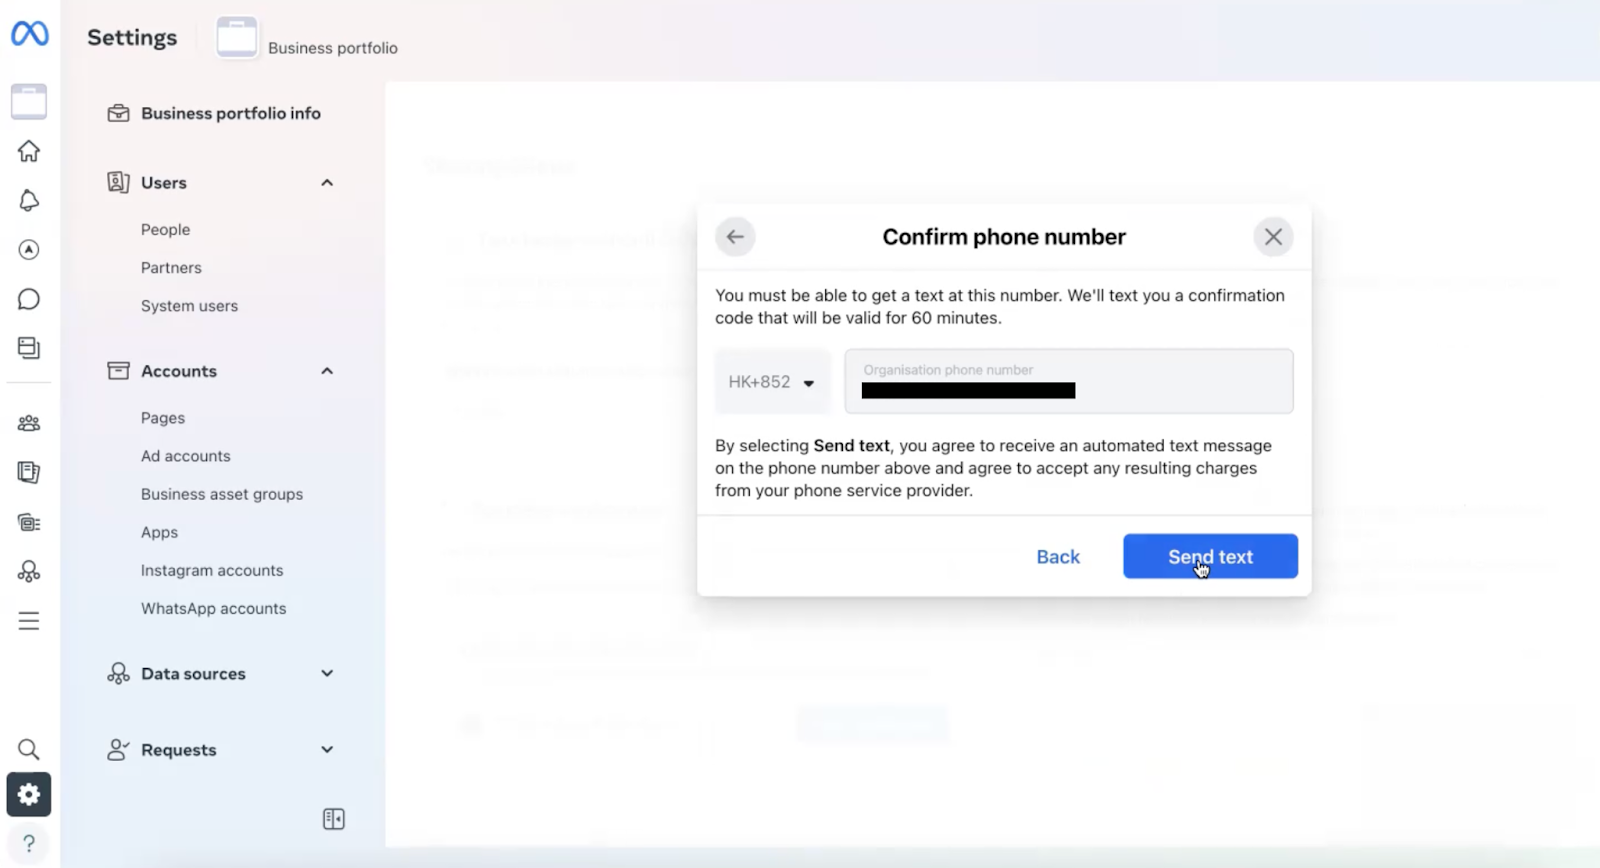
Choose how you’d like to receive a confirmation code — via email or text message.
-
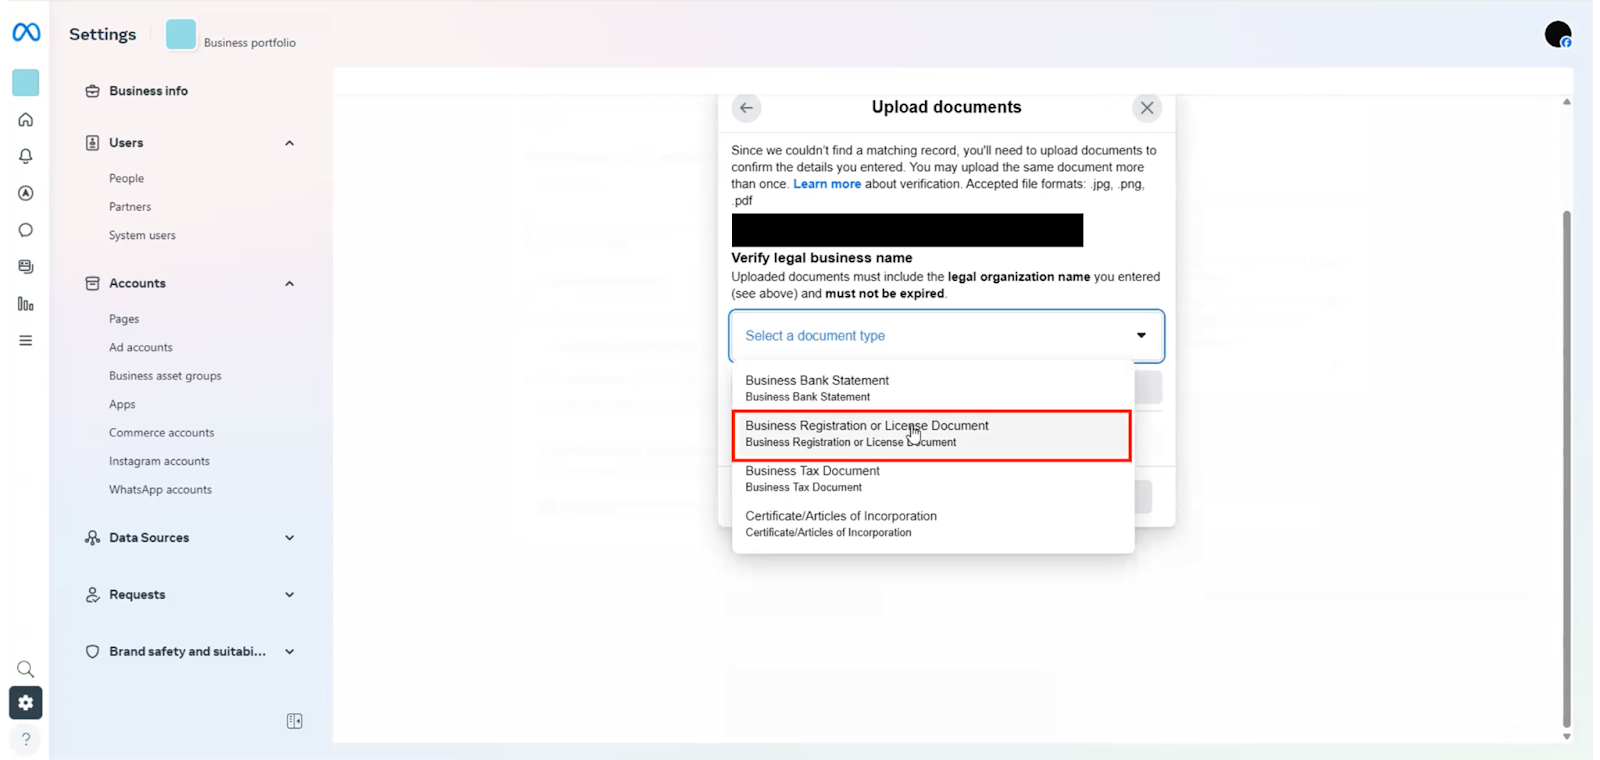
Upload a valid business registration document (e.g. BR, ACRA, or SSM) that includes your legal business name.
-
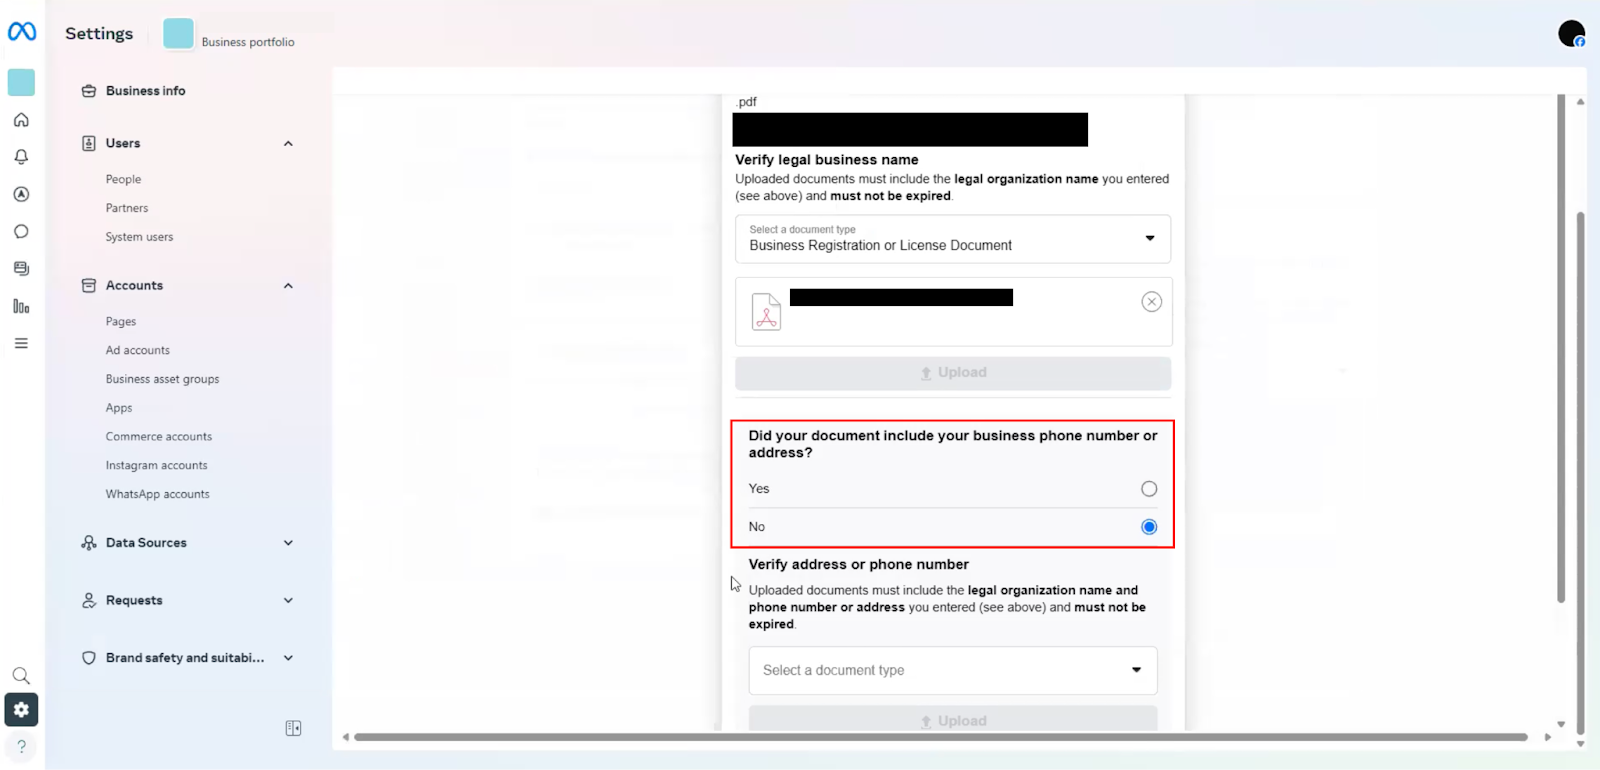
When asked whether your business phone number is shown in this document, select “No”.
-
Upload an additional document to verify your contact details — typically a utility bill or phone bill.
-
Enter the email address or phone number where Meta should send the confirmation code.
-
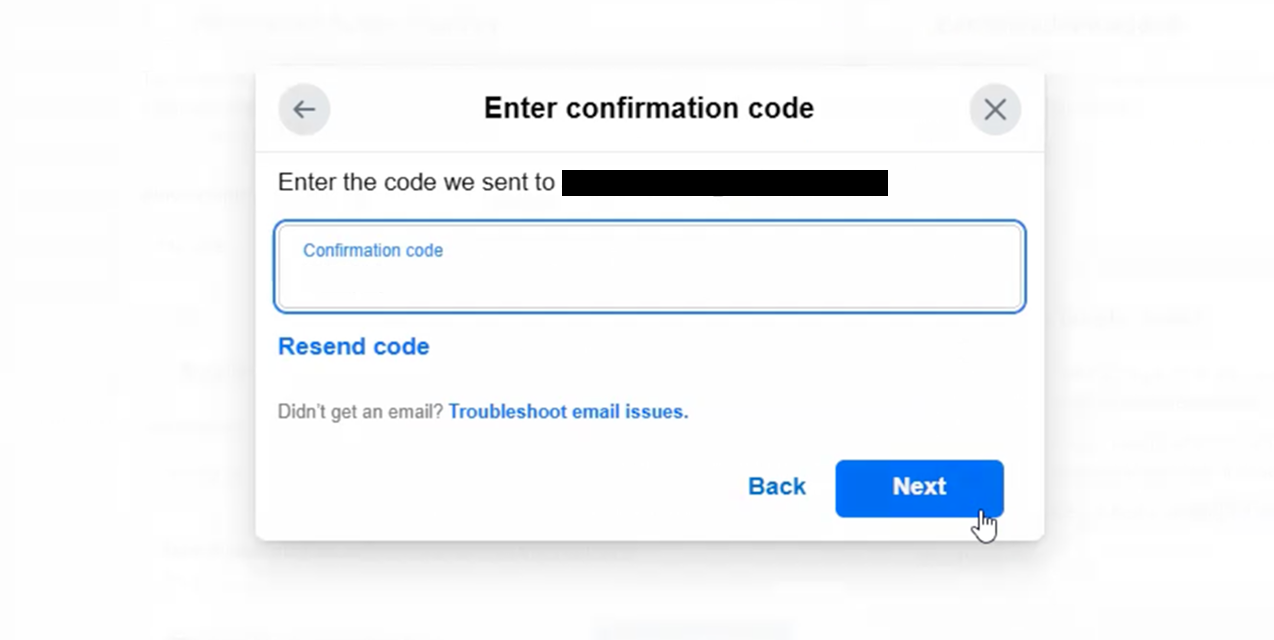
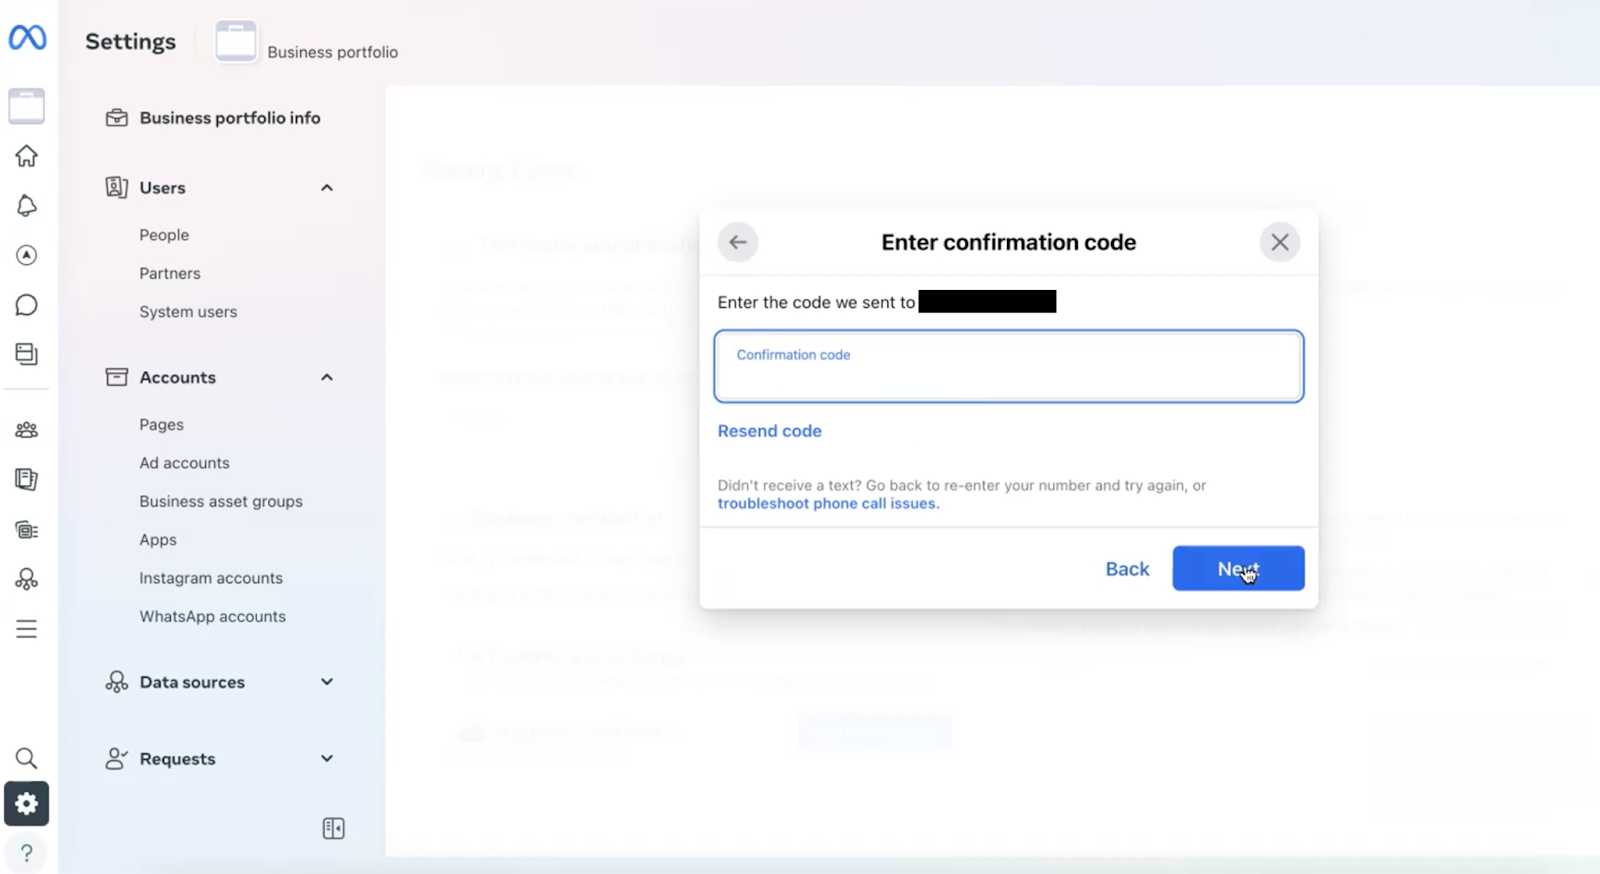
Once you receive the code, enter it in the form to verify your contact.
-
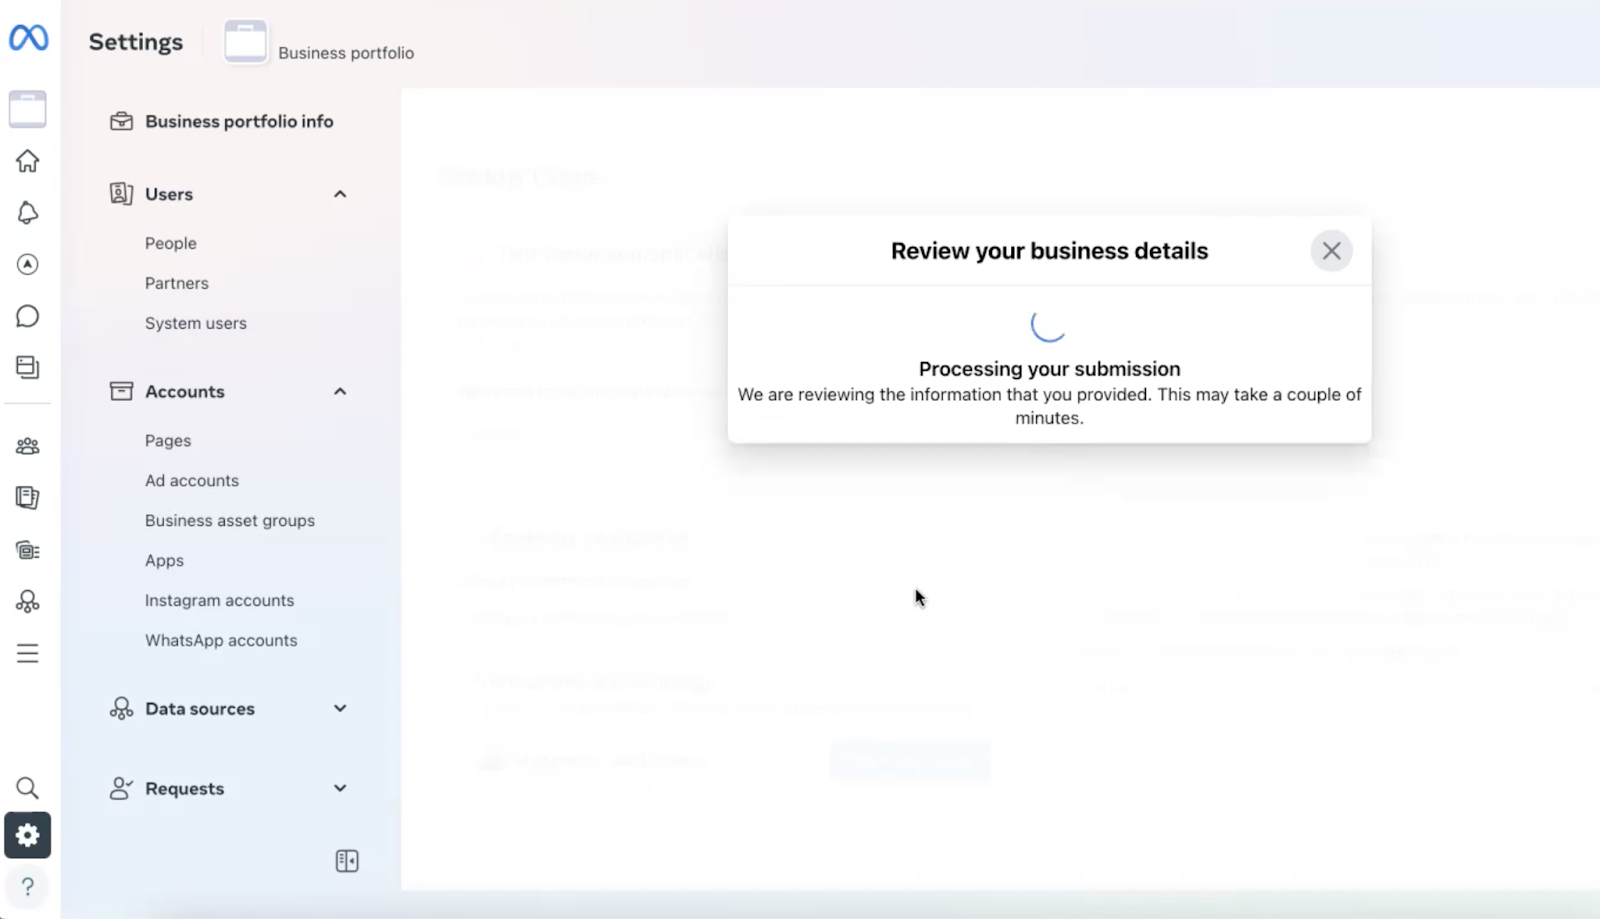
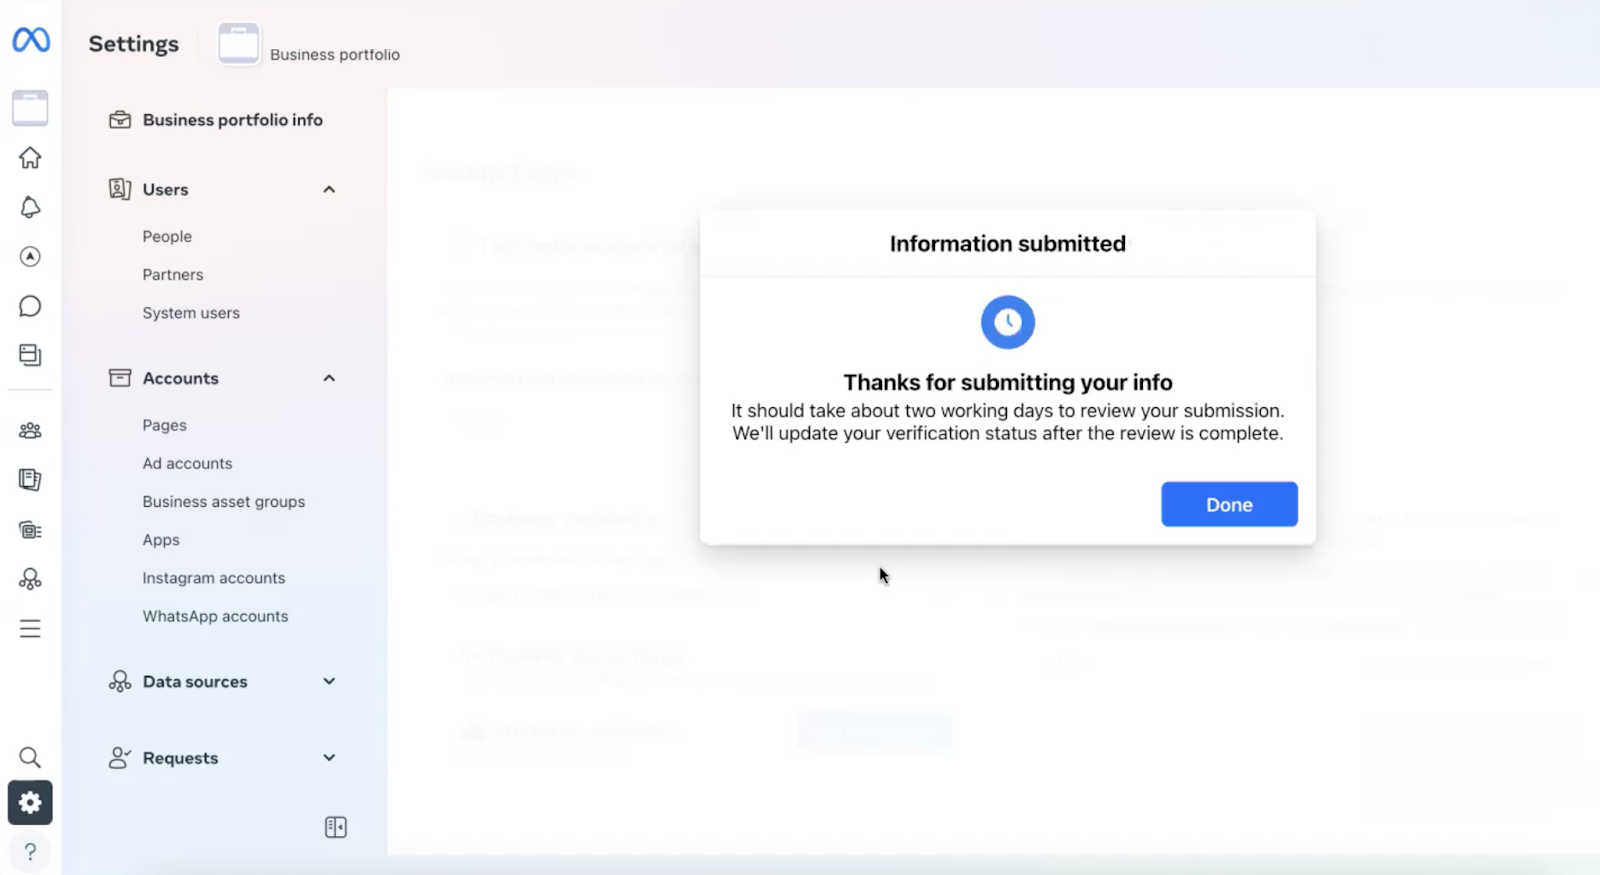
Click “Next”, then “Done” to submit your application.
-
Meta will review your submission, which usually takes around 2 business days.
-
You can check the progress under Security Centre, where your status will show as In review.


If you have questions about verifying your Business portfolio on Meta Business Manager, reach out to our team at cs@sleekflow.io!