


With SleekFlow mobile, you can now manage your broadcast campaigns on the go. This feature allows you to initiate, monitor, and analyze your broadcasts directly from your mobile device, providing the same level of detail and control as the web app. Whether you’re sending a WhatsApp broadcast or reviewing campaign performance, you can do it all from the palm of your hand.
Accessing the broadcast module
ℹ️ Only Admin and Team Admin have access to the Broadcast module. Staff members will not see the Broadcast module in their SleekFlow mobile.
To access the Broadcast module:
1. Open the SleekFlow mobile.
2. Find the “Broadcast” tab on the bottom-left side of the screen.
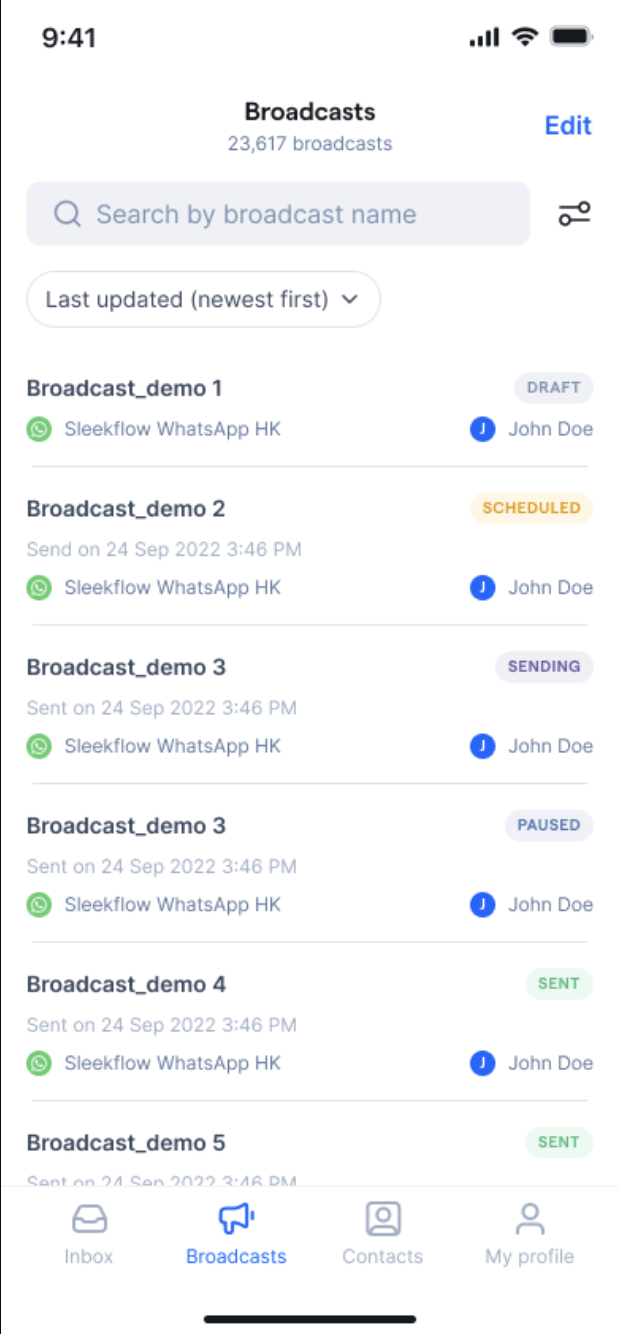
View your broadcast list
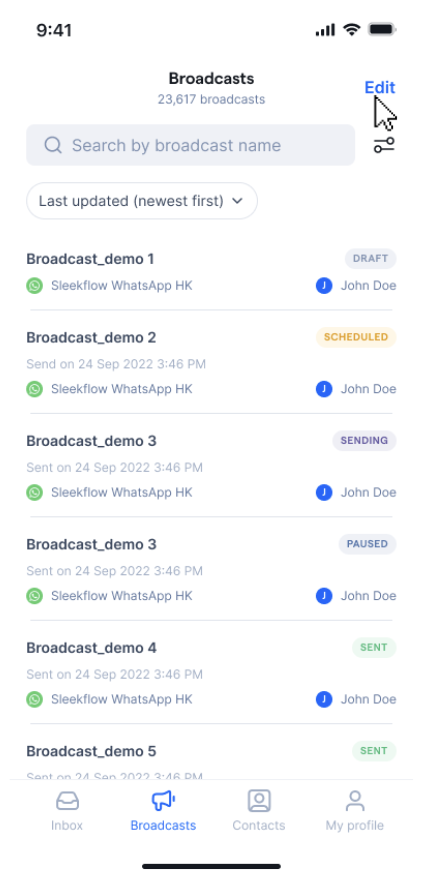
On the “Broadcast list” page, you can view all your broadcasts with key details, including:
- Total amount of broadcast
- Broadcast name
- Channel name used for sending broadcast
- Sending date and time
- Status of broadcast
-
Broadcast creator

Creating a broadcast
To create a new broadcast in SleekFlow mobile, follow these steps:
- Click the floating “Create” button at the bottom-right of the screen.
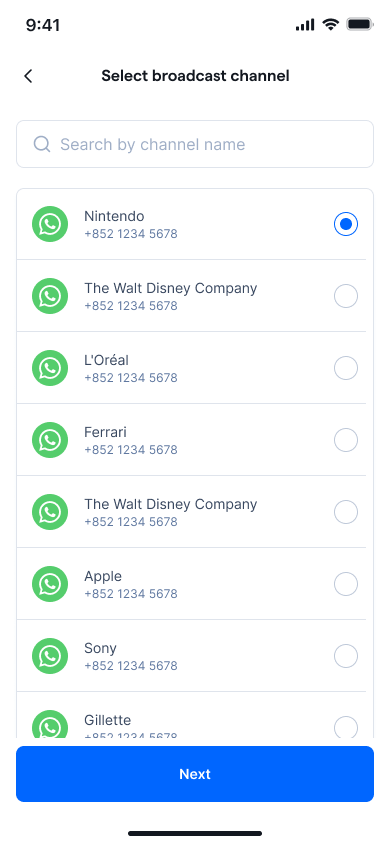
- You can choose one or multiple WhatsApp channels connected to SleekFlow to send your broadcast (WhatsApp is currently the only supported channel).
- All WhatsApp phone numbers under the same Business Portfolio share the same messaging limit. Adding a new WhatsApp phone number to the portfolio does not reset the limit—the new number automatically inherits the portfolio’s current messaging tier.
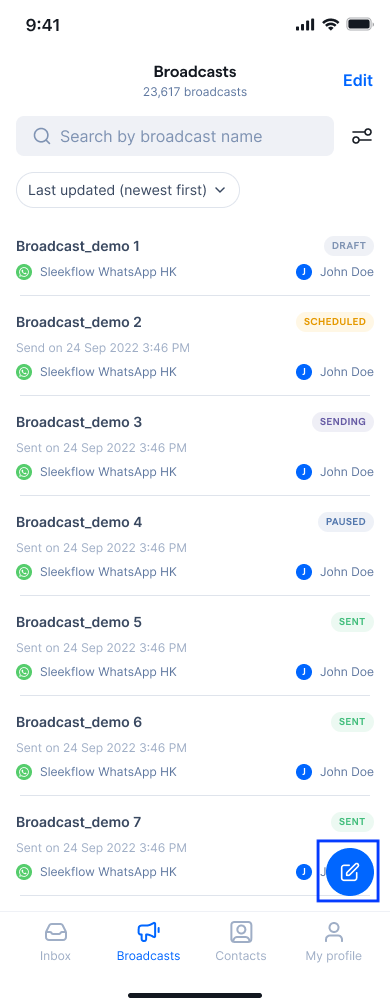
3. Set up a “Broadcast name” to help identify this campaign.

Choose broadcast audience
Choose your target audience either by list or condition:
-
By list: Select one or multiple pre-defined contact lists
-
By condition: Apply filters to select specific contacts based on condition
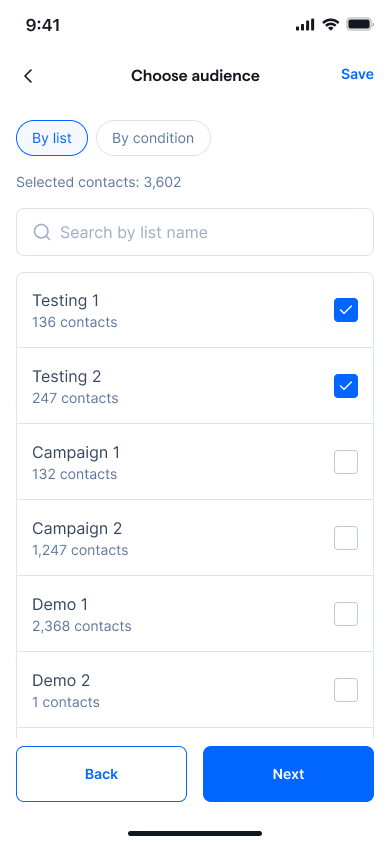
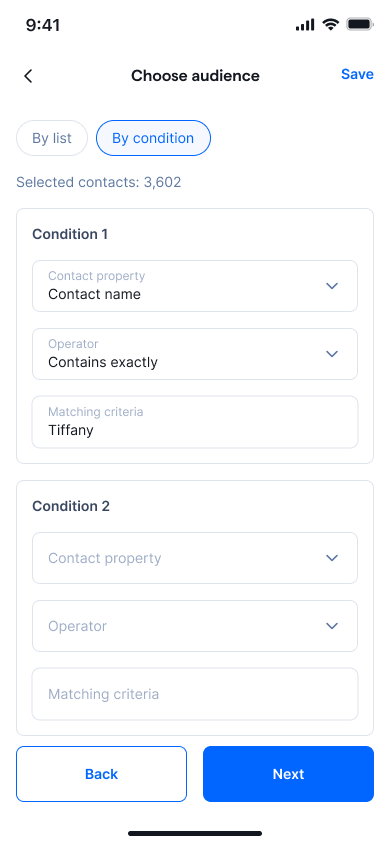
SleekFlow checks your Business Portfolio’s messaging limit to ensure the selected audience can be delivered within your available messaging capacity.
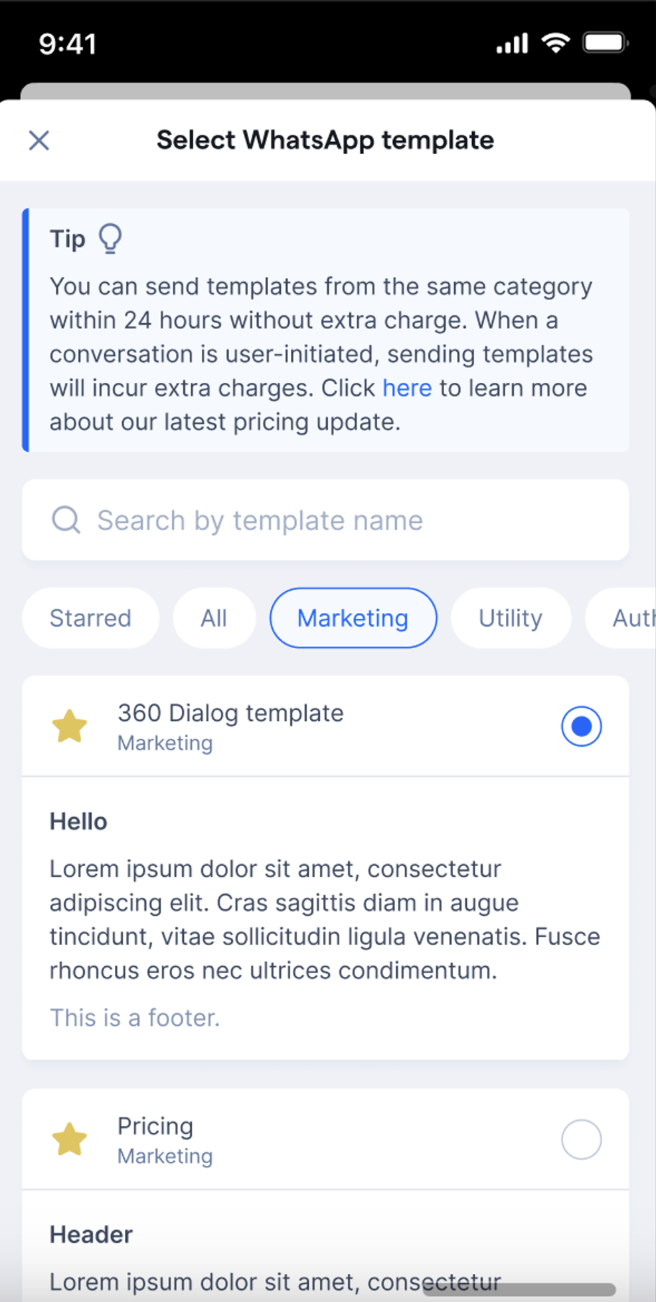
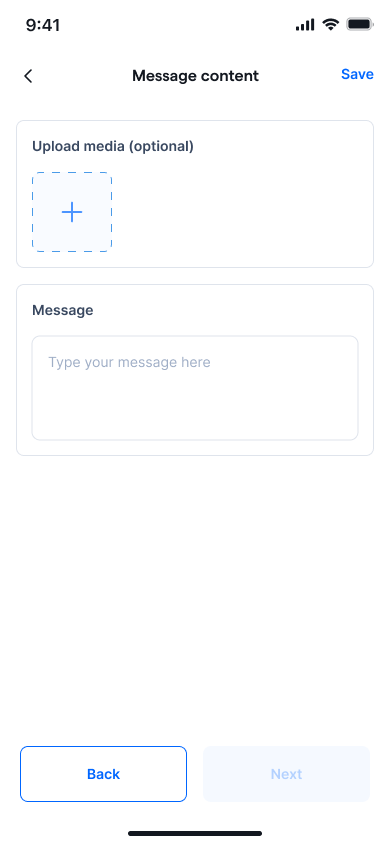
Set up your broadcast content
-
Template message: Choose a pre-designed template message as content. You will need to set up the details of the template. For example, if you're sending an invitation to a VIP event, you can customize it with the event date, venue, and other details before sending it out
- Manual message: Write your message manually.
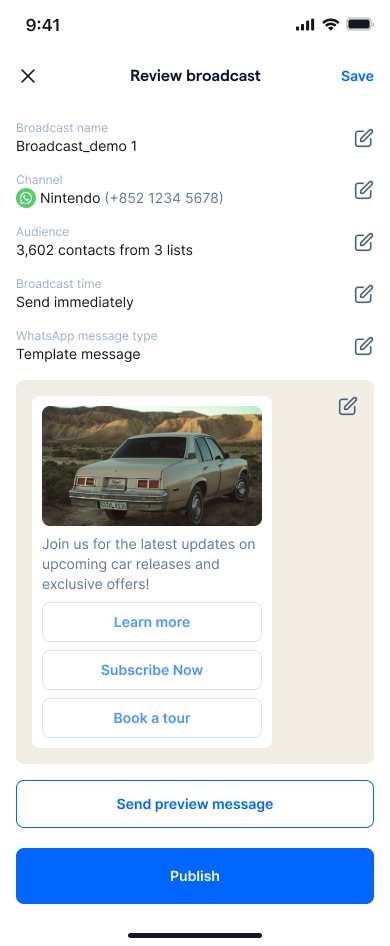
Send preview message
In the Broadcast module, you can now send a preview message before sending out a message. This helps you test your broadcast content and ensure accuracy.
To send a preview message, follow the steps below:
1. After reviewing your broadcast content, click the ‘Send preview message’ button at the bottom of the screen
2. By clicking the button in the top right corner, you can filter your contacts by
a. el: predefined labels like "VIP" to target specific groups
b. Country: based on their geographical location for localized campaigns or time zone optimization
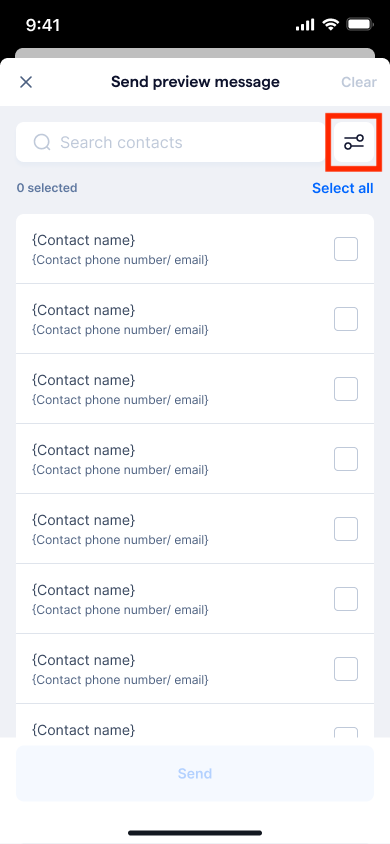
3. Select the contacts using the checkboxes
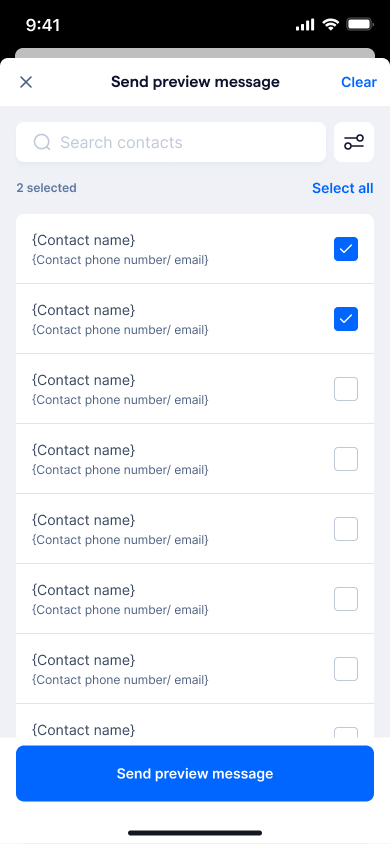
4.Click the ‘Send preview message’ button after selecting contacts
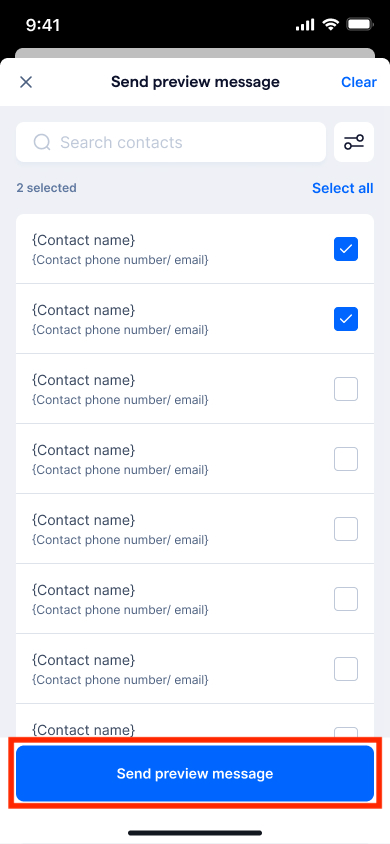
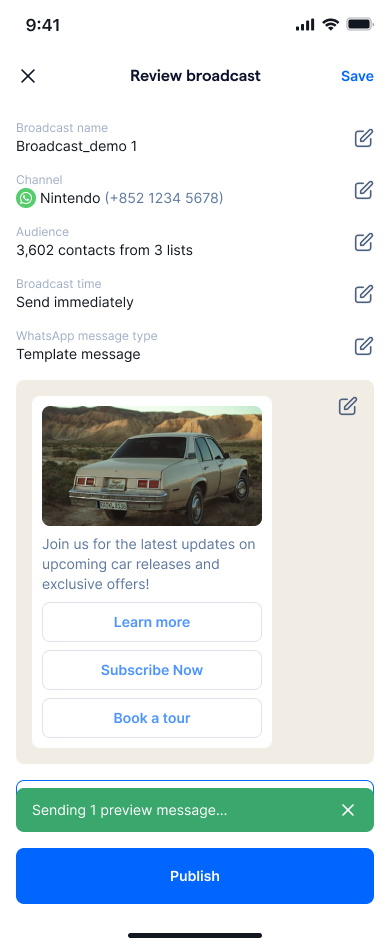
5. Once clicked, a success message will pop out to indicate that the preview message has been successfully sent out. If the preview message meets your expectations, click “Publish” to send or schedule your broadcast.
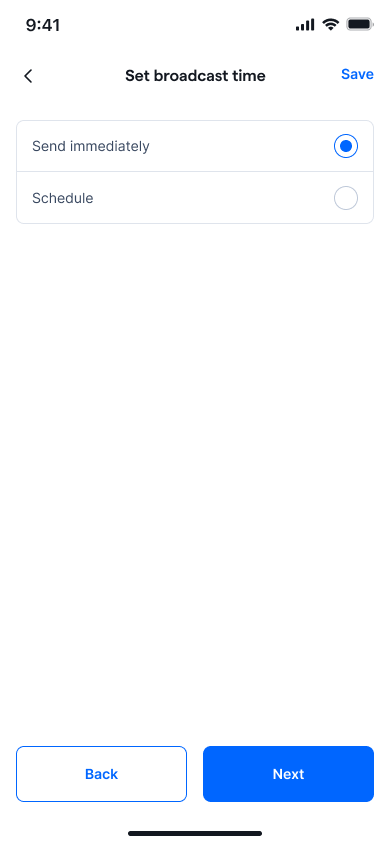
Set your broadcast time
- Send immediately: Broadcast is sent right away.
- Schedule: Set a date and time for automatic delivery.
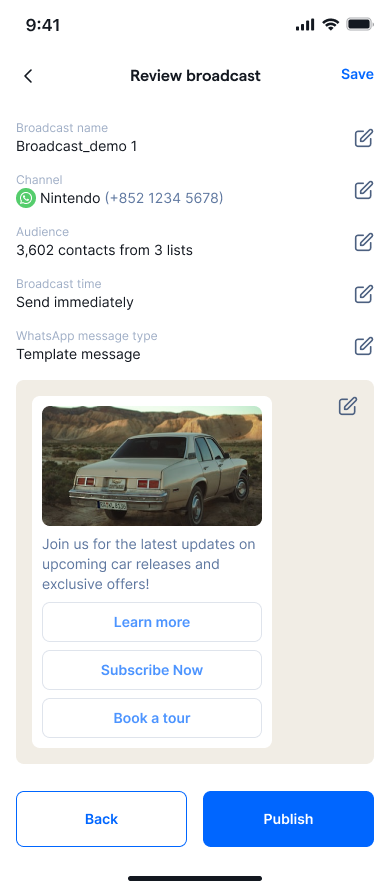
- Review all the broadcast details on the “Broadcast Review” page. Edit any section if needed.
- Click “Publish” to send or schedule your broadcast.
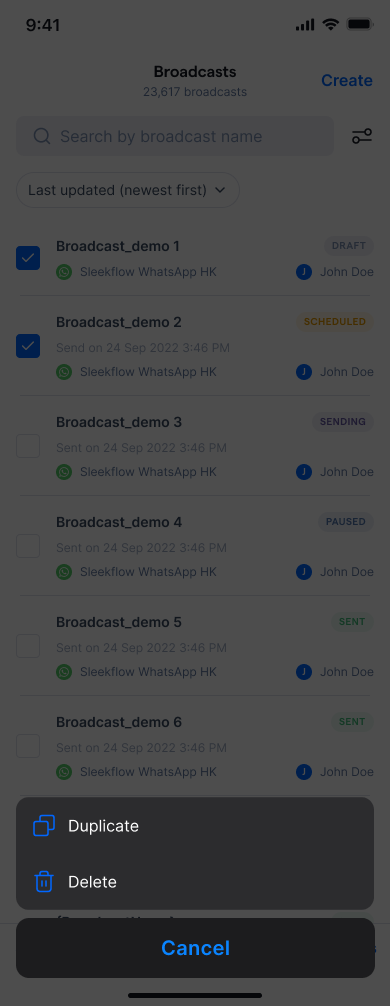
Managing broadcasts
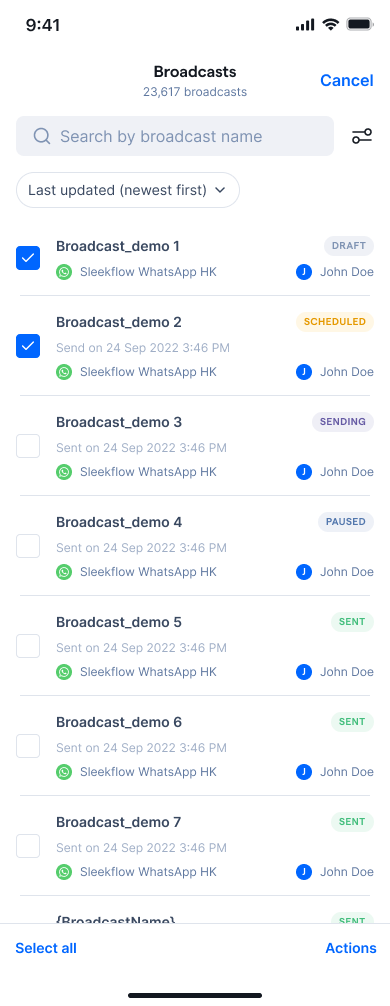
In the Broadcast module, you can perform bulk actions on multiple broadcasts:
- Bulk duplicate: Create copies of selected broadcasts.
- Bulk delete: Delete multiple broadcasts at once.
To perform bulk actions:
- Click “Edit” on the top-right of the broadcast list.
- Select the broadcasts using the checkboxes.
- Click “Actions” and choose either “Duplicate” or “Delete”.
Handling broadcast limits
SleekFlow will notify you if your Business Portfolio is approaching its messaging limit. This limit applies to all WhatsApp phone numbers under the same portfolio and determines how many business-initiated conversations your portfolio can open within a rolling 24-hour period.
If your portfolio does not have enough remaining messaging capacity to support a broadcast:
- Admin users will receive a notification with a link to review or adjust their plan.
- Non-admin users will need to contact their Admin to resolve the issue or choose a different send time.
You can publish the broadcast once your portfolio’s messaging capacity becomes available again.