The information in this section applies to admin account users
You can create a custom object on the “Custom objects” setting page. You can reach this page by following the steps below.
- Click on the
icon on the bottom left of the navigation bar
- The “Settings” sidebar will appear, you can then click on “Custom objects” under the “Contacts and Data” section

3. Click the “Create custom object” button

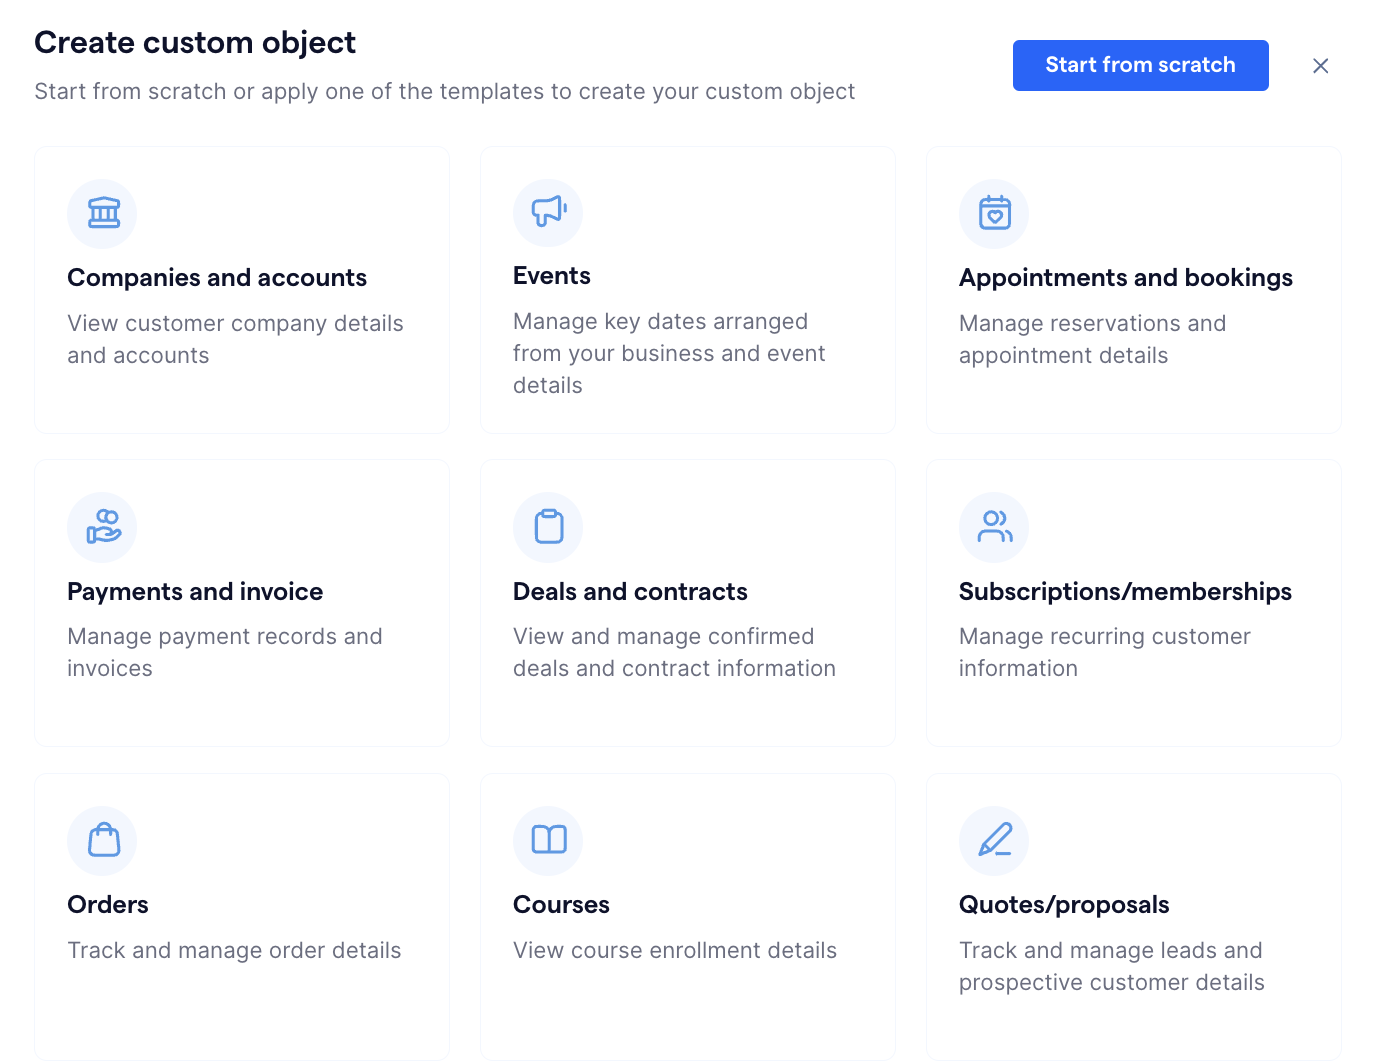
A pop-up window will appear, allowing you to create custom objects from scratch or with a template. Creating from a template will have most of the information prefilled, whereas creating from scratch will allow you to define everything on your own. If you are not sure about the structure of your custom object, feel free to create it from a template to get some inspiration, you can always edit the settings to customize it according to your needs.
Follow the steps below to create your own custom object.
Step 1 - Custom object configurations
First, you are required to provide the object name, which is the display name of the object across the platform.
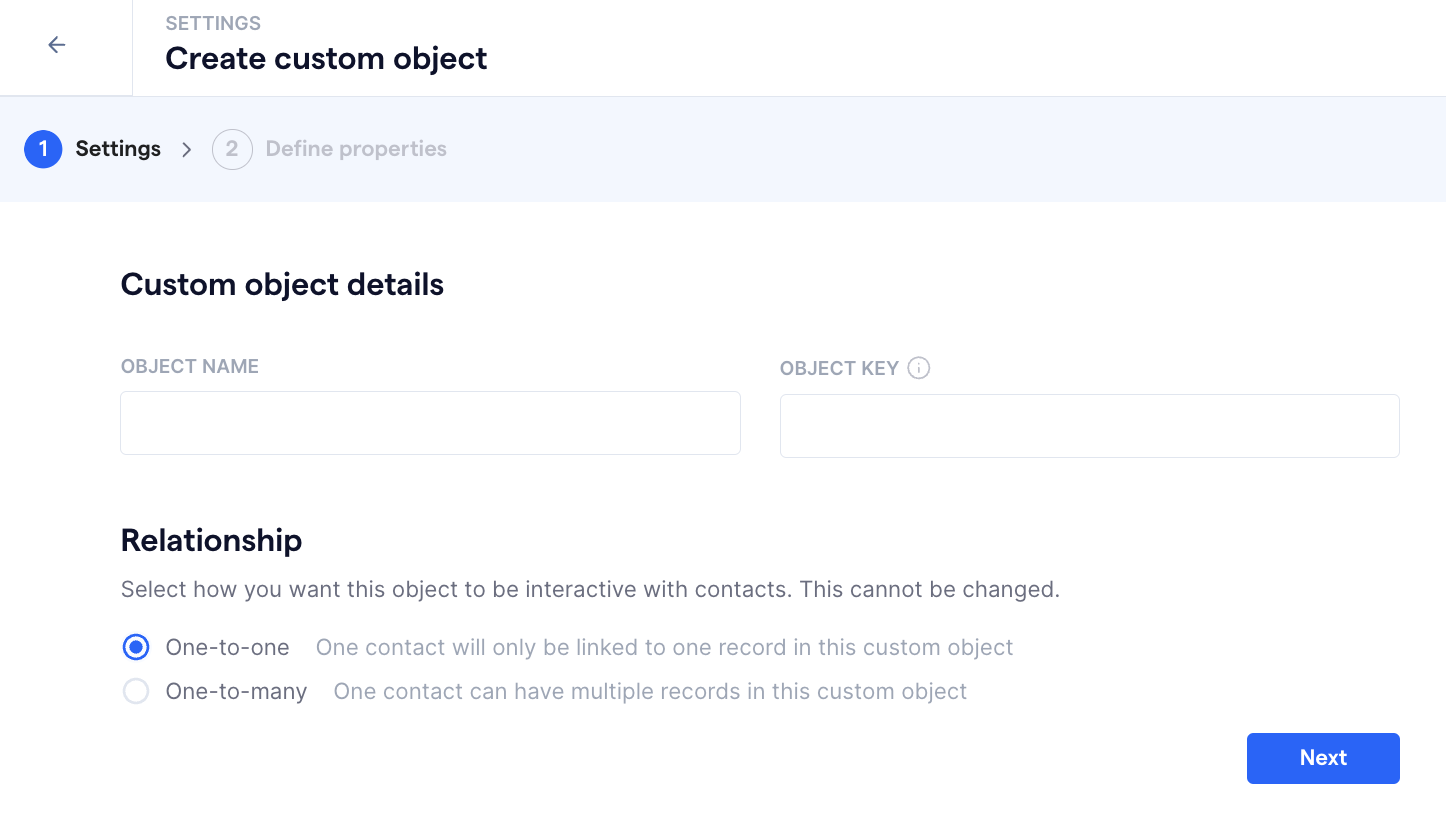
The object key will be auto-generated if the object name is in English character. You can also edit it freely. The object key is the unique key, which will be used when calling our APIs or using third-party integration tools, to let the system know which custom object you want to operate on.
Then you can define the relationship between the object you’re creating and your contacts.
| One-to-one relationship | You can only create one record for this object for each contact |
| One-to-many relationship | You acn create more than one record for this object for each contact |
Once you are satisfied with the object configuration, you can click “Next” and move the Step 2.
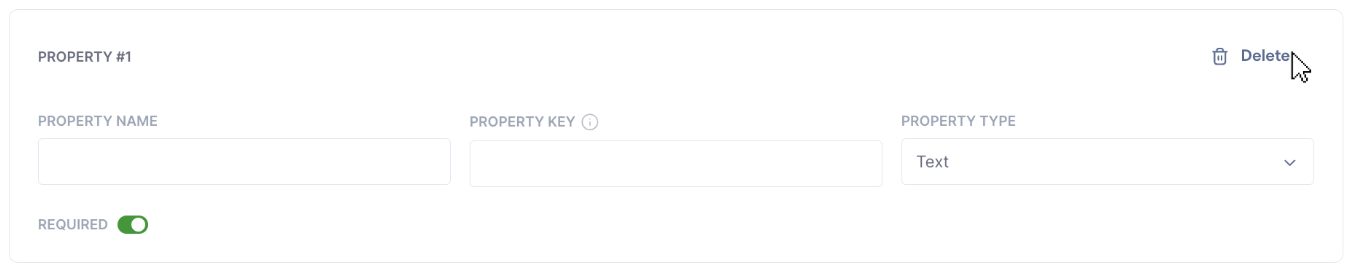
Step 2 - Define properties
| Property name | This is the title of each of the property in the record |
| Property key | This will be used to distinguish properties from each other in the database. This will also be used for API call actions. |
| Property type | This is the data type pertaining to the property, |
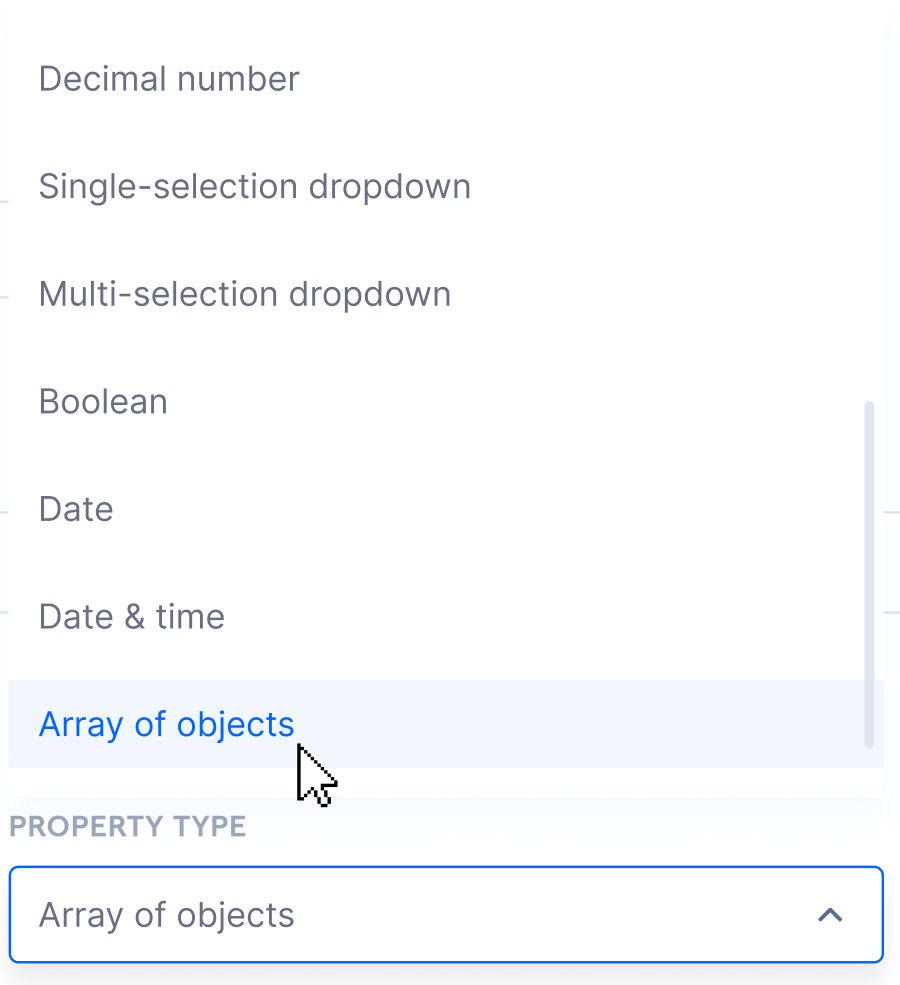
In SleekFlow, we support the following property types within custom objects:
- Text
- Number
- Decimal
- Single-selection dropdown
- Multi-selection dropdown
- Boolean
- Date
- DateTime
In each object, there is a primary property which is used as the main identifier and the subject of each record. On top of the standard property fields, you can choose if this is an auto-generated record. Once you select “Yes”, a “Prefix” field will appear, and you can set the prefix of the primary property. Prefix is the first 3 or 4 characters of the record identifier, for example, if I set the prefix as “TIK”, the primary property ID of the first record generated for the object will be “TIK00001”. The auto-generated record will be in number format. If you choose not to generate record data automatically, you will be required to create this property record data manually.

You can add any additional properties by clicking the “+ Add new property” button on the top right.

You can delete any non-primary property by clicking the “delete” button on the top right of each of the property item.
Once you have added all of the properties you want to the object, you can click “Save” on the top right of the screen.The object will then be created.
There is a limit for the number of properties you can include for each custom object according to your plan tier.If you wish to increase your limit, please contact your account manager.
Setting up “array of objects” as property type
In SleekFlow, an array of objects within Custom Objects refers to a structured list (or “array”) that holds multiple items, with each item being an “object” containing various related fields or properties.
For example, suppose you’re tracking customer orders as custom objects in SleekFlow. An array of objects might represent a list of products within a single order, where each product is an object containing details such as:
• Product name
• Quantity
• Price
• SKU
Each entry in this array represents a unique product with its own specific properties. This setup allows you to organize and access detailed information within each custom object, making it easier to structure complex data that SleekFlow can display and interact with efficiently.
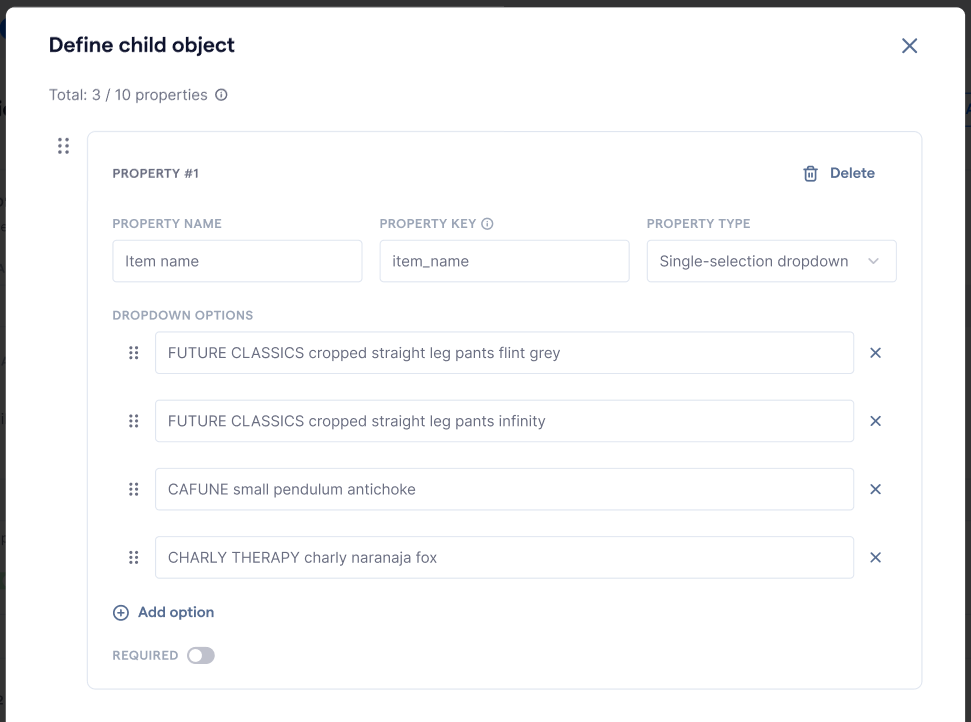
Once you have defined an array of objects, it will be regarded as the “child object” within the custom object you created it in. This means you can create a list of fields specifically for each item (e.g., “Item name” and “Quantity”) and organize them within the main custom object (e.g., the customer’s order). This approach ensures each item in the array has a consistent set of details, making it easy to track information accurately within SleekFlow.
To set up an array of object, you can follow the steps below:
- On the “Create custom object” page, under the step “Define properties,” select “Array of objects” as the property type.
- Once “Array of objects” is selected, click “Manage child object details” to set up the properties of the child object.
- A pop-up window will appear where you can define the properties within the child object.
- Click “Add new property” to add additional properties as needed.
- Once you have completed filling in the details, click on the
 icon to close the pop-up window to go back to the “Define properties” step. To save your changes, make sure to click “Save” in the “Define properties” step to create the object.