You can create new contacts from the "Contacts" main page, or import contacts through .CSV or .XLSX files.
Manual contact creation
To manually create a contact, you can:
-
Go to the "Contacts" main page
-
Click "Create new contact" in the upper right side of the screen
-
Fill in the information of the contact you would like to create
-
Click "Create" on the top right of the screen

💡 Only one contact can be created at a time through manual creation
Importing contacts
You can import contacts in bulk to SleekFlow through uploading a .CSV or .XLSX file. Do this by following the steps outlined below:
-
Go to the "Contacts" main page
- In the upper right, click “More actions”
-
Select "Import contacts"
-
In "Step 1: Prepare", download the sample import file by clicking "sample .CSV" or ".XLSX file", depending on the file type you wish to import. Once you have prepared your file according to the directions on screen, click "Next".
-
In "Step 2: Upload", upload your import file. Click "Next" once your file is uploaded.
-
In "Step 3: Match", map the headers of the import file to the intended contact columns in SleekFlow
-
If we are able to match the column in the imported file with the contact column in Sleekflow, you can select a specific import action by clicking the dropdown under the "Action" column.
Refer to the table below for the details of each action:
-
If we are able to match the column in the imported file with the contact column in Sleekflow, you can select a specific import action by clicking the dropdown under the "Action" column.


| Action | Description |
| Overwrite |
The imported data will overwrite the existing value of that property *If the imported data is empty, that property will be updated to being empty |
| Update blank only | The imported data will only be updated to the contact if they currently do not have a value saved for that property |
| Add appendix |
The imported data will be added on top to the existing value, e.g. *This action is only available for single line properties and labels |
7. Once you have completed the column mapping, click "Next"
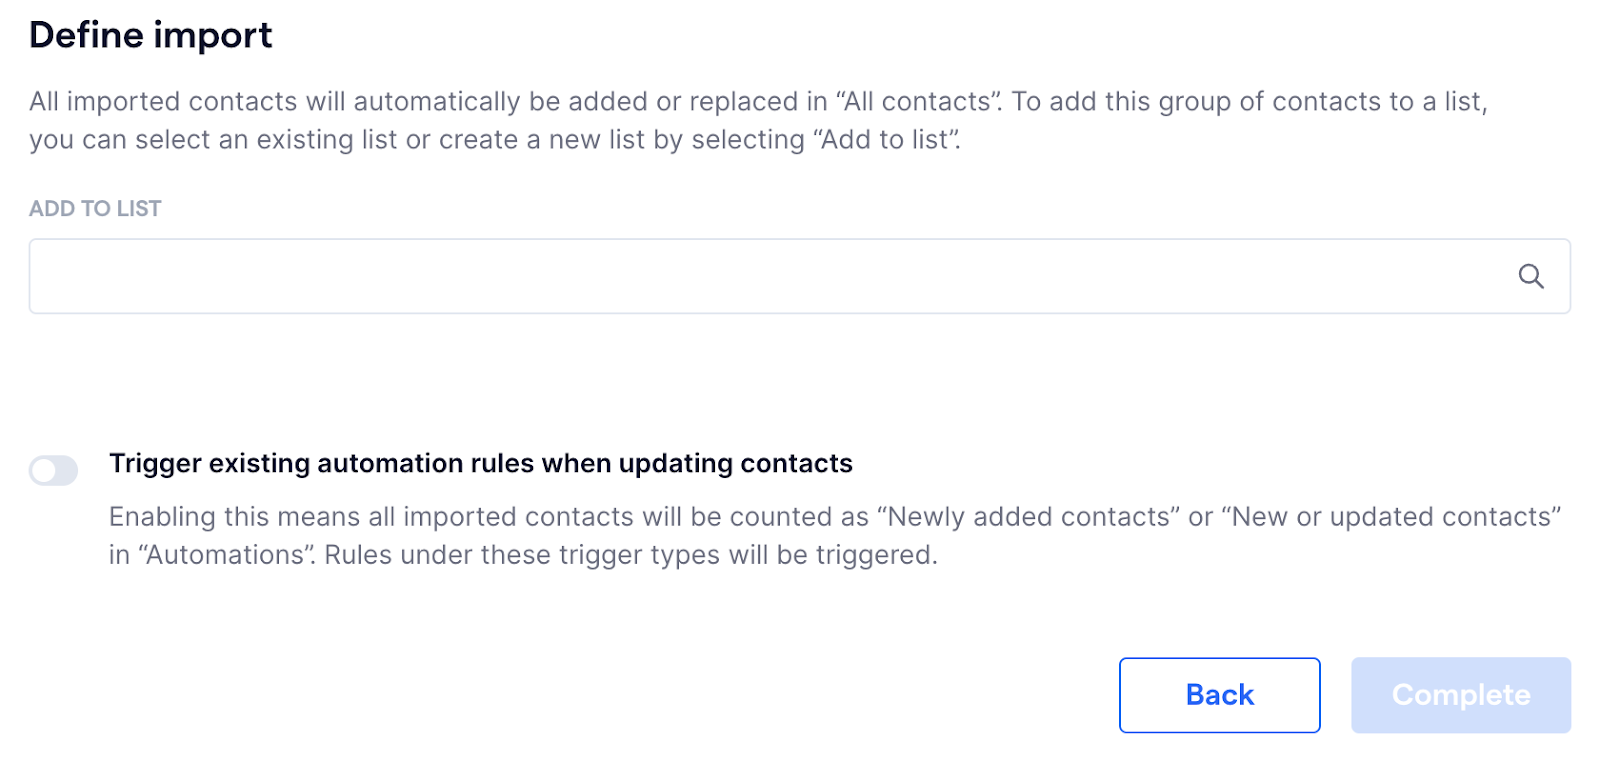
8. In "Step 4: Define", you can add all of the imported contacts into a new list or an
existing list by searching for the list name in the search box. Additionally, you can
toggle on "Trigger existing automation rules when updating contacts" to have all
imported contacts be eligible to trigger automation rules or flows as "Newly added
contacts" or "New or updated contacts".
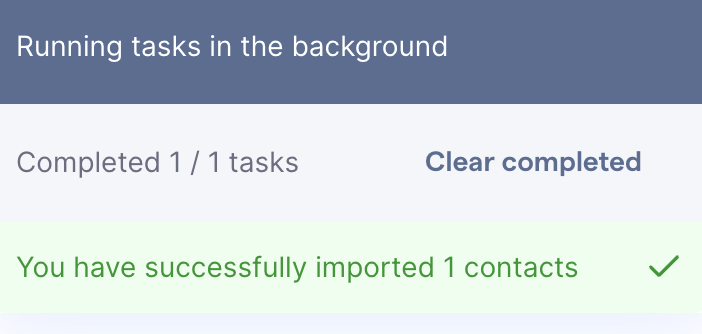
10. Start the contact import by clicking “Complete”
11. Your import progress will be displayed at the bottom left of the screen