


Managing your Flow Builder usage and flow enrollments effectively is crucial for optimizing the performance of your automation processes. This article will guide you through the steps to manage and monitor your usage in Flow Builder.
Flow enrollment
A flow enrollment occurs when a contact meets the flow’s trigger condition and is added to the flow. The enrolled contact will then proceed down the automated journey defined by the flow. You have to publish a flow as an active flow to receive and execute new enrollments.
Each time a contact meets the flow trigger’s condition and the flow starts executing, it counts as a flow enrollment, even If any users within your organization update or deactivate the flow after the contact matches the trigger’s conditions.
Basic flow and advanced flow
SleekFlow supports two types of flows: basic flows and advanced flows. The distinction is based on the structure and complexity of the flow you create.
A basic flow is a simpler automation that includes:
- 5 or fewer nodes
-
No advanced nodes, such as:
- Integrations
- Webhooks
- API Calls
Basic flows are ideal for straightforward use cases that don’t require external systems or complex logic.
An advanced flow includes either:
- More than 5 nodes, or
- At least one advanced node
Advanced flows are more flexible and powerful, allowing you to build sophisticated automations that connect with external platforms and support data-heavy processes.
What counts as a node?
Only trigger and action nodes are counted toward the 5-node limit. Nodes like time delay, condition branching, wait for event, and end/jump to are not counted.
Flow Builder usage
The number of enrollments, active flows, and nodes per flow available for your account depends on the subscription plan that you are on. You can monitor the following Flow Builder usage:
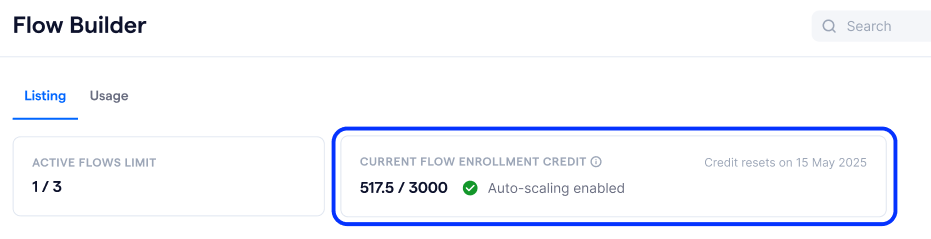
- Active flow: View your active flow usage and limit in the “Listing” tab of the Flow Builder page
- Nodes per flow: Within each flow, check the bottom left corner of the flow editor page to see the nodes used and the total node limit.
-
Flow enrollments: See details below
Understanding flow enrollment calculations
SleekFlow uses two different ways to track the number of flow enrollments:
1. Flow enrollment credit
This determines how your usage counts toward your subscription plan. You can check your flow enrollment credit at the “Listing” tab within Flow Builder. Different types of flows consume different amounts of credits:
- Each basic flow count as 0.5 credit
- Each advanced flow count as 1 credit
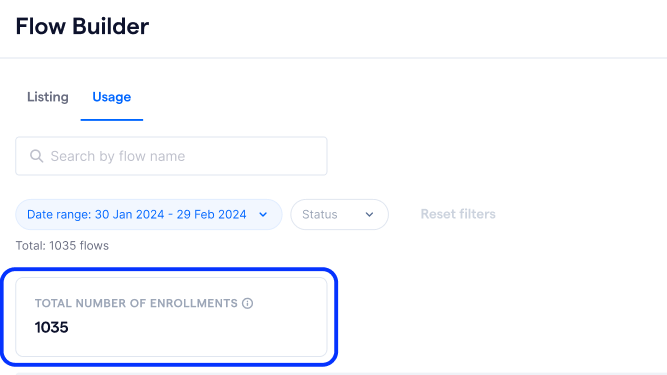
2. Total number of enrollments
This is a usage-based metric that counts how many times any flow, regardless of type, has been triggered in the selected date range. This count exclude flows with a blocked or restricted status. You can check your total number of enrollments at the “Usage” tab within Flow Builder page.
For example:
If 4 basic flows and 2 advanced flows are triggered:
- Flow enrollment credit used = (4 × 0.5) + (2 × 1) = 4 credits
- Total number of enrollments = 6
Flow Builder notifications
When you approach your monthly flow enrollment limit, all admin users in the organization receive notifications via email and in-app alerts at the following thresholds:
- 25%, 10%, and 0% remaining of your monthly limit.
If your usage exceeds the monthly limit, you can purchase add-ons or upgrade your plan in the add-on section under the “Subscription” page to prevent service interruptions.
Track flow enrollment status
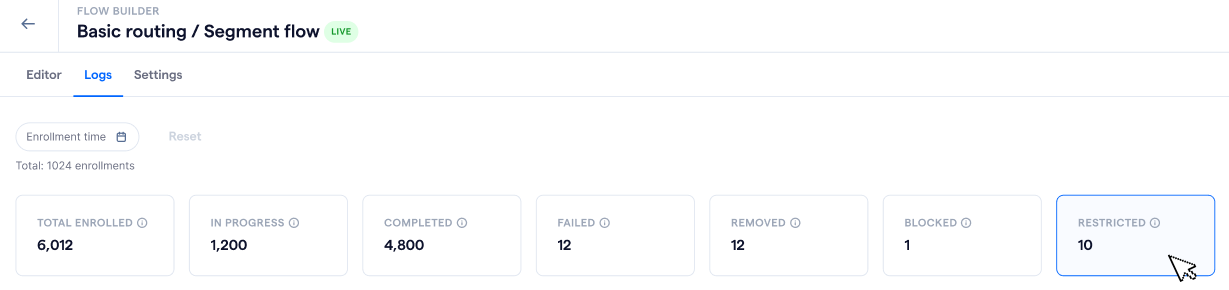
You can view each contact’s enrollment status in the Flow Log within each flow. The following statuses impact your enrollment usage:
Following statuses are counted toward flow enrollment usage:
- In progress: The contact is going through the flow
- Completed: The contact has completed all steps in the flow
- Removed: The contact has been manually removed from the flow by a user
Following statuses are not counted toward flow enrollment usage:
- Blocked: Enrollment was prevented due to enrollment settings or detected unusual actions
- Failed: Enrollment couldn’t execute due to system errors
- Restricted: Enrollment couldn't execute due to enrollment limit exceeded
Restricted enrollments
If your flow enrollment usage limit has been reached, any new contacts who meet the flow’s trigger criteria will not be enrolled in the flow, these contacts are marked as “Restricted”. No further enrollments can be made until you increase your enrollment limit, or wait for the next monthly usage cycle.
To avoid disruption in enrollment, you can upgrade your plan or buy additional enrollments in the “Add-ons” section of the Subscription page.
To identify and manage contacts impacted by the exceeded enrollment limit, follow these steps:
- Navigate to Flow log to see all recent enrollment attempts
- Contacts with “Restricted” status has been restricted to enter the flow due to enrollment limit exceeded
Re-enroll restricted enrollments
To re-enroll restricted contacts, follow these steps:
- Navigate to the Restricted tab within Flow log
- Click the “Re-enroll” button

3. Select the time range to re-enroll contacts with restricted enrollments:
- From the most recent date the limit was reached
- All restricted contacts in the flow, subject to your current limit
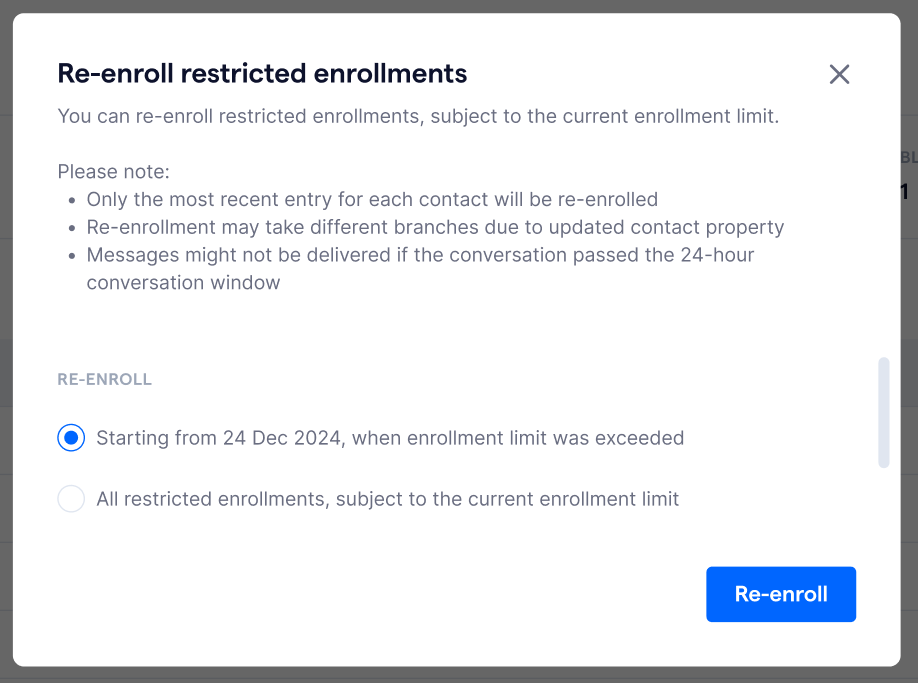
4. The contacts would be re-enrolled into the flow, with the following exceptions:
- Duplicate enrollments: Only the most recent blocked enrollment for each contact will be re-enrolled
- Conversation window expired: Manual messages may fail to deliver if the conversation passed the 24-hour conversation window
5. Click the “Re-enroll” button to start re-enrolling restricted contacts
Be careful of enrollment credit
Note that the amount of restricted enrollments you can re-enroll is subject to your monthly enrollment limit. Your monthly usage cycle resets every month in alignment with your billing cycle.
Manage flow enrollment credit
SleekFlow allows you to manage your monthly flow enrollment credit through plan upgrades or add-ons. This gives you flexibility to scale based on your team’s usage.
To manage your flow enrollment credits:
- Click on the icon on the left-hand navigation bar
- Go to the Add-ons page under Plans and billings
- Under “Monthly flow enrollment”, click “Manage credit”
-
From there, you can upgrade or downgrade flow enrollment credits as needed
How will I be charged?
Once you upgrade or downgrade the flow enrollment credit, you’ll be charged the full amount for your new limit first. Your previous plan will be canceled with a prorated refund, which will be credited to your account and applied to your next purchase.
Monitor flow enrollment usage
Flow enrollment usage is based on a monthly usage cycle and usage will reset every month. You can view and manage your flow enrollment usage in either of the following ways:
- Option 1: Go to the Settings page, then click on the Subscriptions page to monitor your monthly flow enrollment usage.
- Option 2: Navigate to the Flow Builder page and click on the “Usage” tab.
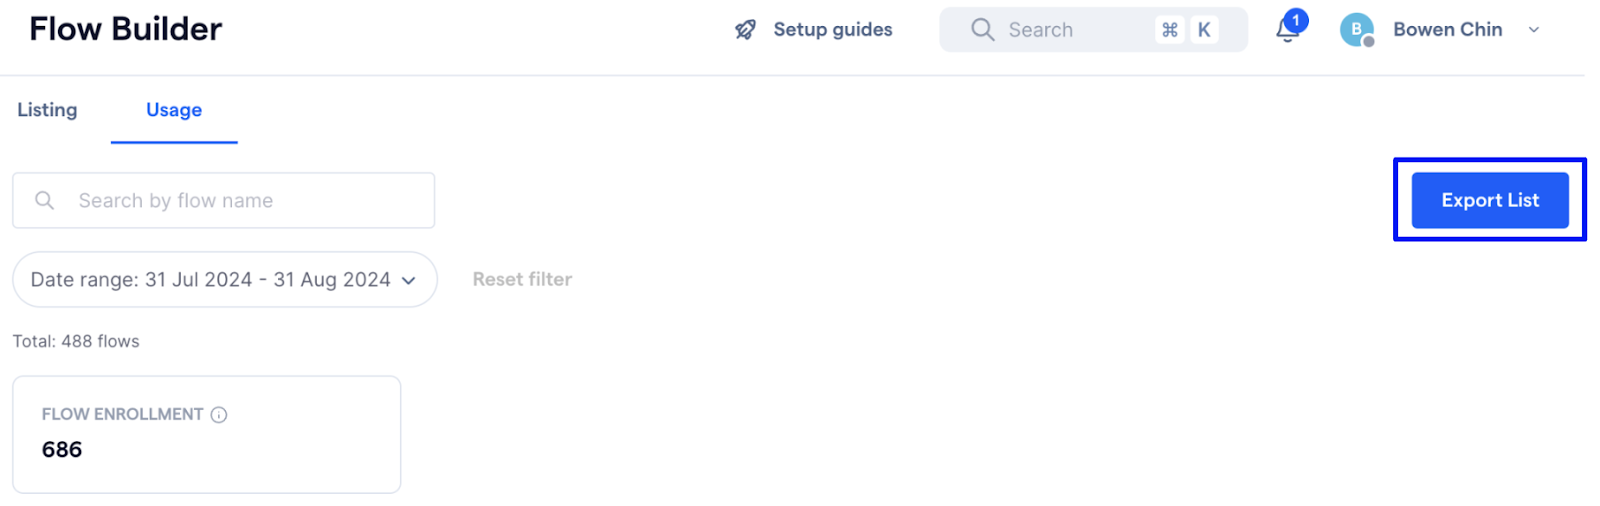
Flow enrollment usage overview
The Flow Builder usage page shows the total number of flow enrollments executed by all flows within your organization in the current usage month or over a set period. This includes flows with Draft or Deleted status that were previously Active and had executed flow enrollments. This page provides a comprehensive overview of all your flow activities within the selected date range. It consists of the following sections:
1. Filter and search flows: Allows you to search for specific flows by name or filter enrollments based on a date range. The default date range is your company’s monthly usage period.
2. Total flow enrollments: Displays the total number of enrollments across all flows during the selected date range.
3. Export list: Enables you to export the flow data as a CSV file.
4. Flow list table: This table lists all flows ever created in your company's account. It includes key details for each flow, such as:
- Flow name
- Flow status
- Number of enrollments (during the selected date range)
- Last enrollment date
- Entry point to the flow’s log

Searching and filtering flows
The usage tab allows you to easily locate and filter specific flows:
Search by flow name: Enter the flow name or relevant keywords in the search bar. The list will automatically update to display flows that partially match your input after you press the Enter key.
Filter flow enrollments by date range: By default, the data displayed corresponds to the current monthly usage period. You can also select a custom date range of up to 31 days. This will update the “Flow Enrollments” column with data specific to the chosen period.
Export the flow list
You can export the flow list to a CSV file for further analysis or record-keeping by the following steps:
1. Click on the “Export List” button at the top right of the flow usage page
2. You can configure the date range to export the relevant usage data by clicking on the dropdown and selecting one of the following options:
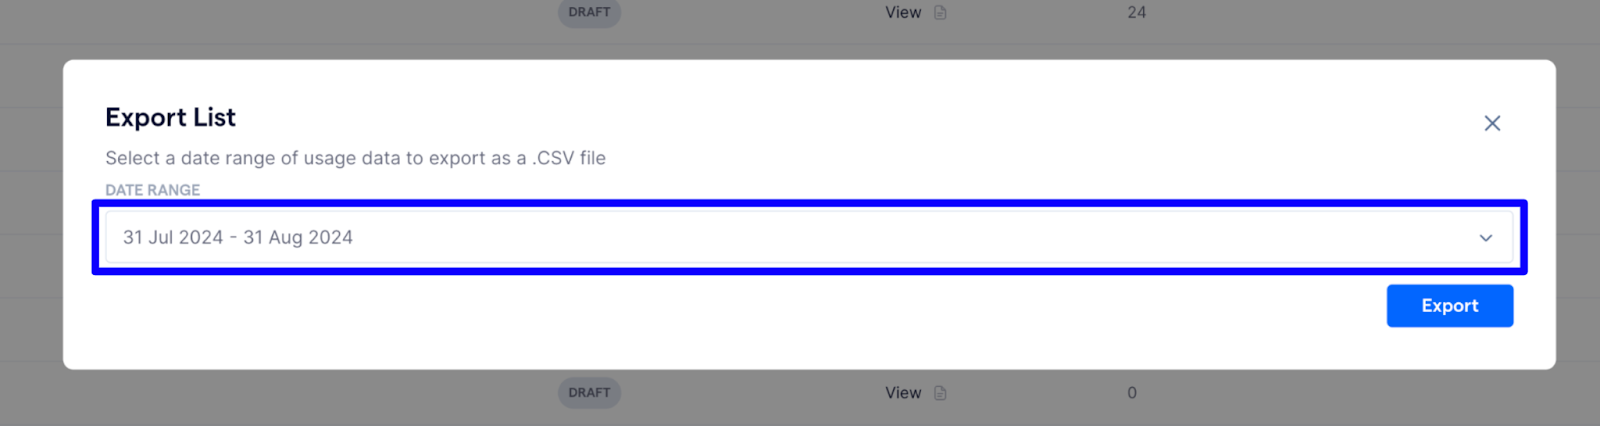
- Export current month’s data: Export the flow table for the current month’s usage period.
- Export custom date range data: Choose a custom date range of up to 31 days and export the corresponding flow data.

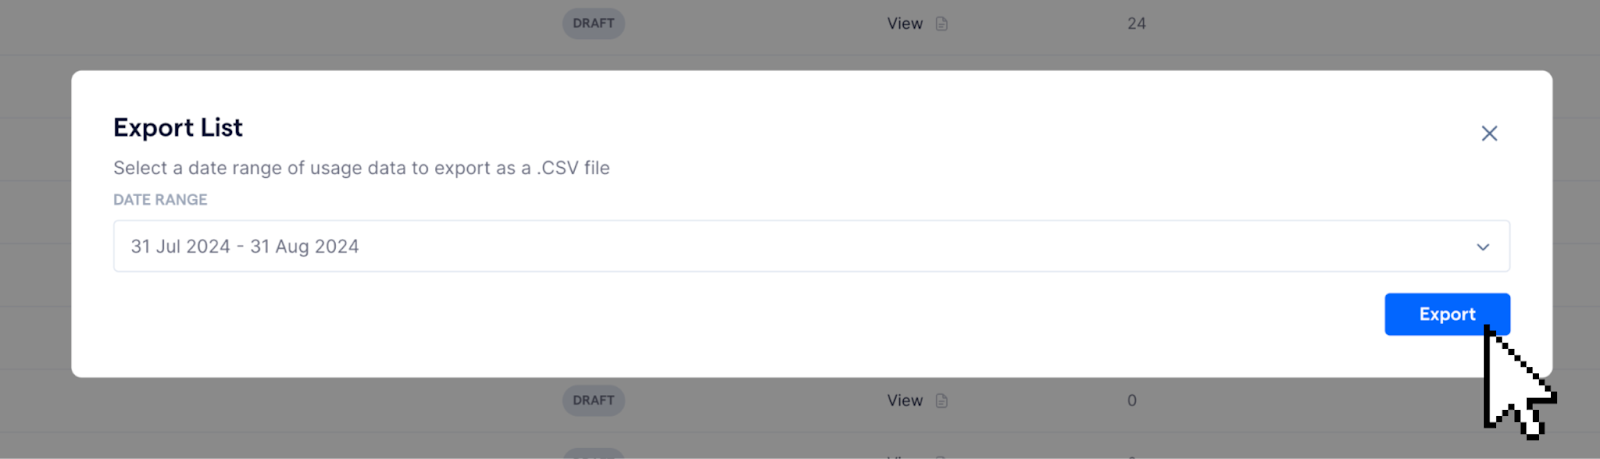
3. Once you have selected the date range, you can click on “Export” and the system will export the usage data of the selected date range as a .CSV file
By using these tools, you can manage your flow enrollments more efficiently and keep track of your performances over time.
Understanding monthly flow enrollment add-ons
Add-ons increase the usage limit of monthly flow enrollments. For example, if you’re on the Pro Plan which includes 500 free enrollments and buy an add-on for 1,500 enrollments (US$59), you’ll gain 1,000 additional enrollments.
Plans have upper limits:
- Pro Plan supports up to 3,000 enrollments per month.
- For more extensive needs, consider upgrading to the Premium or Enterprise Plans, which offer higher limits.
This tiered structure is designed to grow with you, providing affordable upgrades as your requirements expand.